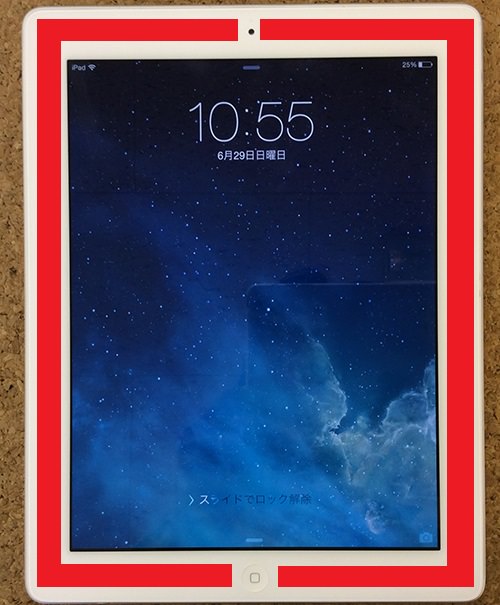
iPad 4 Retina LCD Panel Replacement and Decomposition Procedures
There is a possibility to improve it by replacing the LCD panel if the screen cracking and the line of the iPad 4 Retina is included, and the screen is not reflected.
The liquid crystal has a two-layer structure and is divided into a touch panel and an internal liquid crystal panel, but the purpose of this decomposition method is to remove the internal liquid crystal panel.
The cost of asking Apple to repair the iPad 4 Retina LCD was 32400 yen (excluding tax).
Since it was released in 2012, I think that it will be a model quite a long time ago from the history of the iPad, but if it exceeds 30,000 yen, the secondhand of the normal moving work will be able to be purchased.
In addition, since data erasure is basic when you send it to manufacturer repair, you can not back up the data, if you do not know how to do it, it will be a choice of whether to ask a private repair shop or repair yourself.
The tools that are especially important for disassembling are as follows.
I think that other tools can be substituted for the thing in the home, so please prepare something close.
- [iPad 4 Retina LCD panel replacement STEP 1]
- It is a repair method when the LCD panel of the iPad 4 is broken, the display is defective, and the line enters, but the repair flow is a procedure to remove the touch panel and remove the LCD panel.
A special tool is also required for disassembly, but the most important part of disassembly is to remove the touch panel.
The touch panel is fixed with a powerful double-sided tape, but if you break it by mistake, it will be rather expensive repair fee, so you need to be careful when removing it. - Then, the double-sided tape is attached to the red line part, and heat is applied with a heat gun and a dryer, and the tape is softened.
Instead of warming the whole uniformly, we will peel off one part of the four corners first, so if you decide on the upper right, it is an image that heat is applied only to the upper right part.
- [iPad 4 Retina LCD Panel Replacement STEP 2]
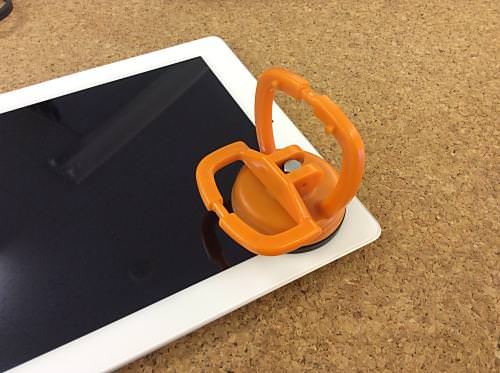
- Next, when it is confirmed that heat is applied using suction cups, etc., we will start removing the LCD panel.
Suction cups are sold at home centers and are mainly used by glass shops.
There are from large to small, but a small thing is enough for disassembling the iPad 4.
The heat is pulled up with a suction cup before it cools down, but if the touch panel does not float even if the suction cup is used, it is evidence that the amount of heat is insufficient.
Remove the suction cup once and heat it again.
This is the most important thing, so try to do the same thing over and over again to avoid breaking the touch panel.
- [iPad 4 Retina LCD Panel Replacement STEP 3]
- Disassembly of this touch panel is the most important for disassembling the iPad 4, so we will work carefully.
Do you see that the touch panel on the surface is farther than the main body?
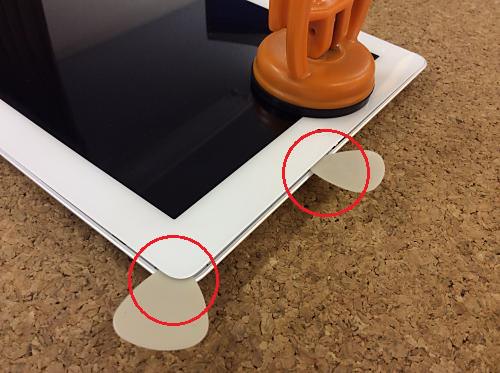
It is the momentum that I want to remove at once as it is, but I will peel it off carefully little by little using a dryer, heat gun, etc.
If you can float in one place, i will slide sideways from the starting point, but let's proceed with the decomposition while applying heat to the touch panel in the direction of sliding.
If you slide the touch panel in the direction of travel is not warmed, the internal double-sided tape is in a hard state, so there is a risk of cracking.
So, let's break down carefully as I say many times!
- [iPad 4 Retina LCD panel replacement STEP 4]
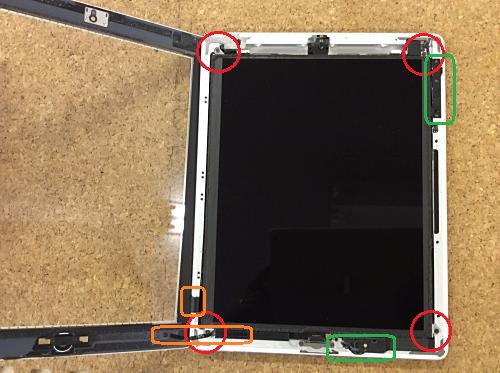
- This is an image of the touch panel on the surface peeled off.
Please note that the touch panel is still attached to the main body, and the cables are also connected to the main body, so if you peel it off forcibly, the cable will be cut off.
Because the cable of the film type is connected to the main body in the orange part (on the left side when the home button is down), it is necessary to be careful not to cut it.
Be careful not to break important parts on the edge of the case on the green area when you peel off the touch panel glass.
By the way, the green frame on the upper side becomes the power button, the volume button, and the green frame on the lower side becomes Wifi.
So, if you have to break down by any chance, there is a problem such as the power will not be turned on, wifi is not connected, so please be careful not to break it.
The long orange frame on the lower left is a home button cable, but if you disconnect it here, the home button will not work.
The part of the red circle is four screws that stop the liquid crystal panel, but it is good to put it in a part case that can be divided so as not to lose it because it is very small.
If you can remove the screw, you can move the LCD panel, but let's wake it up like a touch panel.
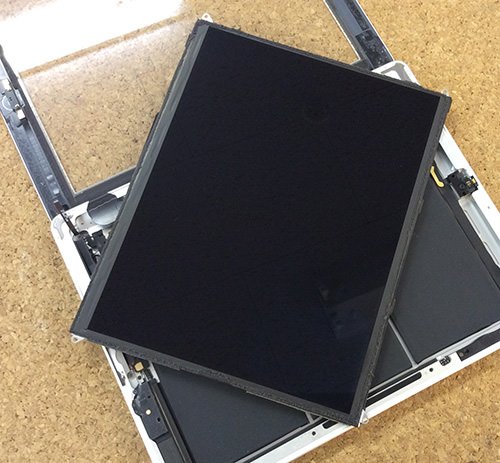
- [iPad 4 Retina LCD Panel Replacement STEP 5]
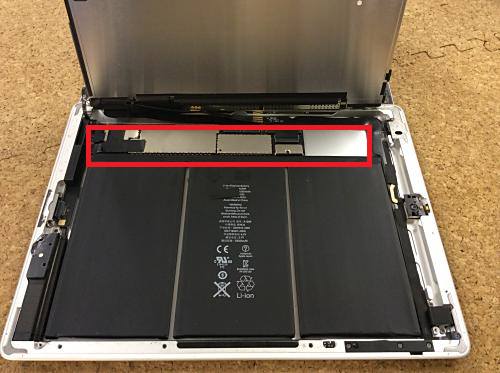
- It is a state in which the liquid crystal panel was raised.
Since the wiring of the liquid crystal panel is connected to the logic board of the red frame part, we will decompose this part from now on, but let's check the structure well.
- [iPad 4 Retina LCD panel replacement STEP 6]
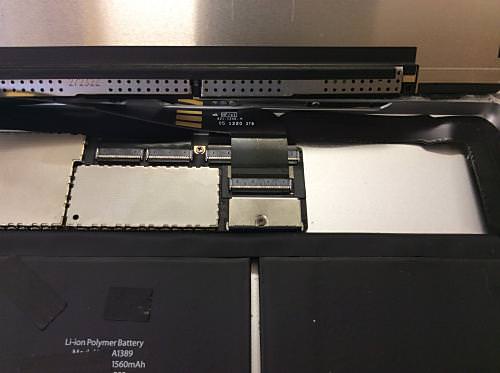
- It is the part connected to the main base and each cable and battery.
- [iPad 4 Retina LCD panel replacement STEP 7]
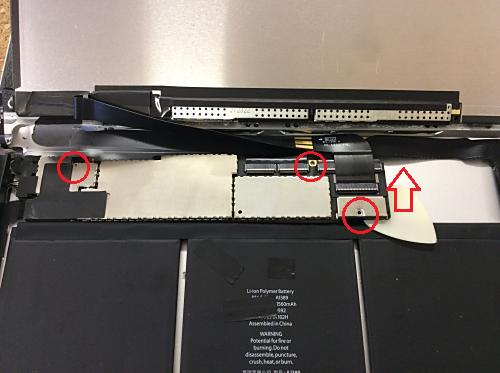
- Remove the three red screws, float the main base slightly, release the battery and the base, and prevent picks from being energized between them.
The part where the pick is caught is the connection between the battery and the logic board.
Therefore, let's release the connection point of the battery before removing the cable of the liquid crystal relation as the order of decomposition and cut off the electricity.
- [iPad 4 Retina LCD panel replacement STEP 8]
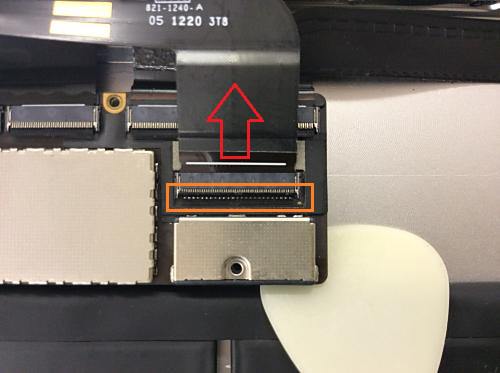
- The connector part of the LCD panel cable is locked with a nail to prevent it from falling out easily.
It is possible to remove the black nail of the orange part by lifting it up to 90 degrees, removing the lock, and sliding the cable toward the arrow.
- [iPad 4 Retina LCD Panel Replacement STEP 9]
- Only the LCD panel of the iPad 4 could be removed.
After that, we will replace the newly prepared LCD panel and reassemble it with the original procedure.
I think that I paste the touch panel at the end, but if the strength of the double-sided tape is weakened, reattach the double-sided tape again, or apply the bond slightly so that it does not peel off.

コメントを残す