The new MacBook Air A1932 EMC3184, released on November 7, 2018, was quickly disassembled.
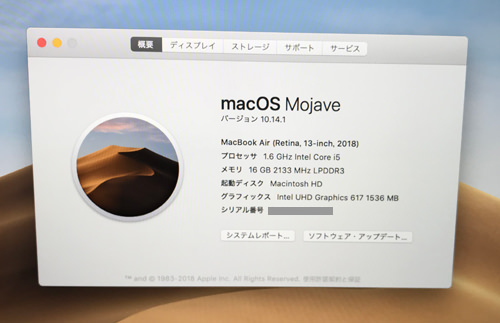
The MacBook Air, which was sold from 2010 to October 2018, is A1369 and A1466 for 13 inches.
The resolution of the LCD was 1490 x 900.
On the other hand, the new MacBook Air has a resolution of 2560 x 1600, so it is very beautiful because the resolution is almost doubled.
In addition, there are many changes compared to the MacBook Air that has been released so far, but I felt that the LCD, keyboard (butterfly), and fingerprint authentication function are particularly significant changes.
The MacBook, MacBook Pro, and all macBook Air and all notebook Macs have switched to Retina displays, but the decomposition method (in the case of LCDs) is similar on all models.
So I feel that it is not so difficult if you have ever disassembled per MacBook Pro Touch Bar model.
This decomposition method is mainly liquid crystal cracking, cracks of the screen, cracks, will be a method of liquid crystal replacement to be performed when the line enters the monitor, but a new kind of screw also appears, so please be sure to align the dedicated tool!
[MacBook Air 2018 LCD replacement and disassembly repair method STEP 1]
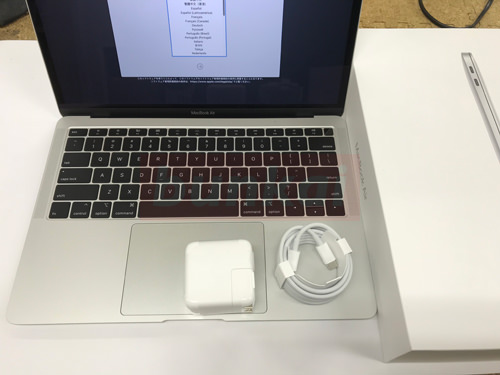
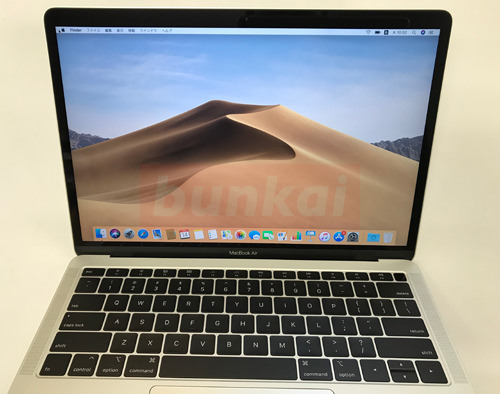
It is a state of just opening the box and pressing the power button.
The power supply has switched from the MacBook Air A1932 to USB-C.
[MacBook Air 2018 LCD replacement and disassembly repair method STEP 2]
Originally, it was planned to decompose on the 11/7 release date, but because the memory was added (customized), it was obtained a week late.
[MacBook Air 2018 LCD replacement and disassembly repair method STEP 3]
I compared it with the MacBook Pro touch bar-free model I was using before switching to the MacBook Air.
The MacBook Air 2018 model is sloped from the keyboard side to the trackpad side, and the front side was a few mm different from the MacBook Pro touch bar-free model.
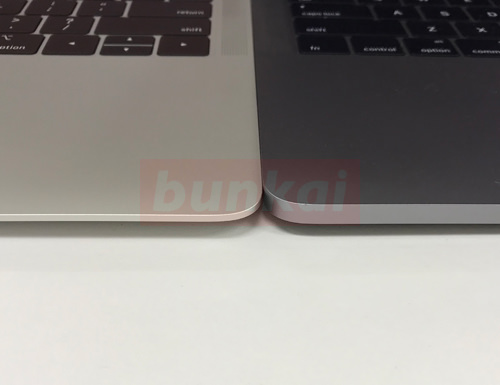
[MacBook Air 2018 LCD replacement and disassembly repair method STEP 4]
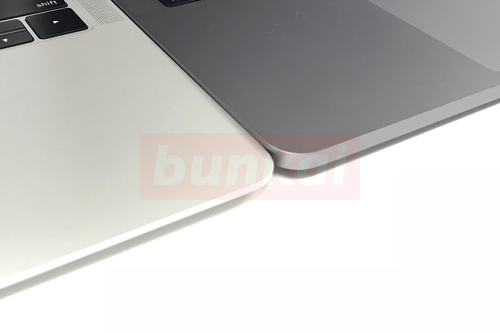
The difference is obvious when you compare the thickness from the side.
[MacBook Air 2018 LCD replacement and disassembly repair method STEP 5]
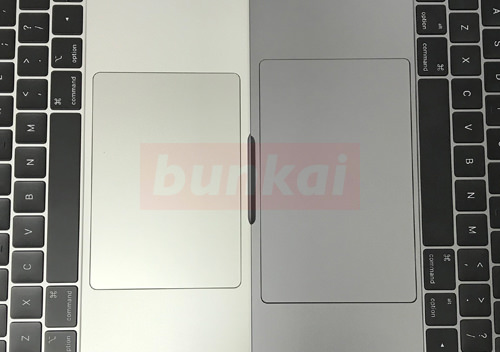
The LCD size is the same, but the trackpad is larger than the MacBook Pro.
Personally, I prefer the MacBook Pro trackpad.
[MacBook Air 2018 LCD replacement and disassembly repair method STEP 6]
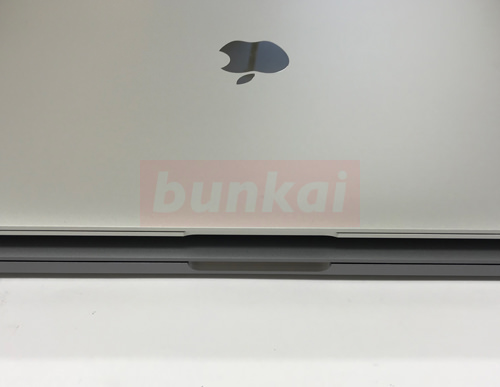
If you look at it over again, MacBook Air 2018 is thinner.
[MacBook Air 2018 LCD replacement and disassembly repair method STEP 7]
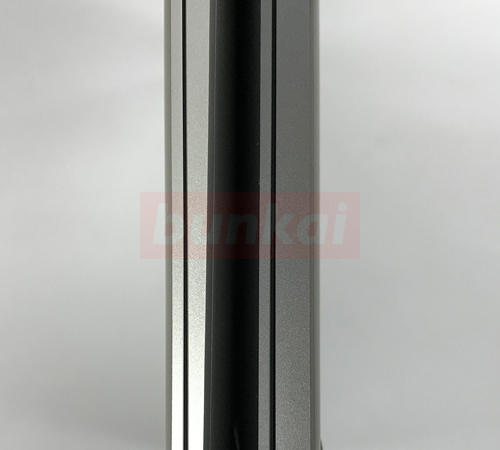
I looked at it vertically.
The macbook air on the left and the MacBook Pro on the right.
[MacBook Air 2018 LCD replacement and disassembly repair method STEP 8]
I turned on the power and completed it until the initial setup, but I want to disassemble the liquid crystal from here.
Please refer to the tool you used as an attachment.
[MacBook Air 2018 LCD replacement and disassembly repair method STEP 9]
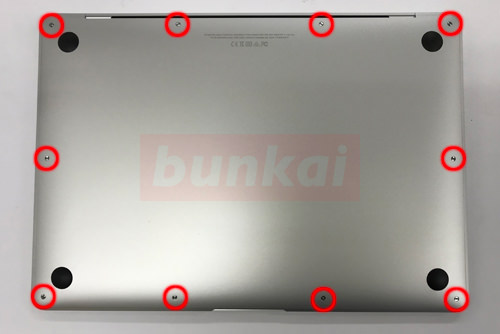
First of all, turn over the main body and remove all screws in the red circle part.
[MacBook Air 2018 LCD replacement and disassembly repair method STEP 10]
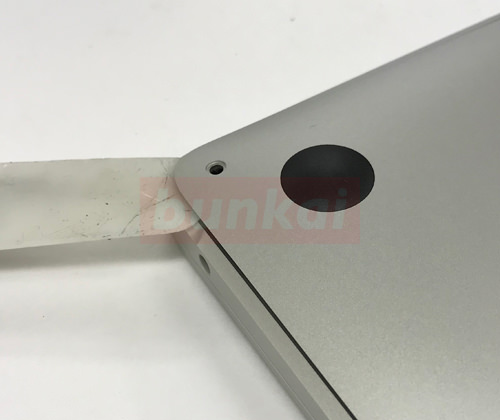
The bottom cover can be removed when the previous screw can be removed.
In the image, the spatula is used and lifted, but it can be easily removed by hand.
[MacBook Air 2018 LCD replacement and disassembly repair method STEP 11]
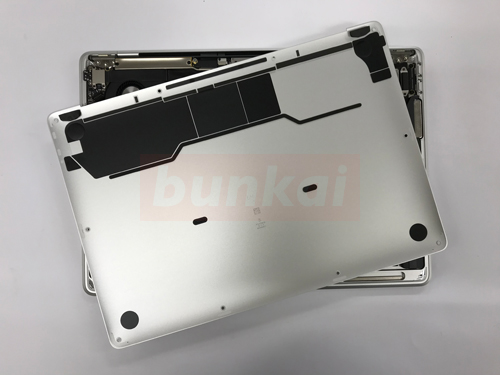
I was able to remove the bottom cover.
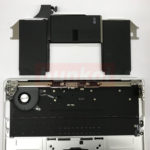
[MacBook Air 2018 LCD replacement and disassembly repair method STEP 12]
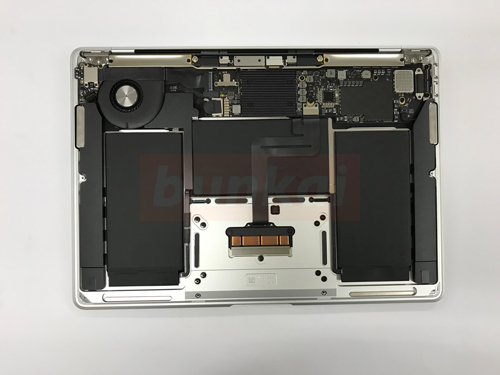
From here is the real thing.
Compared to the macBook Air so far, the structure has changed significantly.
There are many changes such as LCD specifications and keyboards, but the structure of SSDs has also changed.
Until now, the MacBook Air has only been able to remove SSDs, but this MacBook Air 2018 cannot be added or replaced because the SSD is embedded in the logic board.
In extreme terms, if ssd fails, it is essential to back up a lot to replace the logboard.
[MacBook Air 2018 LCD replacement and disassembly repair method STEP 13]
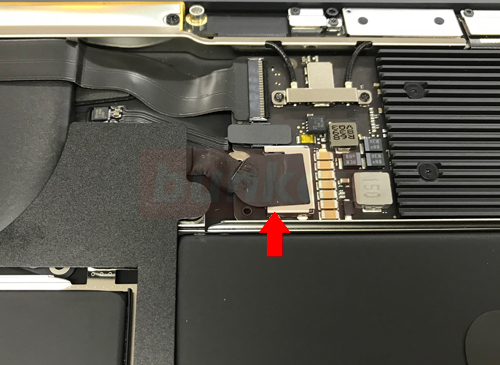
The first thing to do in disassembling is to cut off electricity.
Because the battery of the MacBook Air is built-in, the battery cannot be changed unless the bottom cover is opened, but it is the same this time.
The red arrow becomes the connector on the battery.
[MacBook Air 2018 LCD replacement and disassembly repair method STEP 14]
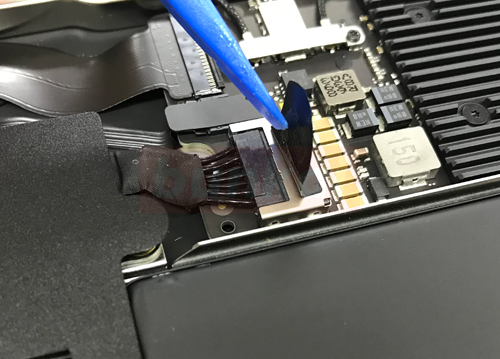
There is a tape on the battery connector, so you can check the connector when you turn it over.
[MacBook Air 2018 LCD replacement and disassembly repair method STEP 15]
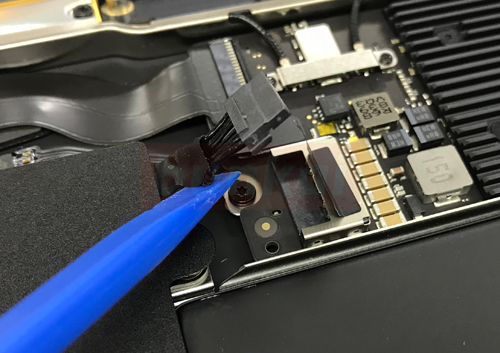
The battery connector can be easily removed by sliding it sideways.
[MacBook Air 2018 LCD replacement and disassembly repair method STEP 16]
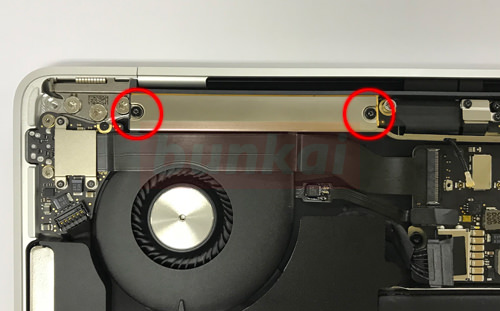
From here, it enters the decomposition of the liquid crystal side, but in order to remove the liquid crystal, it is necessary to remove the WiFI board, etc.
Because there is a screw in the red circle part, let's remove each.
[MacBook Air 2018 LCD replacement and disassembly repair method STEP 17]
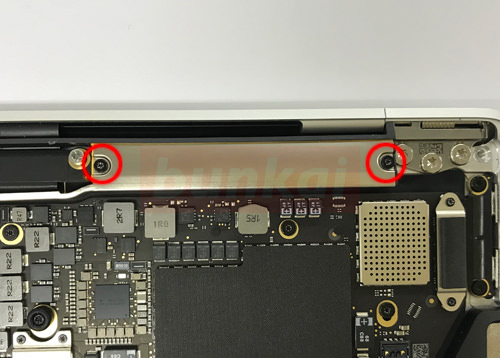
It's on the left side, but let's remove it in the same way here (on the right).
[MacBook Air 2018 LCD replacement and disassembly repair method STEP 18]
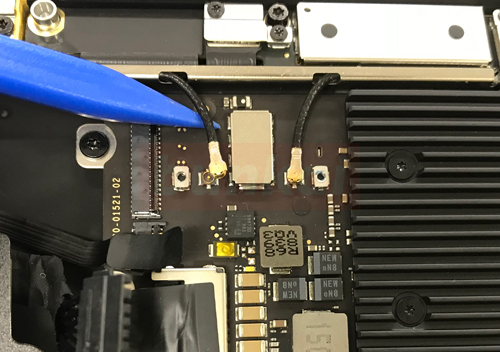
The upper image is where the WIFI cable is connected to the logic board, but I forgot to take one image.
Originally, there is a silver plate on the cable and is fixed with two screws.
If the screw can be removed and the plate can be removed, it will be the same as the image.
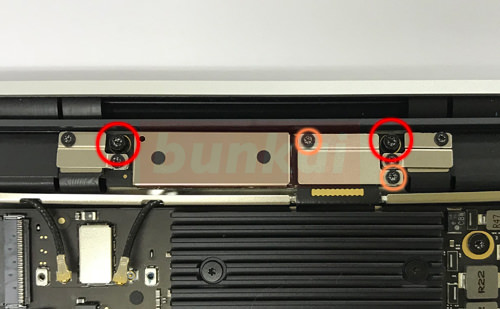
The cable can be easily removed by lifting it from the bottom to the top, and the screw siwn in the red circle and the orange round part is removed respectively.
When the screw of the orange part can be removed, the plate of silver comes off.
[MacBook Air 2018 LCD replacement and disassembly repair method STEP 19]

There is a connector extending from the logic board on the base of the liquid crystal, but it can be easily removed by lifting from the bottom to the top as shown in the image.
[MacBook Air 2018 LCD replacement and disassembly repair method STEP 20]
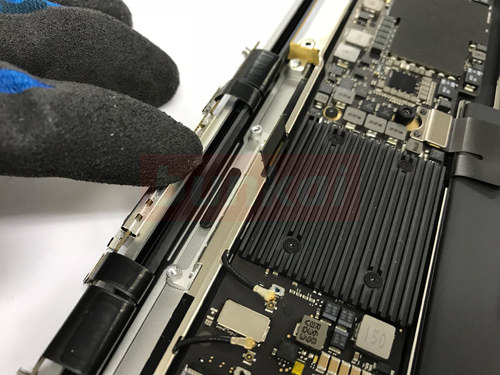
The base of the liquid crystal is lifted by hand, but the WIFI board is still there.
Since the WIFI board is also removed, it is better to check the structure once.
[MacBook Air 2018 LCD replacement and disassembly repair method STEP 21]
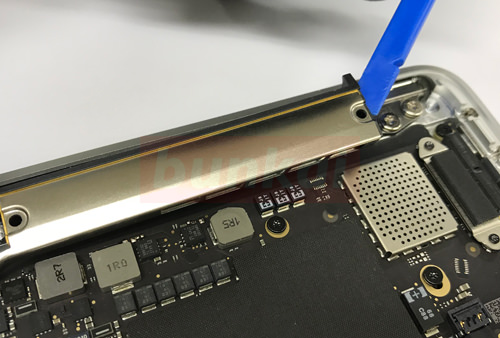
The WIFI board is lifted slightly from both ends and removed as shown in the image.
It may be a little stiff because the nail part of the WIFI board is caught in the gap of the main body.
[MacBook Air 2018 LCD replacement and disassembly repair method STEP 22]
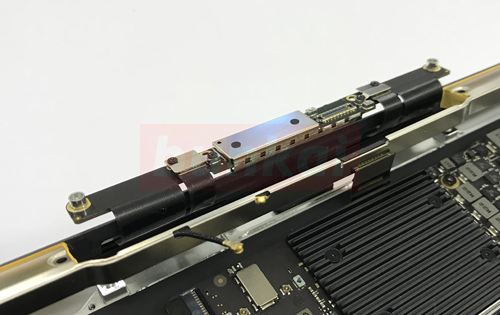
It is a state in which the WIFI board was lifted partway.
The middle of the WIFI board is hollow, and you can remove the WIFI board by passing the LCD cable through the gap.
[MacBook Air 2018 LCD replacement and disassembly repair method STEP 23]
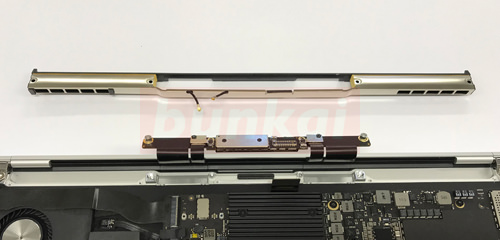
The WIFI board could be removed.
[MacBook Air 2018 LCD replacement and disassembly repair method STEP 24]
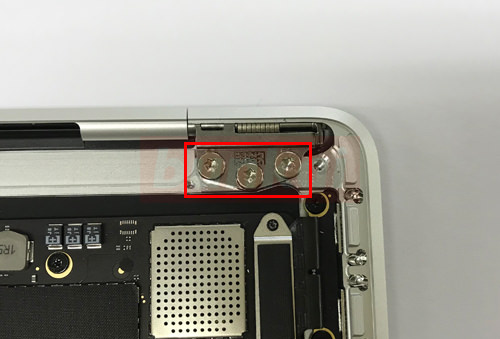
It becomes the hinge part of the right side, but the screw is removed.
[MacBook Air 2018 LCD replacement and disassembly repair method STEP 25]
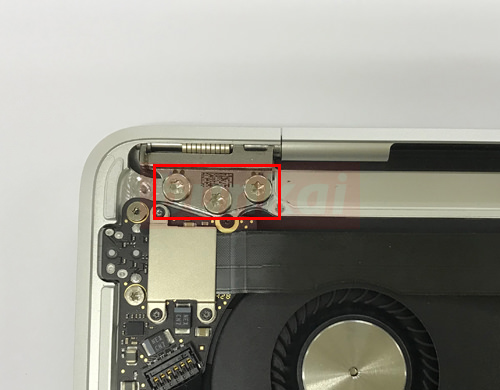
Let's remove the screw as before for the hinge part on the left side.
[MacBook Air 2018 LCD replacement and disassembly repair method STEP 26]
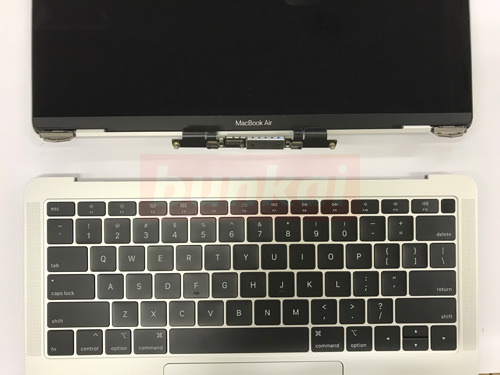
We were able to separate only the liquid crystal.
If you want to change the upper body of the liquid crystal, the liquid crystal change is completed if you reassemble it with the original procedure.
If you only want to replace the liquid crystal panel, it will be necessary to decompose further, but since there is no distribution of liquid crystal panels at this time (2018/11/15), I would like to end it here this time.
Lcd parts will be in circulation in the next few months to six months, but I feel that it will probably cost more than 60,000 yen for the upper body (assembly) and around 50,000 yen for an LCD panel.