iPhone6sPlus LCD Cracking How to Repair Screen Replacement, Disassembly Method
iPhone6sPlus LCD Replacement and Decomposition Procedures
[iPhone6sPlus LCD replacement and decomposition method STEP 1]
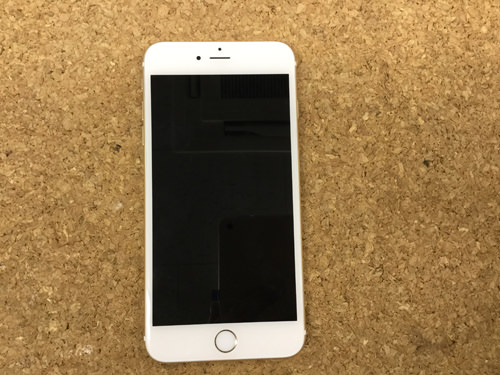
The most common contents of the iPhone failure will be liquid crystal cracking, but it is very different when you request a repair shop and the case to repair by yourself.
If this decomposition method can be accurate, you can cut the charge of liquid crystal repair greatly, so if you are confident in disassembly, please try!
The basic decomposition method is the same as 6Plus.
[iPhone6sPlus LCD replacement and decomposition method STEP 2]
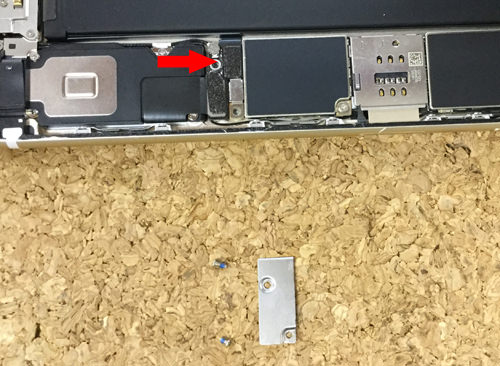
Use a dedicated screwdriver to remove the screws next to the dock connector.
[iPhone6sPlus LCD replacement and decomposition method STEP 3]
Although the liquid crystal is lifted, 6s and 6sPlus are hard compared to 6and 6Plus because a waterproof seal is affixed around the liquid crystal.
Be sure to lift the direction of lifting from the dock connector side.
We introduce the tool used for disassembly even at the bottom, but you can float it if you use a tool with a thin tip to insert it into the gap.
If the screen is not cracked, you can easily disassemble it by using a suction cup.
[iPhone6sPlus LCD replacement and decomposition method STEP 4]
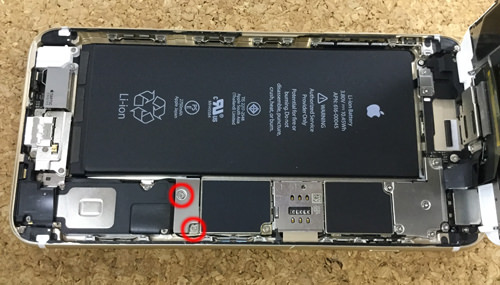
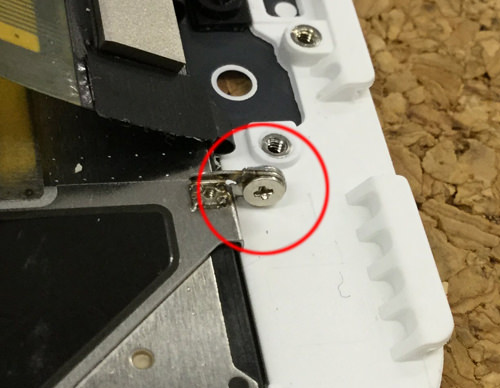
If you can lift the liquid crystal, hold down the liquid crystal with one hand and remove the red-circle screw with the other hand.
[iPhone6sPlus LCD replacement and decomposition method STEP 5]
If you can remove the screw and remove the plate, the battery connector will come into view, so let's remove it from the bottom to the top!
Be sure to disassemble the battery first before removing it.
[iPhone6sPlus LCD exchange and decomposition method STEP 6]
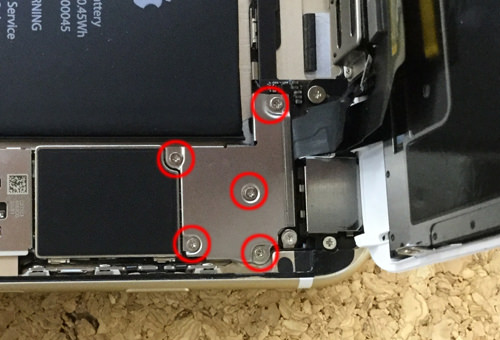
This part is where the connector of the LCD panel is connected, but remove all screws that are enclosed in red circles.
Then, I think that I was able to remove the plate of iron.
[iPhone6sPlus LCD exchange and decomposition method STEP 7]
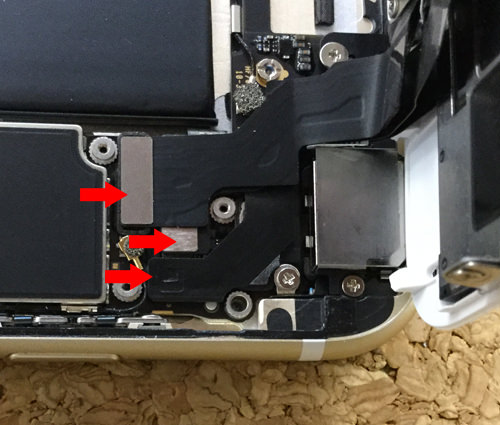
Since the cable of the liquid crystal and the front camera is connected to the logic board, it is removed by lifting it from the bottom to the top, but there are three connectors in all.
[iPhone6sPlus LCD replacement and decomposition method STEP 8]
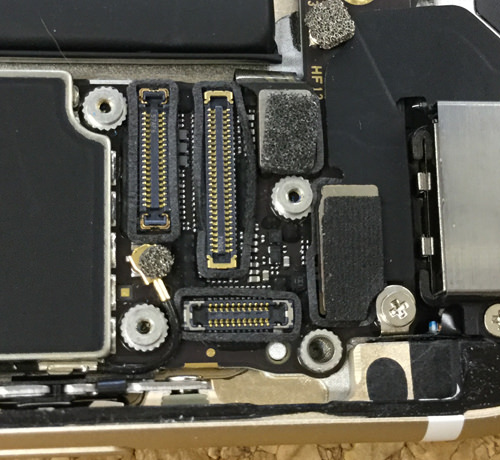
I think that the liquid crystal has come off, but please check the structure to restore it later!
[iPhone6sPlus LCD replacement and decomposition method STEP 9]
I think that only the liquid crystal was able to be removed from the main body, but I think that parts such as home button, front camera, heat shield are not attached to the newly prepared panel.
Therefore, it is necessary to implant these parts into the liquid crystal which installs it newly than the liquid crystal which has failed.
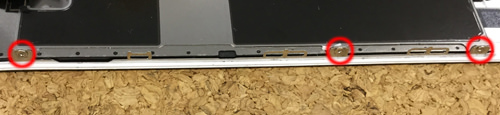
First of all, the front camera is removed, but all screws of the red circle part are removed.
[iPhone6sPlus LCD exchange and decomposition method STEP 10]
If you can remove the iron plate, I think that you can remove the black good speaker immediately.
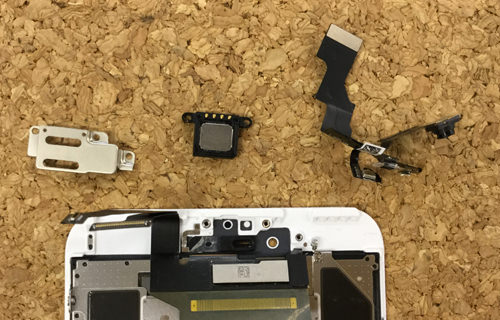
[iPhone6sPlus LCD exchange and decomposition method STEP 11]
Since the camera cable is fixed with light double-sided tape, I think that it can be removed if it is made to twist from the bottom to the top.
As shown in the image, the front camera is composed of three parts.
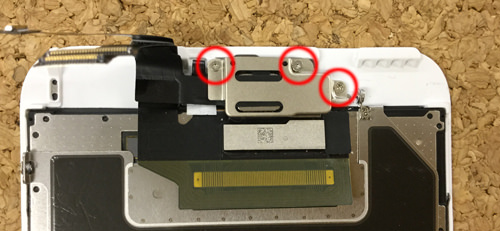
[iPhone6sPlus LCD exchange and decomposition method STEP 12]
Remove the heat shield, but remove all the screws in the red circle.
This part also has screws on the opposite side, so let's remove it!
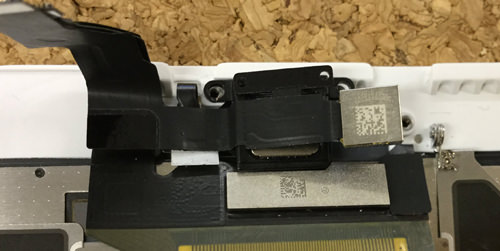
[iPhone6sPlus LCD exchange and decomposition method STEP 13]
Please do not forget to remove it because there is only one place where the screw is difficult to understand right next to the camera area of the previous.
I think that I was able to remove the heat shield by this.
[iPhone6sPlus LCD exchange and decomposition method STEP 14]
The image will be a home button, but this part is the one that you have to be most careful about replacing the LCD of the iPhone.
IPhone6sPlus has fingerprint authentication, but please note that fingerprint authentication will not work if you damage the home button cable.
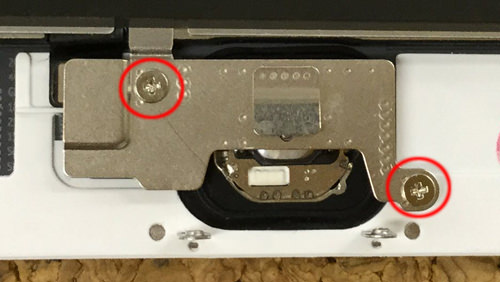
First of all, I will remove the screw of the red circle part, but I think that the plate came off immediately.
[iPhone6sPlus LCD exchange and decomposition method STEP 15]
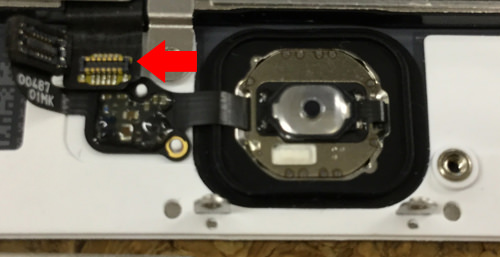
It is possible to remove the connector by lifting the red arrow part from the bottom to the top.
[iPhone6sPlus LCD exchange and decomposition method STEP 16]
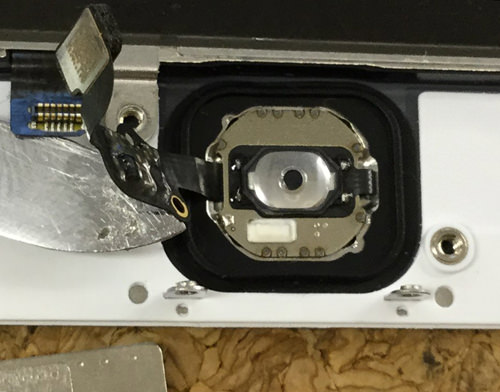
The rest is fixed with light double-sided tape, so I will peel it off slowly.
I think that there is a fine chip between the connector and the home button, but please be sure to peel off this part horizontally.
If you peel it off so that it bends, fingerprint authentication may not work, so it is more reliable to use a tool such as an image.
 The most common contents of the iPhone failure will be liquid crystal cracking, but it is very different when you request a repair shop and the case to repair by yourself.
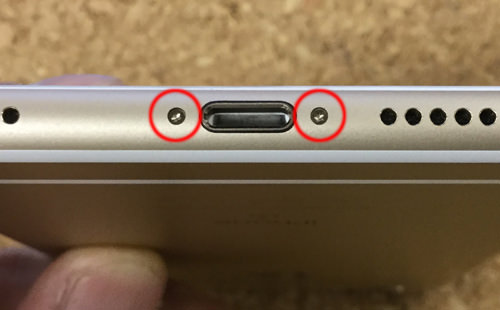
 Use a dedicated screwdriver to remove the screws next to the dock connector.
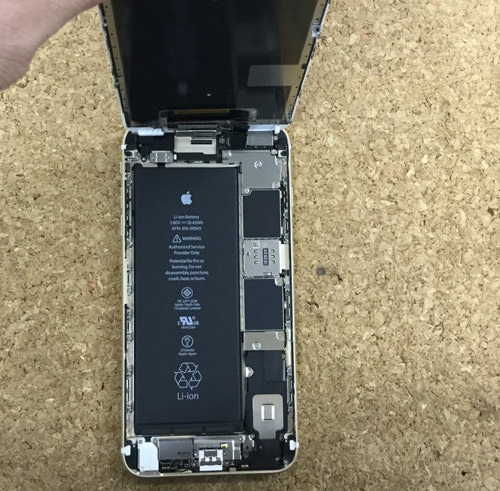

コメントを残す