How to repair and disassemble when there is no sound or sound from the iPhone5
IPhone5 Speaker Replacement and Decomposition Procedures
[iPhone5 Speaker Replacement STEP 1]
This decomposition method is a method to repair if the other party's voice is not heard on the iPhone5 or the sound is broken.
The part to be replaced is a ride speaker next to the inside of the home button, but it becomes a large decomposition procedure, so please check the position of the screw.
Because it becomes the same as the liquid crystal glass exchange until the middle, please refer to it because it will be able to change the liquid crystal glass to some extent if this decomposition method is followed.
[iPhone5 Speaker Replacement STEP 2]
First, remove the Sim Card from the iphone5 body.
The Sim Card uses the pins that were in the box at the time of iphone purchase, but if the pin is lost, it can be substituted for safety pins, clip tips, etc.
When the tip is inserted into the hole of the red frame part, the sim tray comes out.
[iPhone5 Speaker Replacement STEP 3]
Each Sim Tray came out, but keep your Sim Card in check so that it is not lost.
[iPhone5 Speaker Replacement STEP 4]
Next, remove the small screw under the iphone body, but the Phillips screwdriver cannot be used for special shape.
I use a driver of a fairly small star type, but if it is not, I can buy it cheaply with amazon etc.
[iPhone5 Speaker Replacement STEP 5]
The next thing to do is to remove the LCD.
In the image, we use a sucker, but it is not possible to use the sucker because air enters when the liquid crystal is cracked.
As a decomposition method, it should be raised from the home button side.
If the liquid crystal glass does not lift, the only way is to insert a sharp tip, such as a needle, into the gap and open it, but if you want to break open it, please disassemble it carefully.
There are fine parts inside, and if you scratch them, they will lead to other failures.
[iPhone5 Speaker Replacement STEP 6]
The lcd of the iphone5 is lifted.
It is caused from the home button side, but the camera side has a connector, so please do it carefully.
[iPhone5 Speaker Replacement STEP 7]
The first step is to remove the battery connector, but first remove all the screws in the red circle.
When the screw is removed, the iron plate comes off and there is a battery connector inside.
[iPhone5 Speaker Replacement STEP 8]
The red frame is the connector that connects the battery to the logic board.It can be removed if it wakes up from the bottom.
[iPhone5 Speaker Replacement STEP 9]
Because the connector was able to be removed, the power was able to be cut off by this.
If you do not remove the battery and disassemble it, it may shortdown, so be sure to do it when you disassemble it!
[iPhone5 Speaker Replacement STEP 10]
Next, remove the connector of the liquid crystal glass (liquid crystal panel), but remove the screw of the red circle part as well as the battery part.
[iPhone5 Speaker Replacement STEP 11]
Because there is a part where the connector is connected under the iron plate, remove it.
The red frame is two places, but when you remove the connector on the left side, the connector is hidden inside the other one, so it will be removed.
You can remove it by lifting it from the bottom to the top as if you had removed the battery connector here.
[iPhone5 Speaker Replacement STEP 12]
It was possible to separate the upper body of the liquid crystal and the main body.
You can prepare a new LCD to replace and port parts such as camera and home button from the original LCD.
[iPhone5 Speaker Replacement STEP 13]
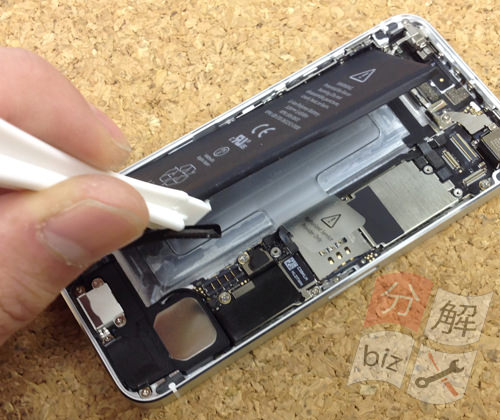
Removing the ride speaker must be removed from the logic board or even the battery.
First, remove the battery, but the battery is double-sided tape, bond?So, use a tool such as a spatula and try to wake it up from the bottom.
[iPhone5 Speaker Replacement STEP 14]
Next, remove the iron frame that secures the camera, but if you can remove the screw in the red circle part, you can remove the plate.
[iPhone5 Speaker Replacement STEP 15]
All screws and connectors on the logic board must be removed, so remove the connectors and screws in the area that are enclosed in red.
[iPhone5 Speaker Replacement STEP 16]
It was the upper side of the logic board earlier, but this is near the center.
Remove all connectors and screws that are enclosed in red as in the previous process.
[iPhone5 Speaker Replacement STEP 17]
I think that the plate of the camera part was removed in step 14, but the next side is the place where the target of STEP17 is targeted.
I think that there are two screws in the place where it is enclosed in red, but the cable is fixed with the screw.
This cable will be an important cable to pick up the radio waves, so be careful not to cut it.
If you cut it, the reception sensitivity will deteriorate rapidly and the phone may not be connected.
[iPhone5 Speaker Replacement STEP 18]
There is also a connector around the loudspeaker, so remove it.
[iPhone5 Speaker Replacement STEP 19]
This is the connector around the bottom of the camera cable, but let's remove it!
[iPhone5 Speaker Replacement STEP 20]
It is a cable mark that was removed in STEP18, but it can be confirmed that it is caused on the upper side.
[iPhone5 Speaker Replacement STEP 21]
If all connectors and screws connected to the logic board can be removed, the logic board can be removed.
I forgot to remove the screw, and I check ed re-check once again whether I forgot to remove the connector and remove it if there is no problem.
[iPhone5 Speaker Replacement STEP 22]
When the logic board is removed, only one pin connector is attached to the back side, but it will be removed because the work efficiency is better if you remove it here.
[iPhone5 Speaker Replacement STEP 23]
The logic board could be removed from the iphone5 body.
[iPhone5 Speaker Replacement STEP 24]
The one in the image on the upper right is the loudspeaker next to this object.
If all the screws of the red circle part can be removed, the loudspeaker and the dock connector can be removed.
[iPhone5 Speaker Replacement STEP 25]
The loudspeaker could be removed.
Since the loudspeaker replacement of the iphone5 is completed, in the case of a failure, it will be completed if you replace the parts and reassemble it according to the original procedure.

 This decomposition method is a method to repair if the other party's voice is not heard on the iPhone5 or the sound is broken.
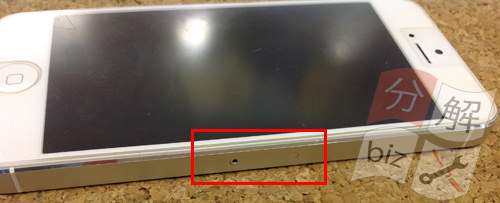
 First, remove the Sim Card from the iphone5 body.
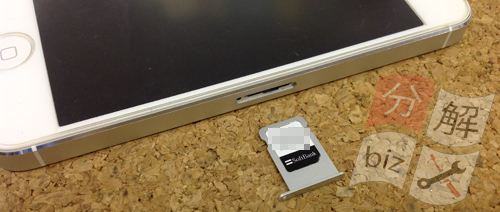
 Each Sim Tray came out, but keep your Sim Card in check so that it is not lost.
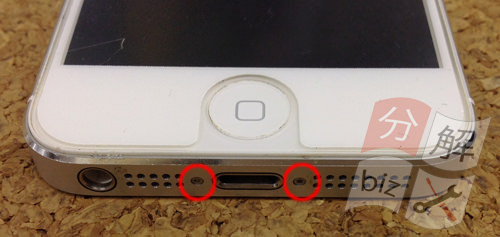
 Next, remove the small screw under the iphone body, but the Phillips screwdriver cannot be used for special shape.
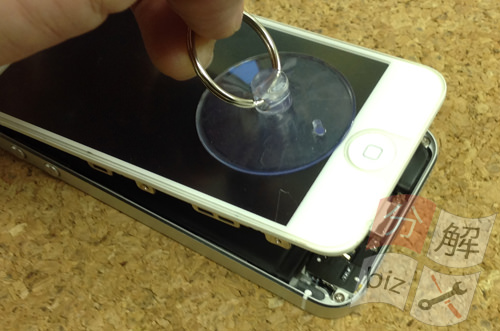
 The next thing to do is to remove the LCD.
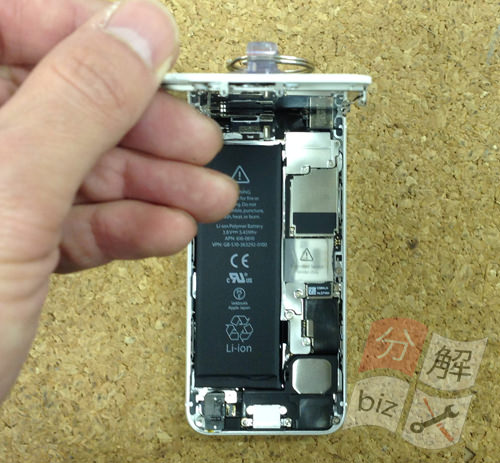
 The lcd of the iphone5 is lifted.
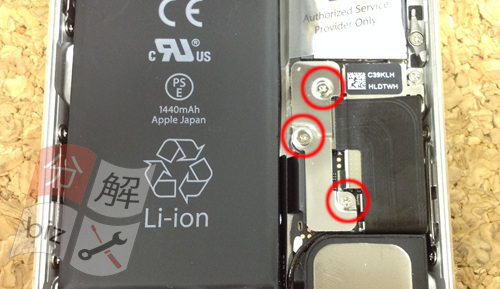
 The first step is to remove the battery connector, but first remove all the screws in the red circle.
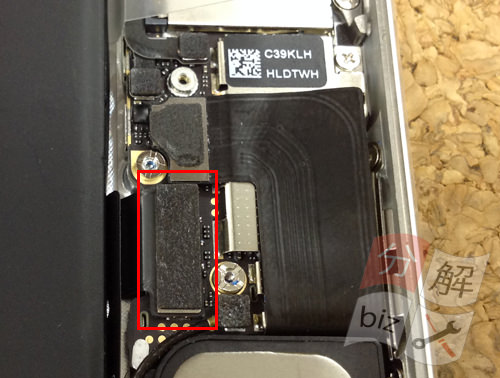
 The red frame is the connector that connects the battery to the logic board.It can be removed if it wakes up from the bottom.
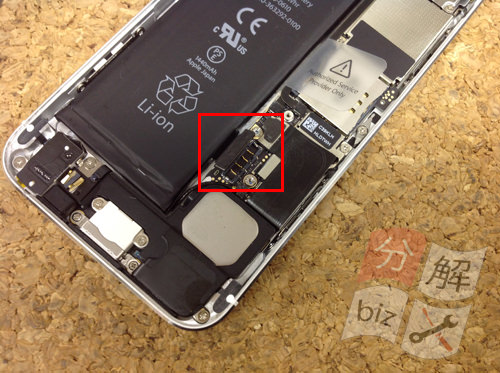
 Because the connector was able to be removed, the power was able to be cut off by this.
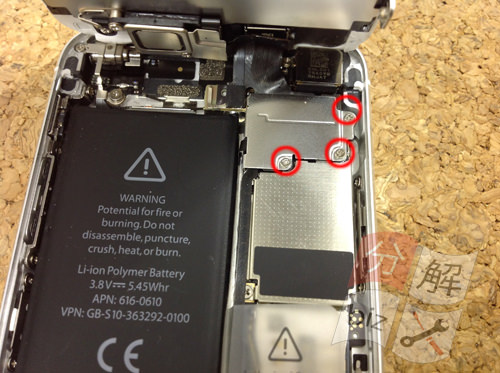

 Because there is a part where the connector is connected under the iron plate, remove it.
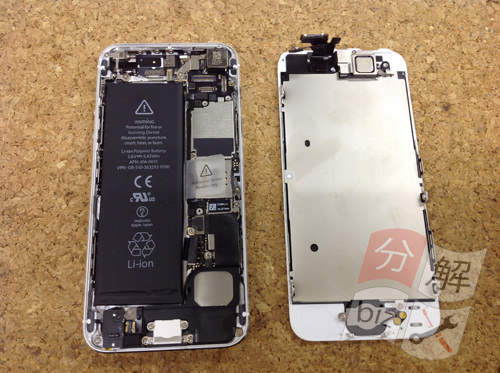
 Removing the ride speaker must be removed from the logic board or even the battery.
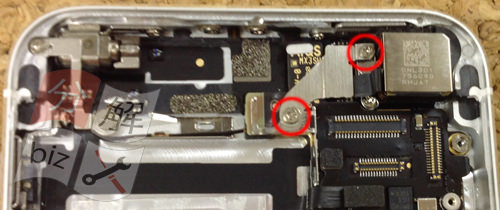
 Next, remove the iron frame that secures the camera, but if you can remove the screw in the red circle part, you can remove the plate.
 All screws and connectors on the logic board must be removed, so remove the connectors and screws in the area that are enclosed in red.
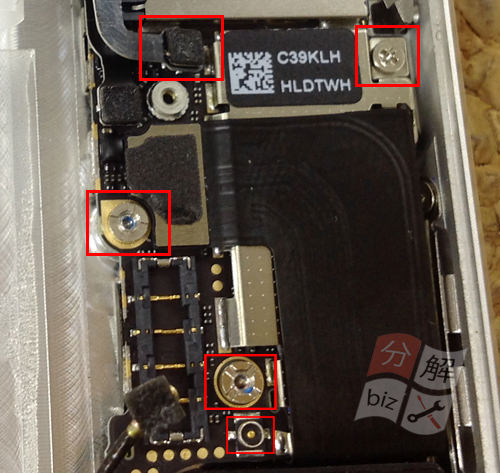
 It was the upper side of the logic board earlier, but this is near the center.
 I think that the plate of the camera part was removed in step 14, but the next side is the place where the target of STEP17 is targeted.
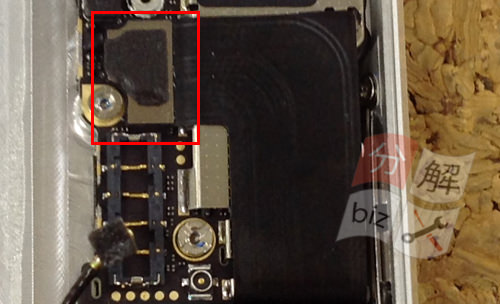
 There is also a connector around the loudspeaker, so remove it.
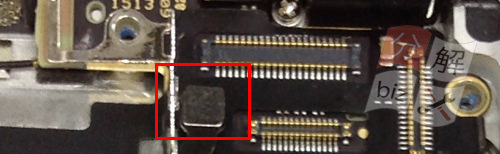
 This is the connector around the bottom of the camera cable, but let's remove it!
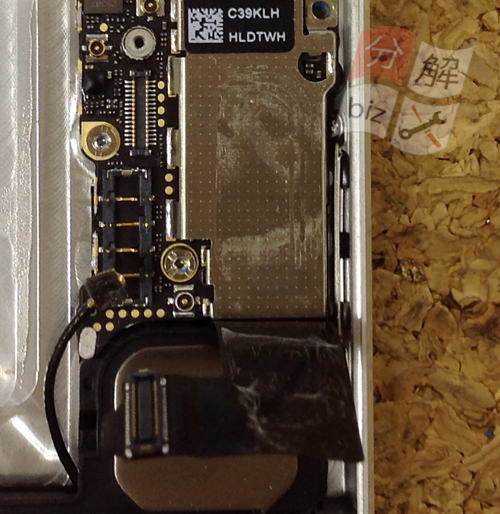
 It is a cable mark that was removed in STEP18, but it can be confirmed that it is caused on the upper side.
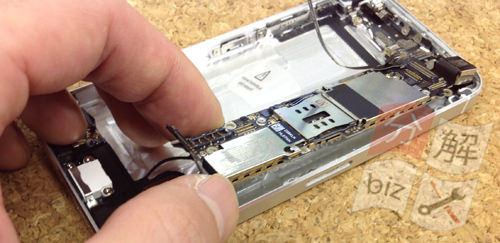
 If all connectors and screws connected to the logic board can be removed, the logic board can be removed.
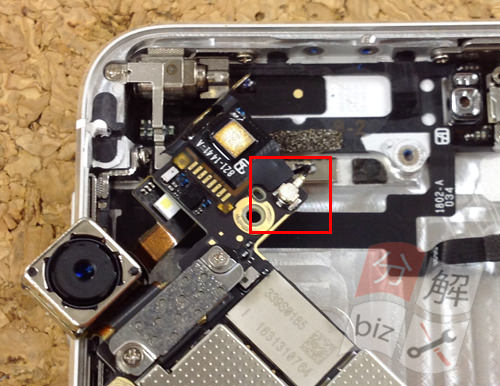
 When the logic board is removed, only one pin connector is attached to the back side, but it will be removed because the work efficiency is better if you remove it here.
 The logic board could be removed from the iphone5 body.
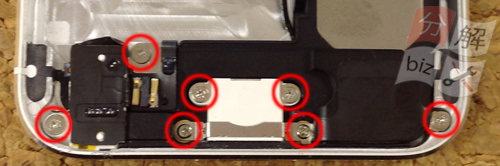
 The one in the image on the upper right is the loudspeaker next to this object.
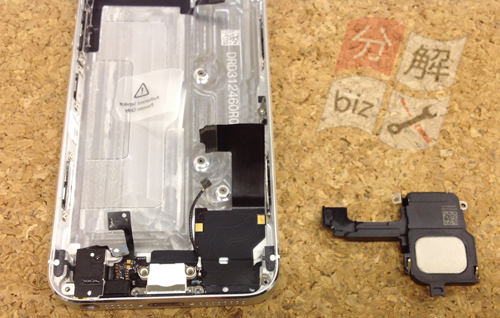
 The loudspeaker could be removed.

コメントを残す