How to replace only the backlight with the iPhobne LCD
If the screen of the iPhone is dark, you can regain the brightness if you replace the backlight!
[iPhone backlight replacement method STEP 1]
If the brightness of the iPhone screen is darkcompared compared to the time you purchased it with a new product, it is not a liquid crystal replacement, it is possible to regain the brightness if you replace only the backlight.
However, the wrong information is also flying around on the Internet, so I will explain it in detail.
If the screen is dark as before, it will be improved by the backlight exchange, but it is not a backlight failure on the liquid crystal side in many cases such as a flashing that can only be seen quite slightly, Since the chip fault of the logic board side of the main body, repair of the logic board is necessary.
If you want to replace the backlight purely, the parts themselves are sold for about 1,000 yen from a few hundred yen, so it is possible to fix them cheaply without having to replace each liquid crystal purposely.
The backlight replacement of the iPhone is high as repair difficulty because it performs the work of removing only the backlight further by removing the liquid crystal.
So if you are not confident in disassembly, I recommend that you consult a repair shop, but I think that you will not replace only the backlight at any repair shop, so it is a challenge!
This decomposition method is done on the iPhone6, but I think that it will be helpful because the way will be almost the same if the model before iPhone6.
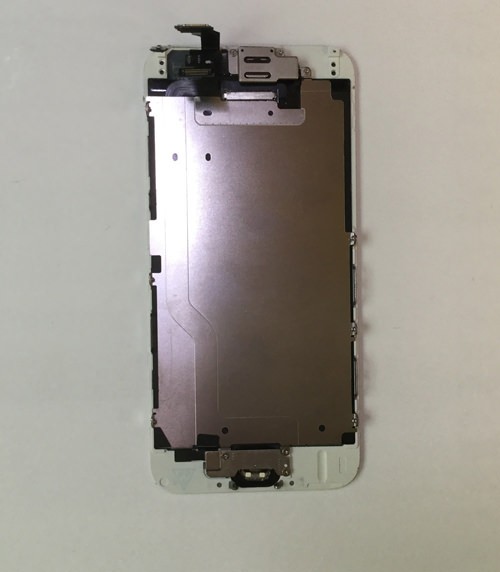
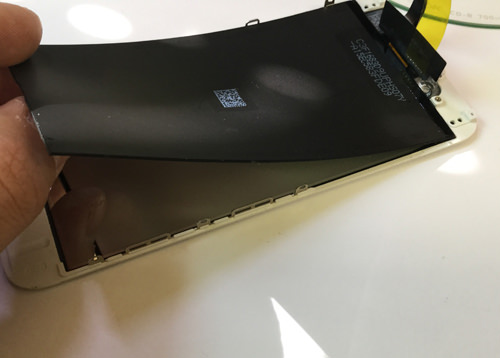
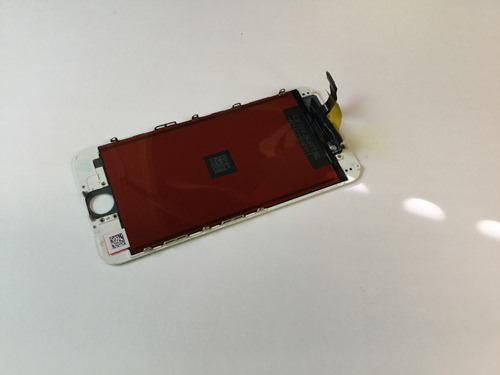
I want to go for the first time, but first of all, I will only have a liquid crystal.
The camera, earphones, home button, heat shield (iron plate) and so on are all removed.
Learn how to disassemble so far
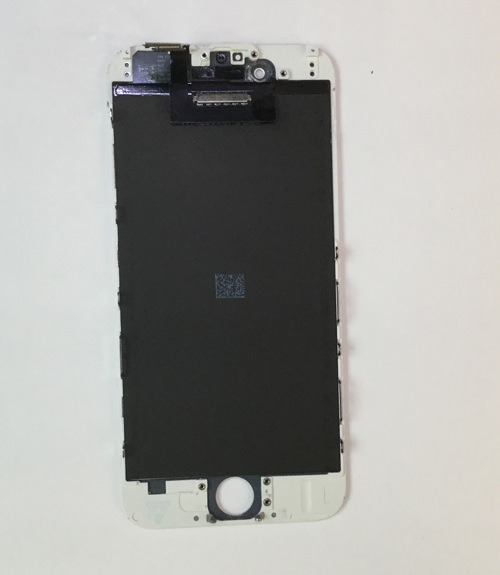
[iPhone backlight replacement method STEP 2]
Camera, earphones, home button, heat shield (iron plate) and all can be removed from here will be the real thing.
It is a tool that is absolutely necessary for the backlight replacement, but it is a complete solder tool, flux.
If there is, please prepare the thing which becomes easy to work because it becomes tape, iron spatula, etc.!
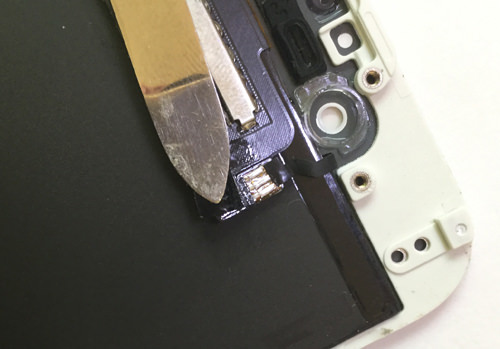
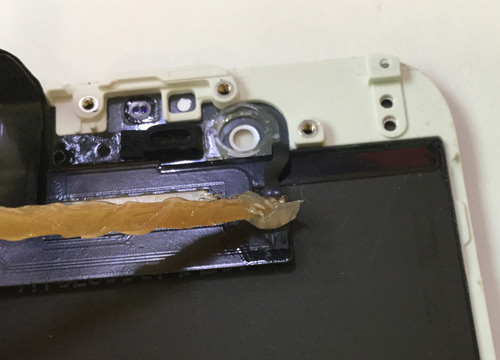
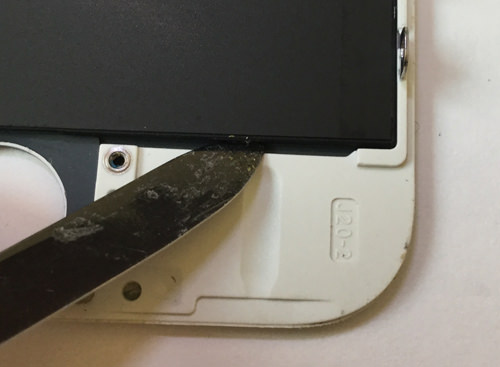
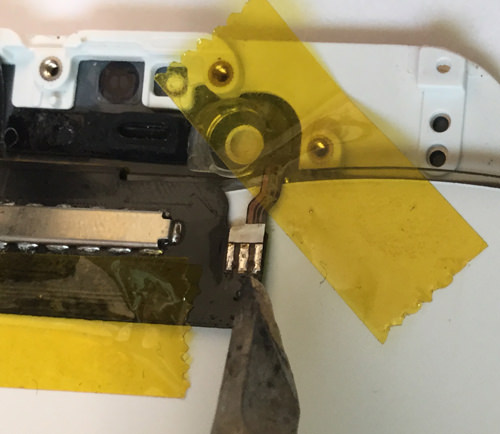
[iPhone backlight replacement method STEP 3]
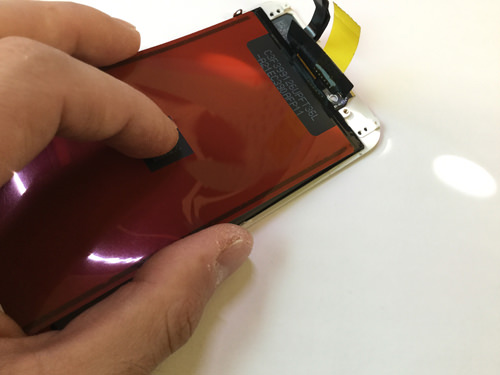
First of all, let's peel off because a small black tape is affixed to the part which is enclosed in a square!
Below is the backlight and the LCD.
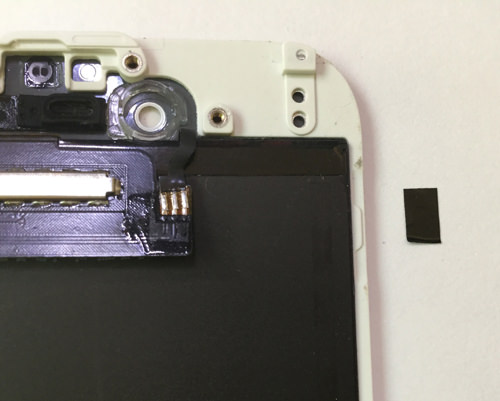
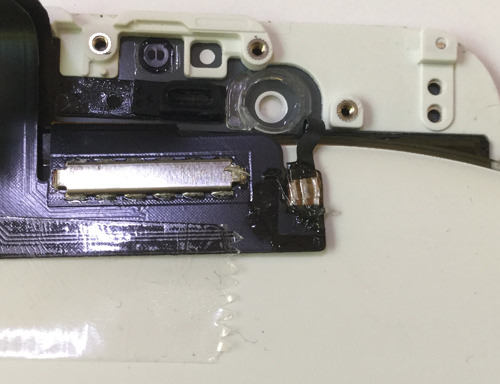
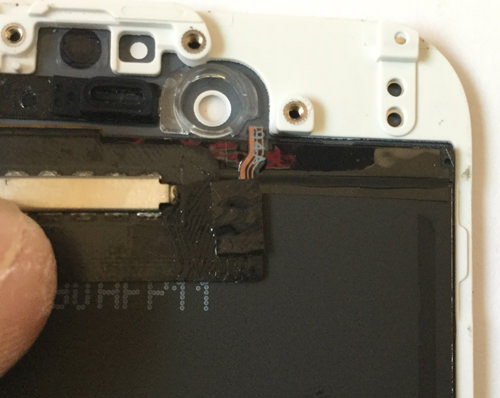
[iPhone backlight replacement method STEP 4]
It becomes such a feeling when the black tape is peeled off.
It is easy to work when there is an iron spatula.
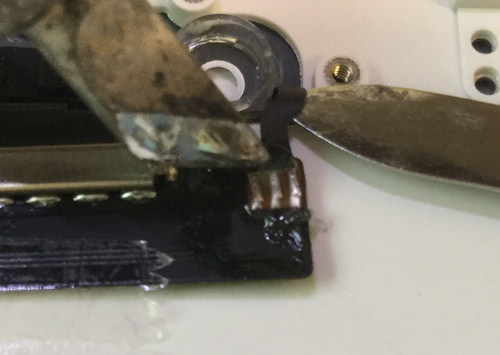
[iPhone backlight replacement method STEP 5]
The black tape has been peeled off, but the connection part is now visible.
A tool is required only for this soldered part.
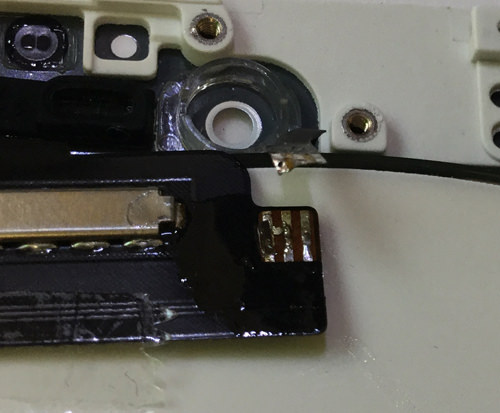
[iPhone backlight replacement method STEP 6]
From here, we will prepare to peel off the solder, but it is a place where flux is applied using toothpicks.
Flux is a thing that improves soldering if it is said simply, but it is effective to apply it when the target area is dirty or oxidized.
[iPhone backlight replacement method STEP 7]
Because the trowel used for solder becomes quite hot, it is better to put something below because there is a possibility that the lower side (liquid crystal side) melts if it is installed as it is.
The one sandwiched this time is CD-R, but it is good per thin iron plate.
Let's fix the surroundings with tape so that it doesn't move!
[iPhone backlight replacement method STEP 8]
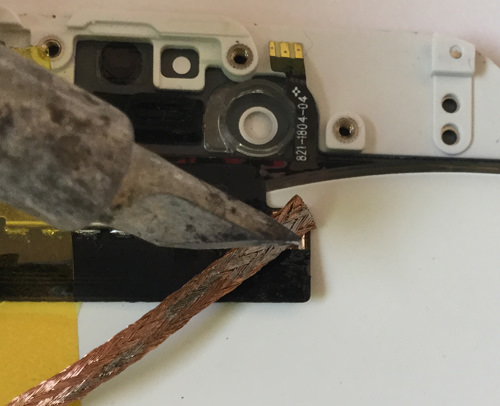
The cable of the liquid crystal and the backlight cable are separated using the soldering.
[iPhone backlight replacement method STEP 9]
I think that you can understand the feeling that comes off if you gently lift the backlight cable from the bottom to the top while applying the solder to the target place.
[iPhone backlight replacement method STEP 10]
It was possible to separate the lcd side and the backlight cable.
[iPhone backlight replacement method STEP 11]
Next, remove the backlight itself.
The backlight of the iPhone is different from the backlight used in the laptop, etc., and the structure is different, and it removes each seat.
The tool is inserted into the gap of the home button side and it slowly lifts it toward the camera, but the backlight seat is fixed with light double-sided tape, so the flow and efficiency are good by applying heat lightly.
[iPhone6 LCD glass, panel replacement STEP 12]
It is possible to remove the backlight sheet if it is possible to lift it from the bottom to the upper side like this.
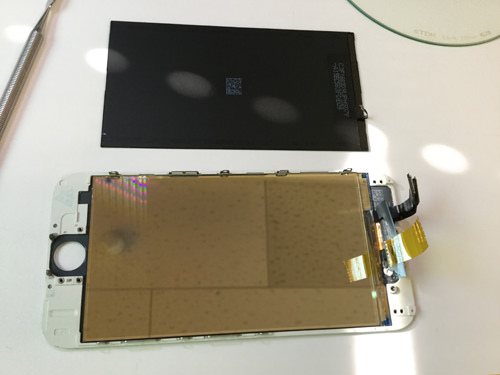
[iPhone6 LCD glass, panel replacement STEP 13]
Only the backlight sheet was able to be removed from the liquid crystal of the iPhone6.
When it can be removed well, the liquid crystal side is like a mirror, but the backlight sheet is composed of several sheets, so if the sheet remains, please peel off the sheet until it looks like an image!
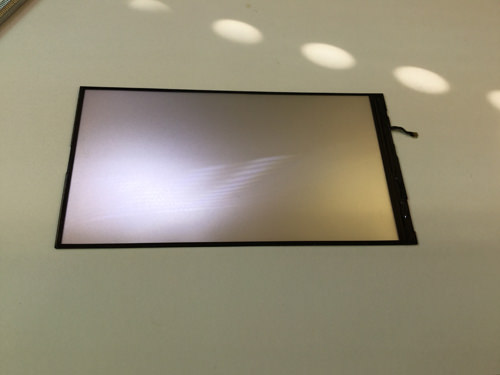
[iPhone6 LCD glass, panel replacement STEP 14]
The image I just pictured is the back side of the backlight sheet, but the surface looks like this.
The cable on the right side is removed by soldering a while ago and it is a part.
[iPhone6 LCD glass, panel replacement STEP 15]
The newly prepared backlight is done in the original procedure.
Alignment is not so difficult, but if the position is clearly and the backlight is uneven, it will be that only a part is dark.
[iPhone6 LCD glass, panel replacement STEP 16]
It is a whole photograph with the backlight sheet.
[iPhone6 LCD glass, panel replacement STEP 17]
The cable is not attached yet because it is in the state where the backlight sheet is put in the process up to a while ago.
From here, we will continue to work to use and attach solder, but let's set it so that it can be soldered as when you removed it!
After that, apply the flux to the ground surface again.
[iPhone6 LCD glass, panel replacement STEP 18]
It is a place where the solder suction wire is applied to the ground surface of the liquid crystal side and it is clean, but let's clean it because there is a thing that does not stick well when the ground surface is dirty!
[iPhone6 LCD glass, panel replacement STEP 19]
It is a place where the ground surface of the backlight is set to the liquid crystal side and fixed using the tape so as not to move.
I think that it is unnecessary for those who are accustomed to soldering, but it is easy to work with tape for solder beginners.
[iPhone6 LCD glass, panel replacement STEP 20]
It is difficult to understand in the image, but the decision work has been completed.
[iPhone6 LCD glass, panel replacement STEP 21]
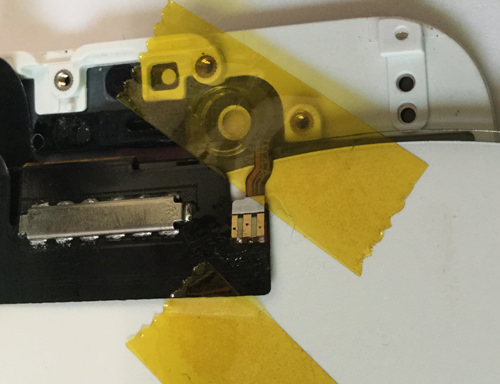
In order not to short-circuit the part attached with solder, let's paste the original black tape.
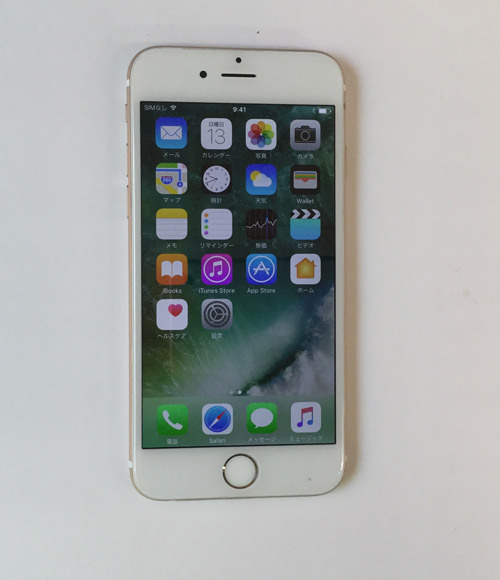
[iPhone6 LCD glass, panel replacement STEP 22]
It is the place where I reassembled the iPhone in the original procedure and turned on, but you can see that the backlight is turned on normally.
I explained at the very beginning, but many of the cases where the symptoms do not change even if the screen becomes dark and restarts, the possibility of failure on the logic board side is higher than the backlight failure, so this decomposition method cannot be utilized.
Once the screen is reflected by replacing each liquid crystal, it will be a liquid crystal panel or backlight failure, but if the symptoms do not change even if you replace each liquid crystal, logic board failure will be confirmed so you can cut the breakdown!


コメントを残す