how to repair the iPad3's LCD cracking, the screen not reflected, and the display failure, and how to disassemble it

 IPad3 LCD panel replacement and disassembly procedure
- [STEP 1]
 It is a replacement repair method when the LCD panel of the iPad3 cracks or cracks.
If the LCD panel is displayed incorrectly or there is a line on the screen, it will be a liquid crystal failure, so it is necessary to replace the LCD panel.
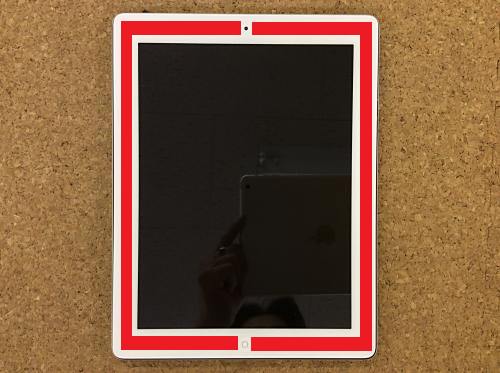
First of all, a strong double-sided tape is attached to the part filled with red, so I warm it with a dryer and float the double-sided tape.
If you have a heat gun, work efficiency will increase.
Please note that if it is too hot, burns and parts will deform or break due to heat.
Before you start working, leave the iPad shut down.
- [STEP 2]
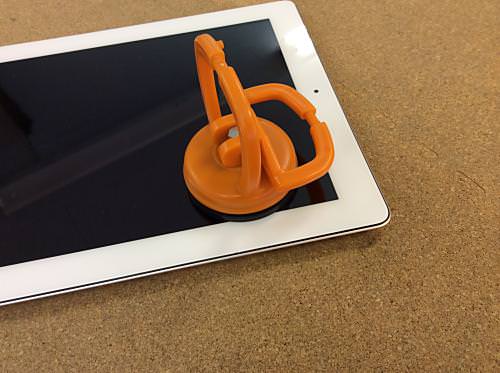 Next, we start to disassemble the liquid crystal panel using suction cups and other methods.
Suction cups are sold at home centers and are mainly used by glass shops.
There are from large to small, but small things are enough for disassembling the iPad.
When the touch panel glass on the surface is broken, it does not stick firmly, so the work becomes difficult and patience is necessary.
Also, be careful not to get hurt by broken glass.
- [STEP 3]
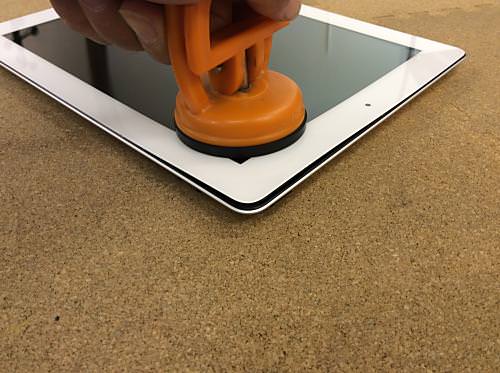 Decomposition of this LCD panel is the most important for disassembling the iPad, so we will work carefully.Do you see that the touch panel on the surface is farther than the main body?
It is the momentum that I want to remove at once as it is, but I will peel it off carefully little by little using a dryer, heat gun, etc.
We make a gap little by little, insert a pick, etc. into the gap, so that the glass does not stick again.
Please be careful not to insert the pick etc. deeply into the main body.Cables and parts may be damaged.
Because there is rubber between the touch panel and the main body of the surface, please be careful not to deform or cut a thousand.
- [STEP 4]
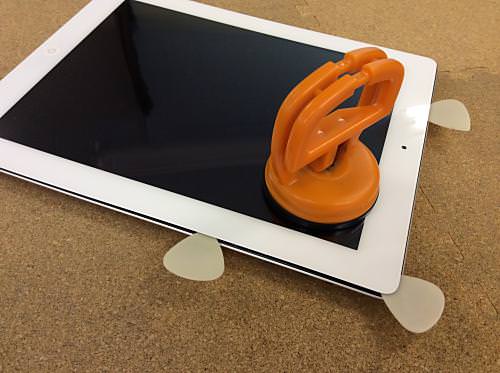 It is a good idea to put a thin one like a thin guitar pick in the part where the touch panel of the surface is peeled off and floated.
If you plug it too deeply, you will cut the parts and wiring in it, so insert about 5mm as a guide.
In this way, if you do not peel off little by little, the touch panel will suddenly crack.
- [STEP 5]
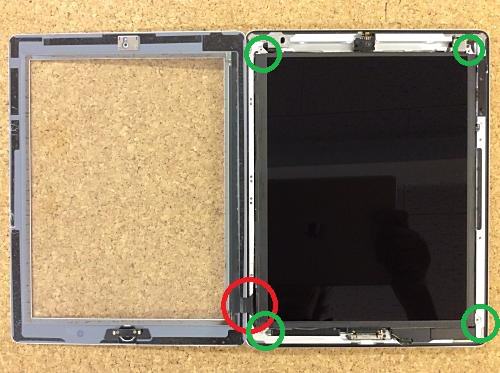 This is an image with the touch panel removed.
The touch panel extends from the lower left side and the red area to the main unit, and is connected to the main base of the iPad (logic board).
There are four screws in the green mule part, so remove the liquid crystal display with this.
- [STEP 6]
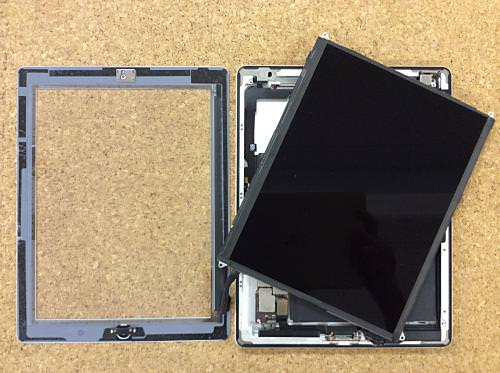 Remove the screw and the LCD display will come off, but it is still connected to the main base of the iPad (logic board) by cable.
It is the part connected to the main base and each cable and battery.
- [STEP 7]
 Remove the part where the battery and the main base (logic board) are connected and float with a plastic insulating object such as a pick.
Remove the three screws in the green mal part, float the main base slightly, release the battery and the base, and prevent the pick etc. from being interrupted between.
- [STEP 8]
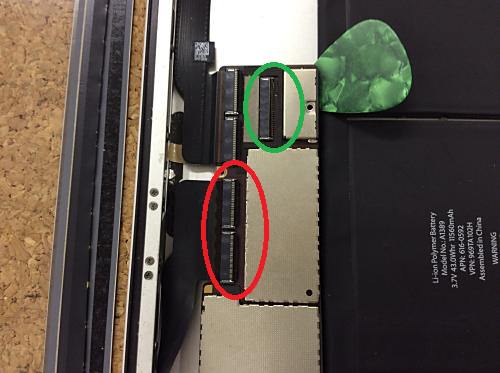 The connector part of the cable on the LCD panel and touch panel is locked with a nail to prevent it from slippage easily.
Green is the cable of the liquid crystal display, and red is the nail which secures the cable of the touch panel.
Lift the black claws on top of each part, remove the lock, and slide the cable to the left to pull it out.
You can remove the LCD panel by removing the connector on the green LCD panel.


コメントを残す