If you need to replace your HP EliteBook 820 G3/CT hard disk due to increased capacity or failure, please refer to the following decomposition method.
[EliteBook 820 G3/CT Hard Disk Replacement 1]
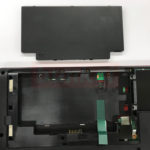
The HP EliteBook 820 G3/CT cannot be easily removed because the battery is built-in type, although the work of removing the battery is done if it is originally done in the decomposition.
Remove the back cover and remove the connector directly from the battery and the motherboard connection.
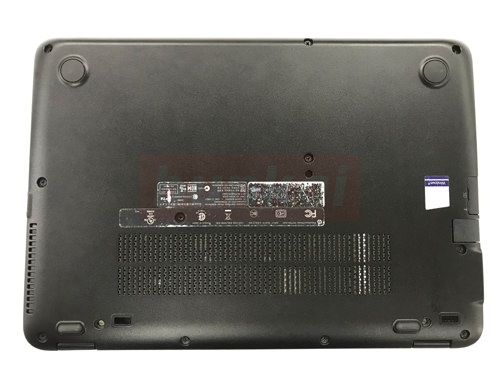
First of all, all screws on the back side of the main body are removed.
[EliteBook 820 G3/CT Hard Disk Replacement 2]
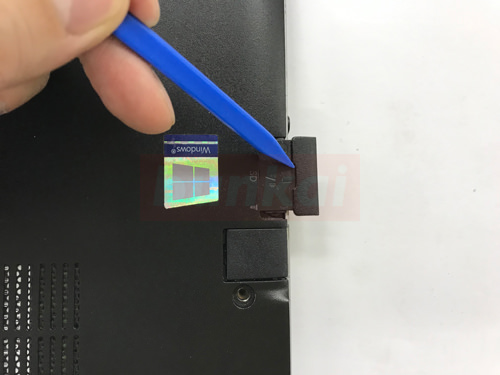
Because there is a dummy card in the part where the SD card is inserted, it will be removed.
[EliteBook 820 G3/CT Hard Disk Replacement 3]
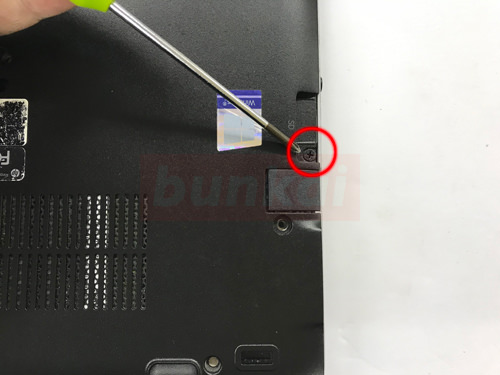
Because the screw is hidden under which the dummy card of SD is removed, it removes it.
[EliteBook 820 G3/CT Hard Disk Replacement 4]
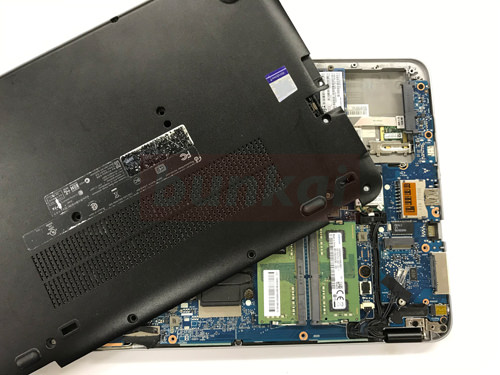
I was able to remove the back cover.
[EliteBook 820 G3/CT Hard Disk Replacement 5]
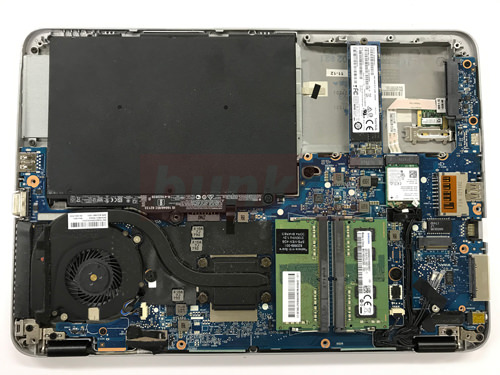
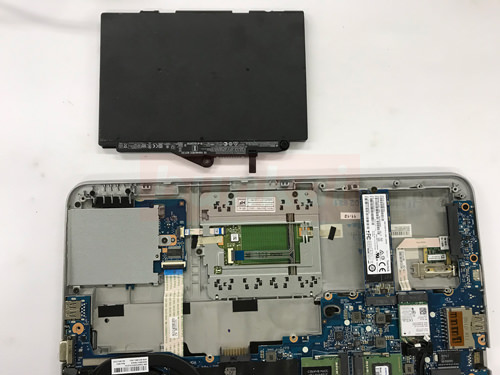
Let's check it for the future because it is possible to confirm the quilt various parts by removing the back cover.
[EliteBook 820 G3/CT Hard Disk Replacement 6]
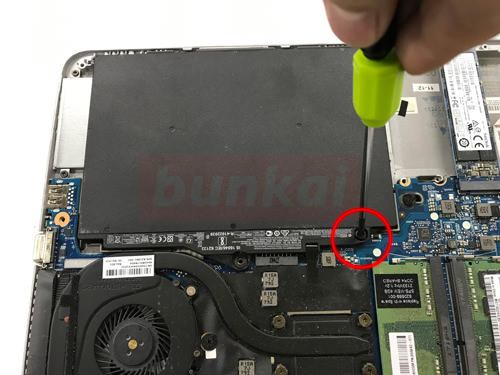
The battery is directly stuck in the motherboard, but it is fixed with a red circle screw.
Let's use the screwdriver to remove the screw.
[EliteBook 820 G3/CT Hard Disk Replacement 7]
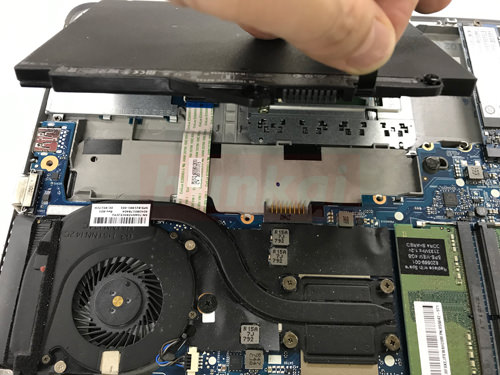
When the screw could be removed, it was possible to remove it by simply lifting it on the battery.
[EliteBook 820 G3/CT Hard Disk Replacement 8]
You can remove it like this.
[EliteBook 820 G3/CT Hard Disk Replacement 9]

This is the hard disk, but it is not a 2.5-inch hard disk used in a typical laptop, but an SSD.
In addition, the speed is considerably fast because the standard hard disk called PCIe which is said to be the fastest among SSDs is used.
Let's remove it because it is fixed with a screw in the red circle part.
[EliteBook 820 G3/CT Hard Disk Replacement 10]
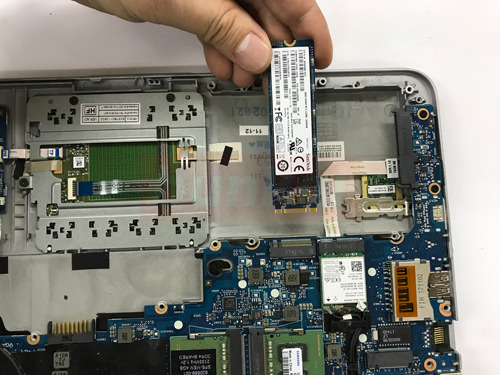
After removing the screw, you can remove it if you grab the SSD by hand and pull it out.
After that, the hard disk replacement is completed if you replace it with a newly prepared SSD, etc., and assemble it with the original procedure.