We will show you how to replace the battery for MacBook Air 2018.
I do not think that there is a case to be replaced by the deterioration and expansion of the battery because the model is still new, but I think that it is possible to refer to the future because it is not possible to replace it easily like the MacBook Air up to now.
Up to now MacBook Air has been able to replace the battery in a few steps, this MacBook Air 2018 in order to require more than twice the decomposition process, If you are a beginner disassembly, it is quite dangerous, so you may want to consult a repair agent!
It is necessary to remove it to the logic board, and it becomes considerably difficult to retrieve the data if it apologizes and it breaks down.
(The SSD of MacBook Air 2018 is embedded in the logic board, so it is not possible to replace or eject the SSD alone.))
Since the tool used for disassembly is not enough only tools that have been used in the MacBook Air so far, it is necessary to dedicated tool,
If you plan to replace the battery from now on, be sure to prepare a special tool before starting.
[MacBook Air 2018 Battery Replacement and Decomposition Repair Method STEP 1]
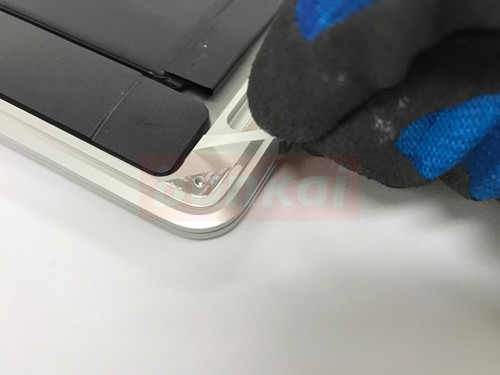
Up to now, the MacBook Air was able to replace the battery by itself relatively easily if you can remove the bottom case, but this MacBook Air is honestly quite difficult.
Is it easy to check the battery immediately by removing the bottom case?It seems that,
It is necessary to remove it to the logic board because a part of the wiring of the trackpad on the battery is connected to the bottom of the logic board.
Of course, if you try to remove the cable forcibly, it will lead to other failures, so be sure to remove the trackpad cable in order.
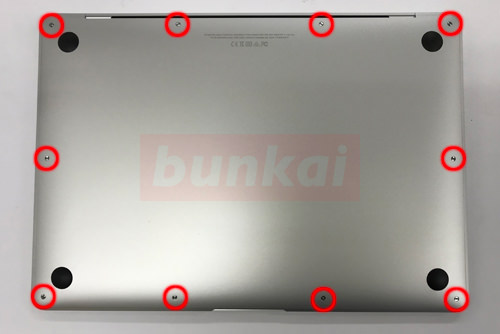
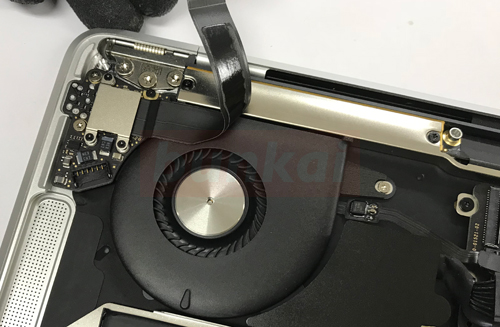
Let's turn over the body and remove all screws of the red circle part.
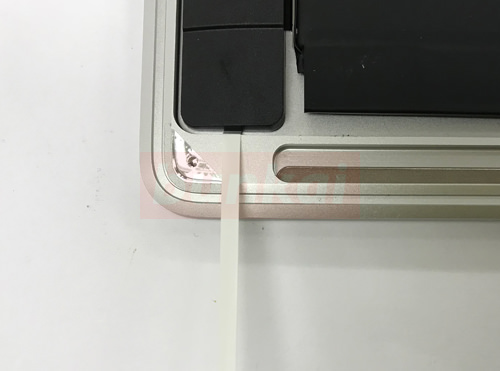
[MacBook Air 2018 Battery Replacement and Decomposition Repair Method STEP 2]
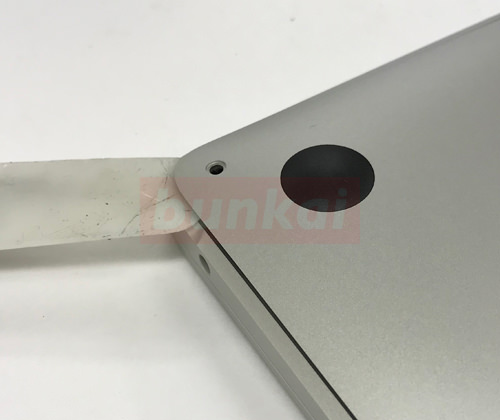
You can remove the bottom case when you can remove the screw, but you can remove the rest by hand if you lift one place with a tool.
[MacBook Air 2018 Battery Replacement and Decomposition Repair Method STEP 3]
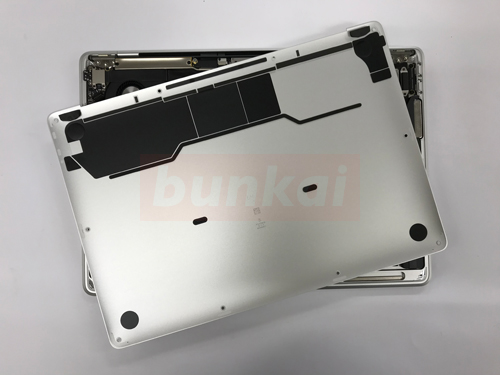
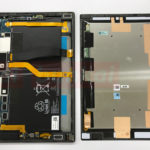
I was able to remove the bottom case.
I feel that it seems to be able to take it easily because the battery can be confirmed immediately, but unfortunately I can not remove it.
At this point, it is a good idea to check the internal structure in various ways.
[MacBook Air 2018 Battery Replacement and Decomposition Repair Method STEP 4]
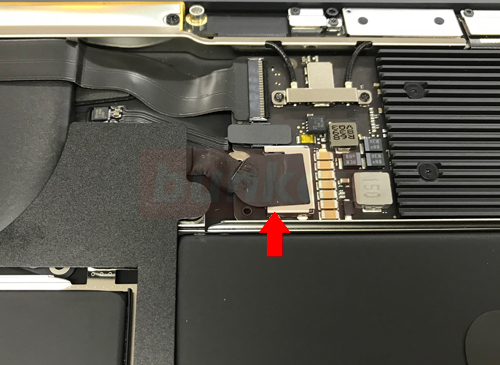
It is common to all disassemblies, but the first thing you start with removing the battery connector.
The image part is hidden by a black seal though it becomes the place where the battery and the logic board are connected.
[MacBook Air 2018 Battery Replacement and Decomposition Repair Method STEP 5]
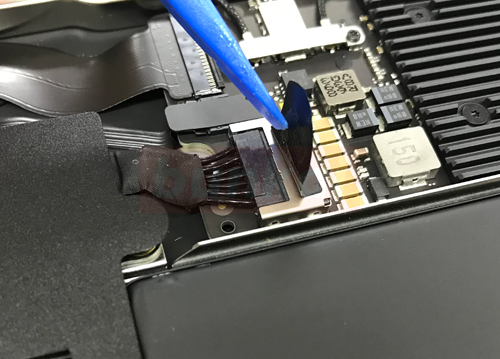
When turning over the seal, there is a connector connection part, so slide it sideways and remove it.
In terms of the image, it is a feeling of pulling to the left.
[MacBook Air 2018 Battery Replacement and Decomposition Repair Method STEP 6]
I was able to remove the connector.
It's very easy to get here, but it's better to look through it quickly because the process is long from here.
[MacBook Air 2018 Battery Replacement and Decomposition Repair Method STEP 7]
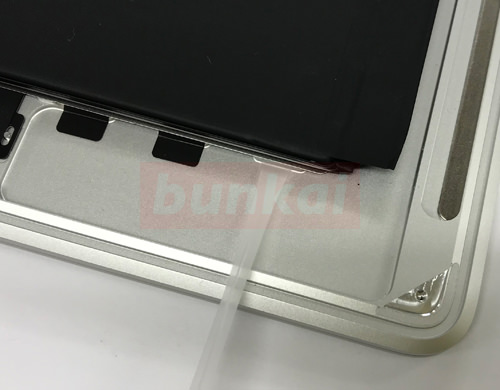
This part will be the speaker, but why the speaker to remove the battery?The screw that secures the battery is under the speaker.
The speakers are not screwed and are secured with the same double-sided tape that secures the iPhone's battery.
Raise the tip of the tape as shown in the image and gently pull it out.
[MacBook Air 2018 Battery Replacement and Decomposition Repair Method STEP 8]
If you try to pull it forcibly, the tape will be easily torn off, so please pull it fairly carefully.
There is no problem even if the tape is cut by any chance, but it takes time to return because it comes to take forcefully by inserting the tool.
The angle to pull is ideal lying up rather than sideways.
[MacBook Air 2018 Battery Replacement and Decomposition Repair Method STEP 9]
I'm pulling out the tape, but I'm not kidding.
If you pull out the tape slowly with such a feeling, you can peel it off beautifully.
[MacBook Air 2018 Battery Replacement and Decomposition Repair Method STEP 10]
When you can peel off the tape cleanly, it lifts up easily by hand.
If it does not come off easily by any chance, the tape remains on the back side of the speaker, so let's peel it off so that it is strained with a spatula.
[MacBook Air 2018 Battery Replacement and Decomposition Repair Method STEP 11]
The speaker has been raised from the bottom to the top, but the tip is connected to the logic board.
The connector can be removed from the logic board by lifting it from the bottom to the top.
[MacBook Air 2018 Battery Replacement and Decomposition Repair Method STEP 12]
The speaker on the left side could be removed.
[MacBook Air 2018 Battery Replacement and Decomposition Repair Method STEP 13]
It is the speaker on the right side toward, but let's remove it as before.
[MacBook Air 2018 Battery Replacement and Decomposition Repair Method STEP 14]
It is the connector part of the speaker, but let's remove it by the same procedure as before.
[MacBook Air 2018 Battery Replacement and Decomposition Repair Method STEP 15]
The trackpad cable is connected to the logic board in the image part, but there is another line next to the cable that is fixed.
Because of this one wire, the battery replacement has become a very hard task.
The only reason you need to remove the logic board is for this cable.
Since there is a screw (T3) in the red circle part, let's remove the dedicated screwdriver.
[MacBook Air 2018 Battery Replacement and Decomposition Repair Method STEP 16]
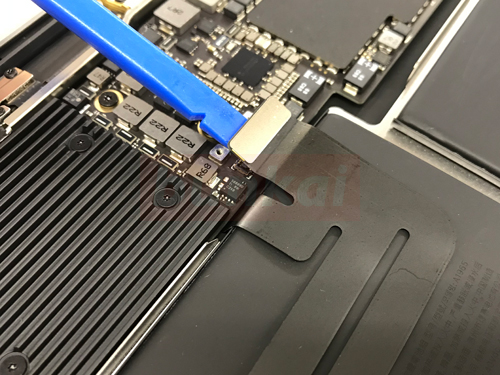
There is a connector that can remove the silver plate, but it is possible to remove it easily if it is lifted from the bottom to the top.
[MacBook Air 2018 Battery Replacement and Decomposition Repair Method STEP 17]

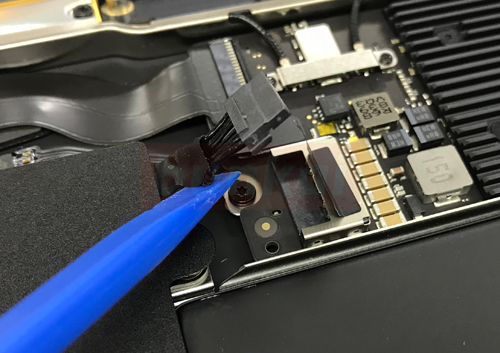
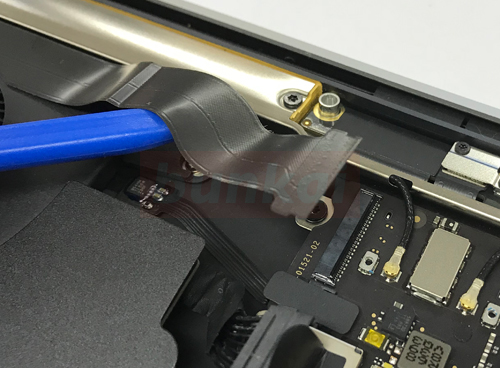
From now on, I want to remove the logic board.
The wiring is stopped by a black nail, but as shown in the image, a tool is used from the bottom to the top to cause a black nail.
If you pull the wiring without causing the nail, it may damage the cable, so be careful.
[MacBook Air 2018 Battery Replacement and Decomposition Repair Method STEP 18]
It is possible to remove it by sliding the cable sideways when confirming that the nail occurred earlier.
[MacBook Air 2018 Battery Replacement and Decomposition Repair Method STEP 19]
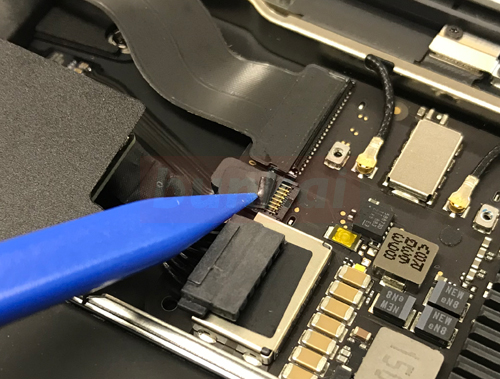
There is a small connector right next to the previous wiring, but let's remove the wiring by the same procedure.
[MacBook Air 2018 Battery Replacement and Decomposition Repair Method STEP 20]
I was able to remove the wiring.
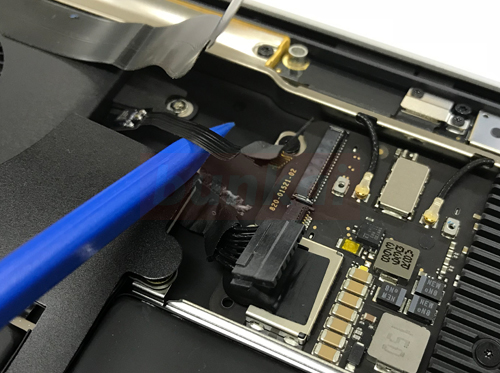
[MacBook Air 2018 Battery Replacement and Decomposition Repair Method STEP 21]
The cable you removed earlier is connected to the fingerprint authentication side, but you don't need to remove it.
[MacBook Air 2018 Battery Replacement and Decomposition Repair Method STEP 22]

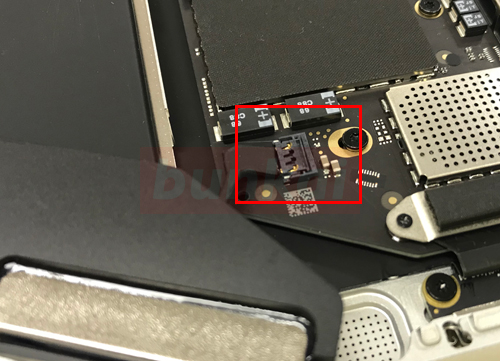
The WIFI connector is connected, but I forgot to take one photo.
Because the silver plate is stopped by two screws, it becomes the state of the image when the plate is removed.
The connector can be easily removed by lifting it from the bottom to the top like the image.
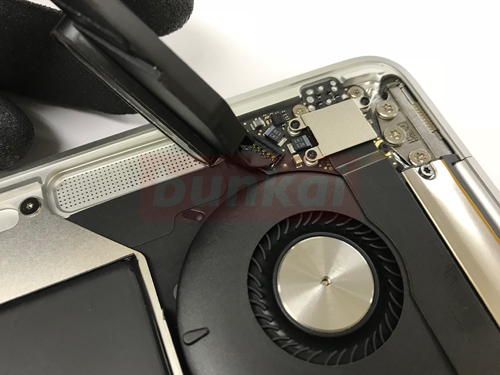
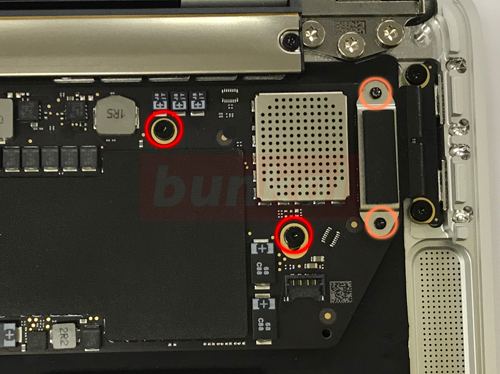
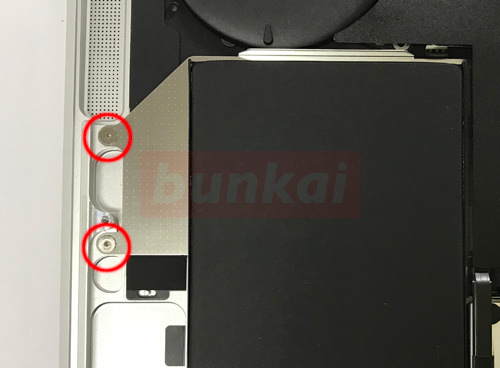
[MacBook Air 2018 Battery Replacement and Decomposition Repair Method STEP 23]
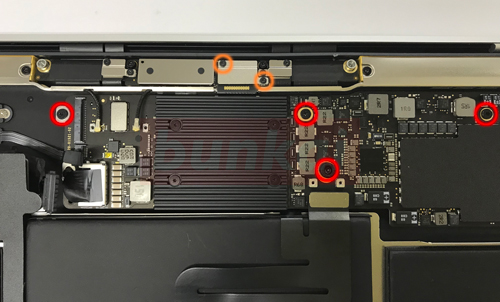
This is the main area of the logic board.
There are screws in the red circle and orange round part, so let's remove all.
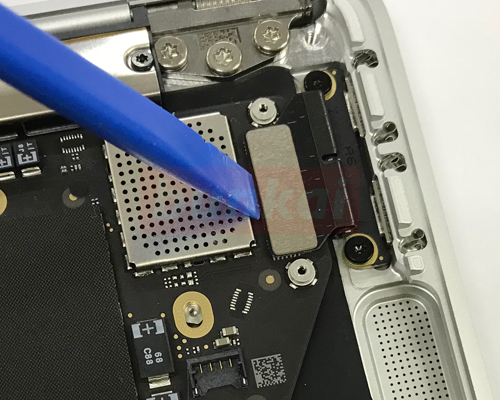
[MacBook Air 2018 Battery Replacement and Decomposition Repair Method STEP 24]
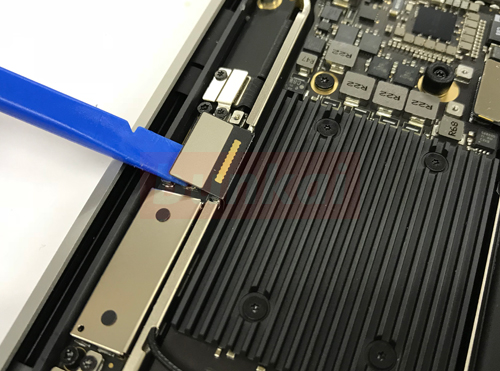
There is a connector when you can remove the plate of the orange circle part earlier, but let's wake up from the bottom to the top using the tool.
[MacBook Air 2018 Battery Replacement and Decomposition Repair Method STEP 25]
Because there is a screw in the place where it is difficult to understand, I do not forget to remove it.
[MacBook Air 2018 Battery Replacement and Decomposition Repair Method STEP 26]
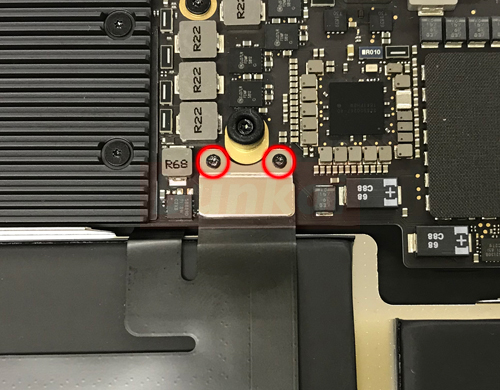
It is the logic board area on the right side, but remove all the screws of the red circle and the orange round part.
[MacBook Air 2018 Battery Replacement and Decomposition Repair Method STEP 27]
Because the power connector is connected to the logic board, use the tool and remove it.
If you can remove the connector, you do not need to remove the screw of the power supply part.
[MacBook Air 2018 Battery Replacement and Decomposition Repair Method STEP 28]
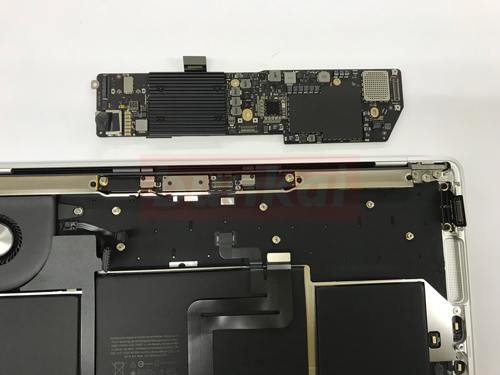
The logic board could be removed.
Be careful with storage because it will be a fairly delicate part.
If you fail by mistake, you will not be able to retrieve the data easily.
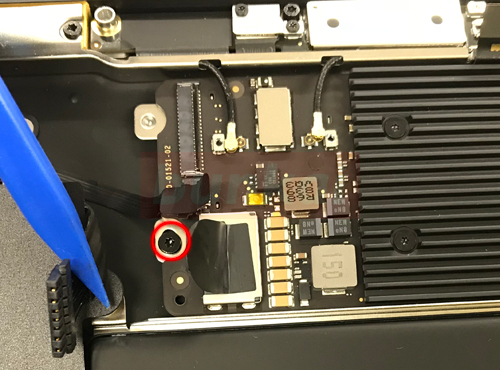
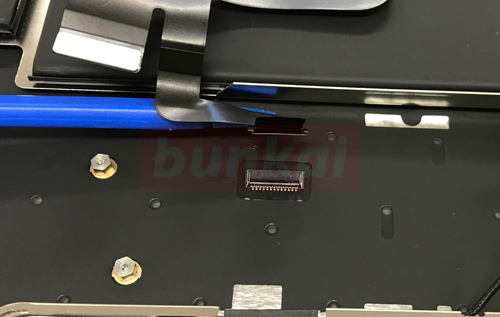
[MacBook Air 2018 Battery Replacement and Decomposition Repair Method STEP 29]
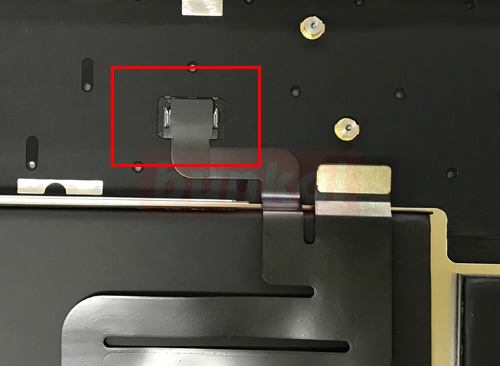
There is a position of the image under the logic board, but this is the problem part of this time.
One cable extending from the trackpad is connected to the keyboard.
We have been disassembling up to now just to remove the wiring here.
[MacBook Air 2018 Battery Replacement and Decomposition Repair Method STEP 30]
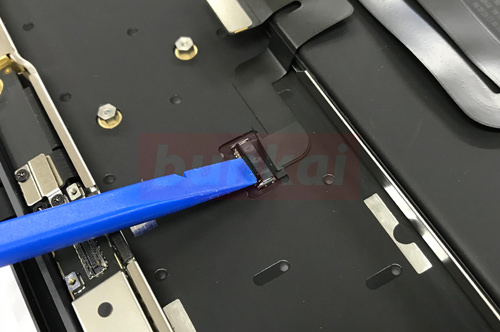
When the black seal is peeled off, there is a black nail, so wake up the nail and then remove the cable.
[MacBook Air 2018 Battery Replacement and Decomposition Repair Method STEP 31]
I was able to remove the cable.
[MacBook Air 2018 Battery Replacement and Decomposition Repair Method STEP 32]
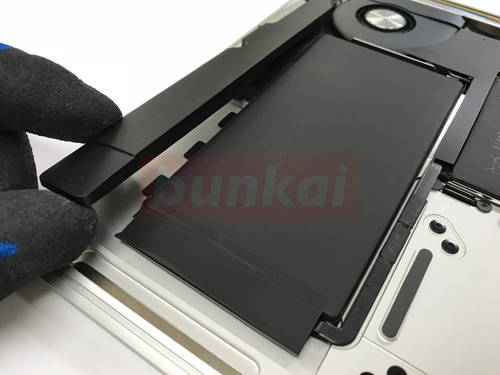
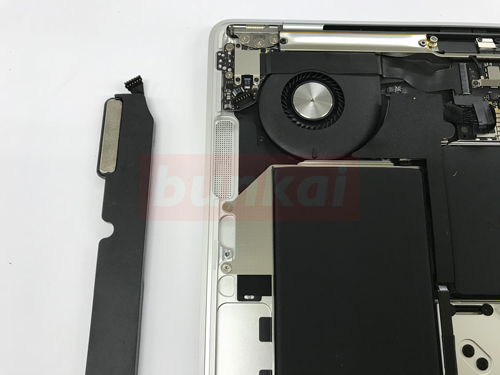
The screw that secures the battery under the speaker, but remove each screw.
[MacBook Air 2018 Battery Replacement and Decomposition Repair Method STEP 33]
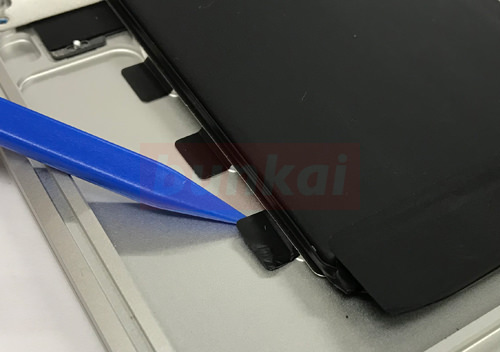
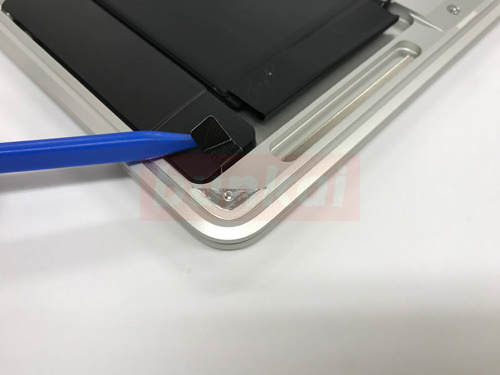
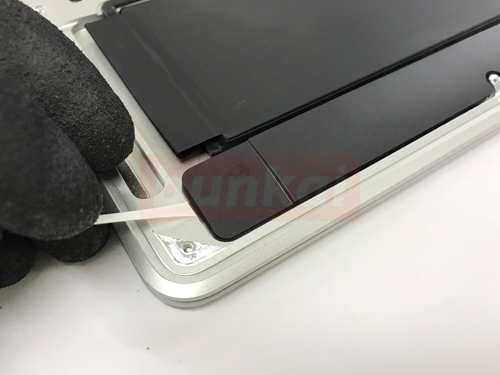
The battery is fixed to the main unit with double-sided tape as well as the speaker that was removed earlier.
Let's peel off three tapes with the capacity where the speaker was removed.
[MacBook Air 2018 Battery Replacement and Decomposition Repair Method STEP 34]
This is also the same as the speaker, while stretching it like this, i will remove the tape.
There are three same tapes, so let's remove them all.
[MacBook Air 2018 Battery Replacement and Decomposition Repair Method STEP 35]
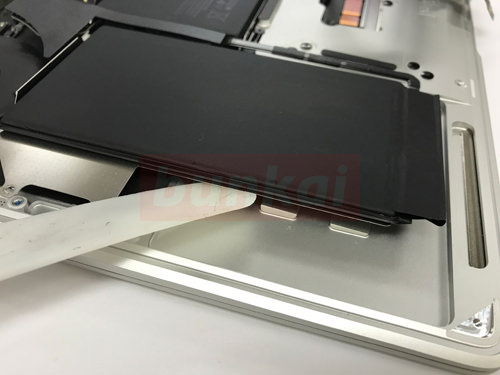
When the tape can be peeled off, the battery lifts up as easily as in the image.
The image will be on the left side, but remove the tape and screws using the same procedure on the opposite right side.
[MacBook Air 2018 Battery Replacement and Decomposition Repair Method STEP 36]
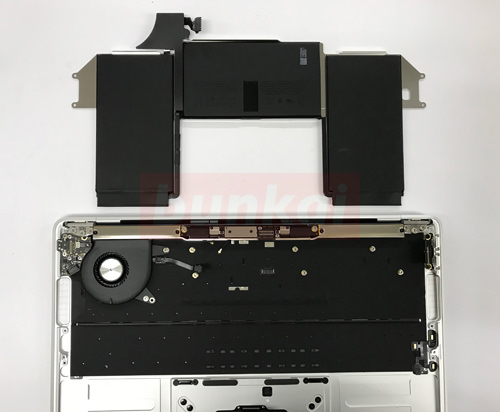
The macBook Air 2018 battery can now be removed by itself.
Compared to the macBook Air in the past, it takes many times longer, and the work process is also getting harder.
There is work to remove the logic board on the way, but if you break the logic board by any chance, it will cause a problem and the power will not turn on, so if you do not have it in disassembly, it is more certain to ask the repair shop.