The Macbook Pro Retina A1502 (13 inch) LCD cracking, in the case of poor display, a liquid crystal replacement is required!
[Macbook Pro Retina A1502 LCD Replacement STEP 1]
The liquid crystal is cracked, and the lower half is not seen just because.
In the upper half, the OS is starting normally, so you can see up to the login screen, so there seems to be no need to worry about data!
I think that i can use retina without changing the environment just by changing the liquid crystal, so I want to go into repair immediately.
There are two types of liquid crystal repairs for Retina, which are divided into a method of replacing all lcd upper body and only the liquid crystal panel.
This repair will only be done lcd panel replacement, but please refer to it because it is possible to correspond to either repair method because it becomes the liquid crystal upper body replacement part.
Please try to send the liquid crystal repair of Macbook Pro Retina to the repair shop if you feel that it is difficult to see the flow of the following repair because the difficulty is very high.
[Macbook Pro Retina A1502 LCD Replacement STEP 2]
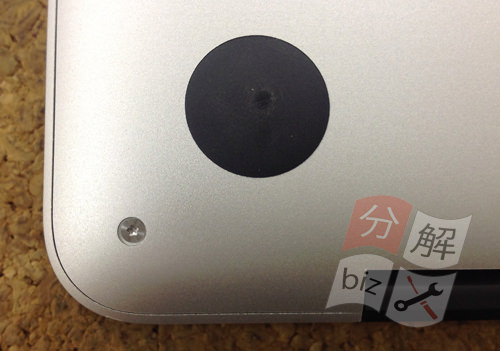
First, remove the battery and then work.
The macbook Pro Retina has a built-in battery and cannot be removed unless the bottom case is opened.
Because there are 10 screws in all on the back of the main body, all will be removed.
Because of the special shape called Torx screw, it is not possible to remove it with a Phillips screwdriver, but please prepare a screwdriver called a Torx screwdriver sold at the home center.
[Macbook Pro Retina A1502 LCD Replacement STEP 3]
A Torx screwdriver is required to disassemble Retina.
Torx drivers can be purchased at the home center, so be prepared in advance.
First of all, I will disassemble it from the bottom case, but please remove all there because there are 10 screws in total.
[Macbook Pro Retina A1502 LCD Replacement STEP 4]
If all screws can be removed, the bottom case can be easily removed.
[Macbook Pro Retina A1502 LCD Replacement STEP 5]
The first thing to do after removing the bottom case is to remove the battery connector from the logic board.
The red frame part is the target place, but it can be easily removed if you try to lift it from the bottom to the top.
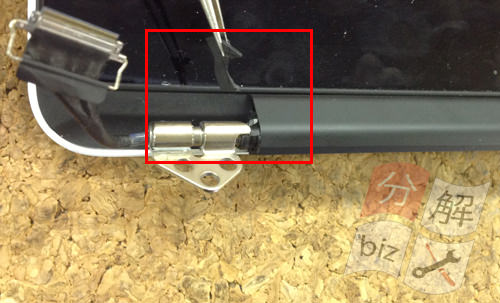
[Macbook Pro Retina A1502 LCD Replacement STEP 6]
Next, remove the rubber in the hinge part, but it can be easily removed with tweezers etc. because it is only attached with a light bond.
[Macbook Pro Retina A1398 LCD Replacement STEP 7]
Remove the screw on the side of the rubber.
[Macbook Pro Retina A1502 LCD Replacement STEP 8]
There is a small plastic part under the screw, so please keep it so as not to lose it.
[Macbook Pro Retina A1502 LCD Replacement STEP 9]
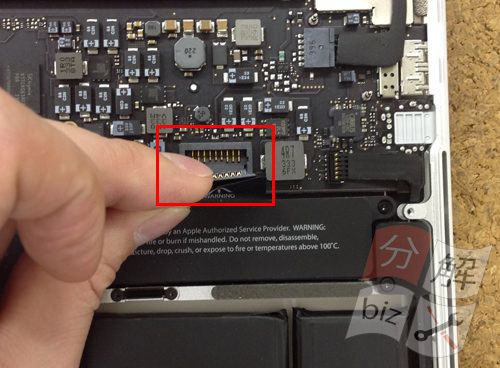
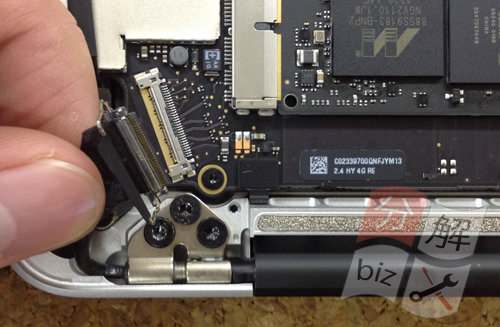
Next, remove the LCD cable from the logic board.
You can remove the "co-shaped" pin by raising it up and pulling it out.
[Macbook Pro Retina A1502 LCD Replacement STEP 10]
Next, I remove the wifi cable, but since it is connected to three in all, I try to lift it from the bottom to the top and remove it.
[Macbook Pro Retina A1502 LCD Replacement STEP 11]
This is where the camera cable is removed, but you can easily remove it by sliding it.
[Macbook Pro Retina A1502 LCD Replacement STEP 12]
Next, remove the hinge screws.
There are three slightly larger screws on the left and three on the right, so remove them all.
Now that the cables and screws that secure the upper body of the liquid crystal can be removed, it is possible to remove the upper body of the liquid crystal.
[Macbook Pro Retina A1502 LCD Replacement STEP 13]
I was able to take out the upper body of the liquid crystal!
When each liquid crystal upper body is replaced, it is completed in the process so far, but when it comes to replacing only the liquid crystal panel, it is necessary to decompose further.
This time, i would like to break down further because it is a process of changing the liquid crystal panel.
From here, the decomposition becomes more detailed, but please take time and work slowly.
[Macbook Pro Retina A1502 LCD Replacement STEP 14]
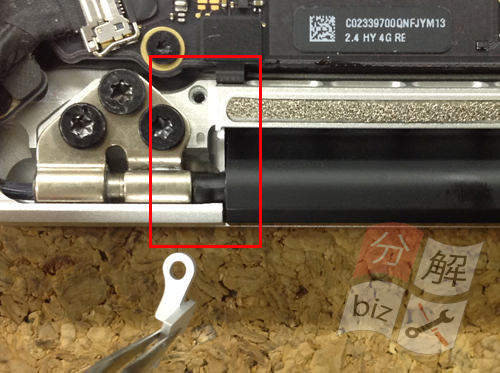
First, remove the black plastic next to the hinge.
It can be removed with tweezers, but the place is slightly hard to remove.
Because it is only fixed with a plastic nail, it can be easily removed if the structure is known.
On the left, it is on the right side, so let's remove each!
[Macbook Pro Retina A1502 LCD Replacement STEP 15]
If you can remove the plastic of the previous, you can remove the middle part, but please store it because it will be reused later.
[Macbook Pro Retina A1502 LCD Replacement STEP 16]
The seal of the liquid crystal cable is peeled off.
There are a number of small screws around the LCD cable, so remove all visible areas.
[Macbook Pro Retina A1502 LCD Replacement STEP 17]
There are small screws on the outside of the LCD cable, so don't forget to remove them.
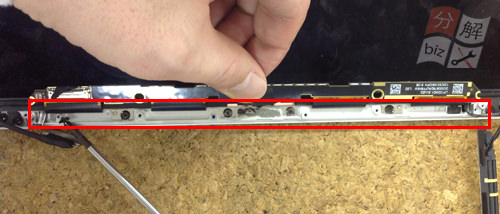
[Macbook Pro Retina A1502 LCD Replacement STEP 18]
If all screws can be removed, the upper part can be removed.
The visible part of the lower side is the base of the LIQUID crystal panel.
[Macbook Pro Retina A1502 LCD Replacement STEP 19]
Because there is a small screw next to the base, I remove it, but only two screws of the base are both sides.
[Macbook Pro Retina A1502 LCD Replacement STEP 20]
Slide the LCD cable to remove it!
[Macbook Pro Retina A1502 LCD Replacement STEP 21]
Don't forget to remove the connector next to the LCD cable.
[Macbook Pro Retina A1502 LCD Replacement STEP 22]
If you turn over the base, you can see that there are screws underneath.
This screw is a screw that secures the iron stay of the liquid crystal panel, so it is necessary to remove it.
[Macbook Pro Retina A1502 LCD Replacement STEP 23]
Next, remove the rubber that is attached around the LCD panel.
It can be easily removed by putting it in the gap between the liquid crystal panel and the rubber using a tool such as a spatula.
[Macbook Pro Retina A1502 LCD Replacement STEP 24]
It is necessary to remove only the lower side with a spatula, etc., but it is possible to remove it by hand with respect to the upper, left and right.
[Macbook Pro Retina A1502 LCD Replacement STEP 25]
Let's remove the screw of the red frame part after removing the rubber!(There is a left and right.))
[Macbook Pro Retina A1502 LCD Replacement STEP 26]
This makes it possible to remove the LCD panel.
The LCD panel is made very thin, so it is very difficult to peel it off cleanly.
In addition, there is a transparent film inside, so it is necessary to remove it so as not to damage it.
It is this work that takes the most time to replace the LCD panel of Macbook Pro Retina, but even if it breaks into a liquid crystal baki baki, it is no problem if you clean the glass around it later, so let's peel it off at once!
[Macbook Pro Retina A1502 LCD Replacement STEP 27]
Let's remove it while devising or putting a spatula from the upper side because there is no rubber around the liquid crystal panel!
[Macbook Pro Retina A1502 LCD Replacement STEP 28]
Only the liquid crystal panel is removed, but if it cannot be peeled off cleanly, glass will remain around the liquid crystal.
If a piece of glass is left, remove it with a spatula.
In the disassembly process so far, we were able to remove the LCD panel from the PC body.
After that, if you replace it with a newly prepared LCD panel, the LCD repair of Macbook Pro Retina will be completed.
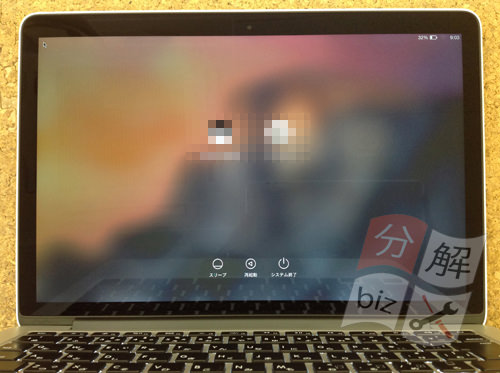
[Macbook Pro Retina A1502 LCD Replacement STEP 29]
It is a state in which the LCD panel is built-in and the power is turned on, but it was confirmed that it is displayed normally!

 The Macbook Pro Retina A1502 (13 inch) LCD cracking, in the case of poor display, a liquid crystal replacement is required!
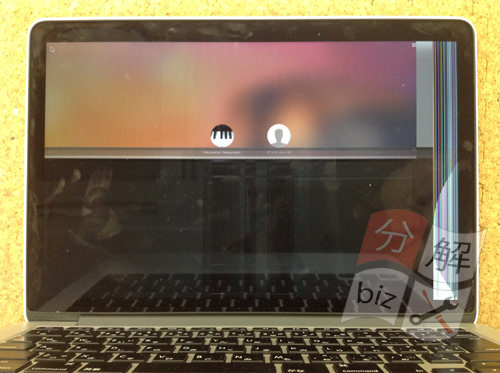

 First, remove the battery and then work.
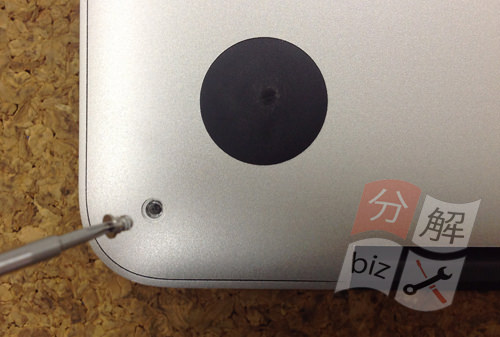
 A Torx screwdriver is required to disassemble Retina.
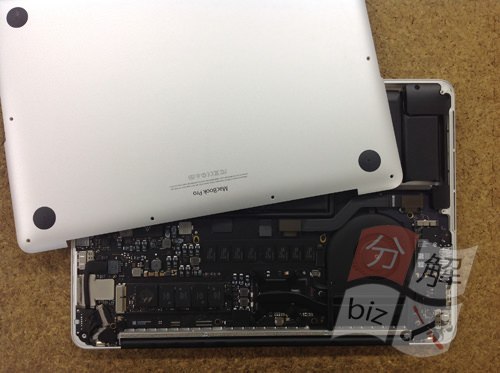
 The first thing to do after removing the bottom case is to remove the battery connector from the logic board.
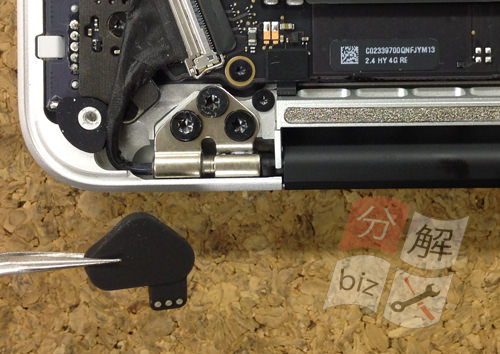
 Next, remove the rubber in the hinge part, but it can be easily removed with tweezers etc. because it is only attached with a light bond.
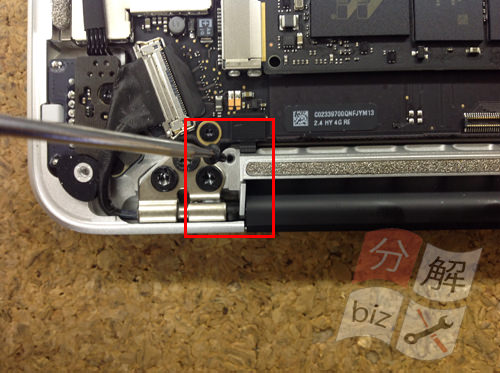
 Next, remove the LCD cable from the logic board.
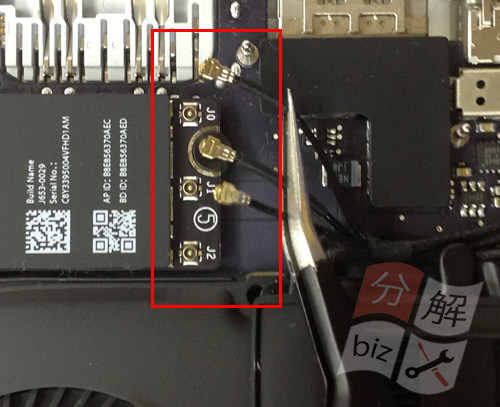
 Next, I remove the wifi cable, but since it is connected to three in all, I try to lift it from the bottom to the top and remove it.
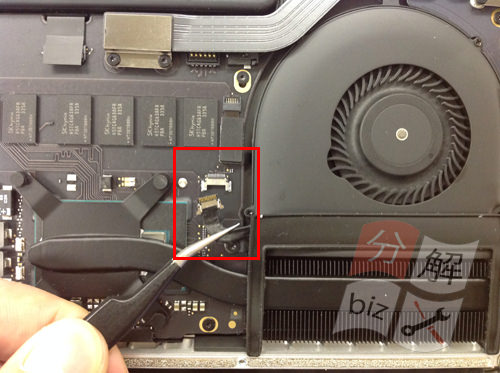

 Next, remove the hinge screws.
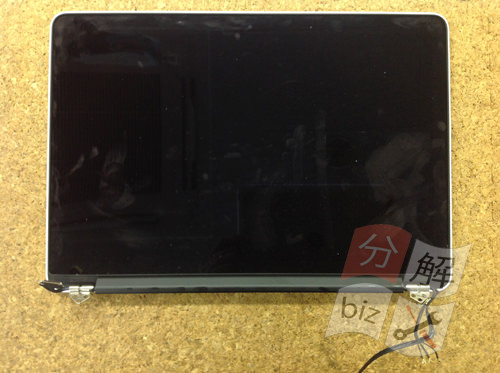
 First, remove the black plastic next to the hinge.
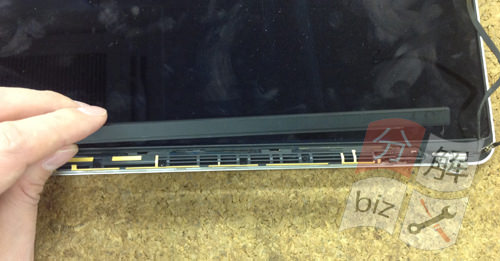
 If you can remove the plastic of the previous, you can remove the middle part, but please store it because it will be reused later.
 The seal of the liquid crystal cable is peeled off.
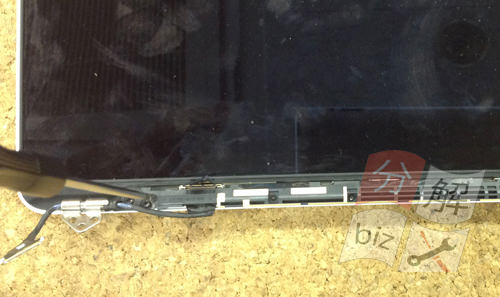
 There are small screws on the outside of the LCD cable, so don't forget to remove them.
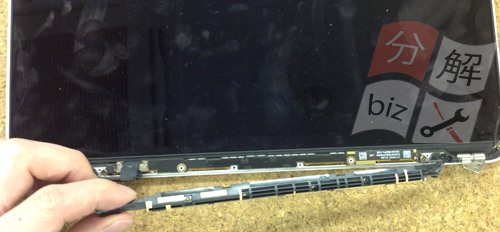
 If all screws can be removed, the upper part can be removed.
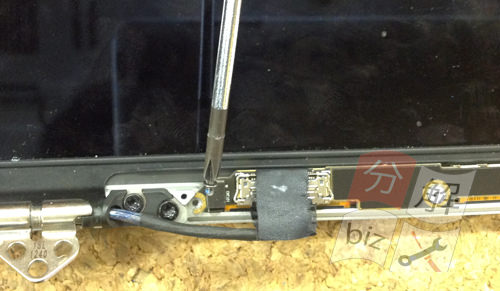
 Because there is a small screw next to the base, I remove it, but only two screws of the base are both sides.
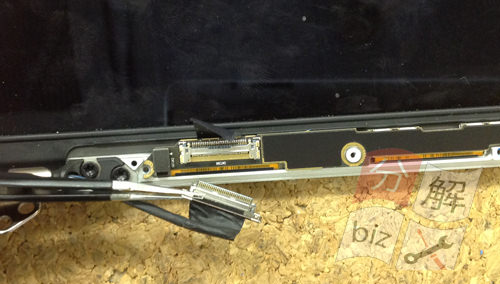
 Slide the LCD cable to remove it!
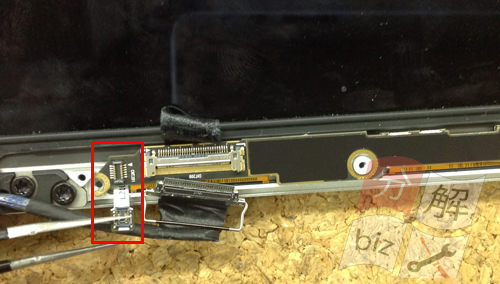
 If you turn over the base, you can see that there are screws underneath.
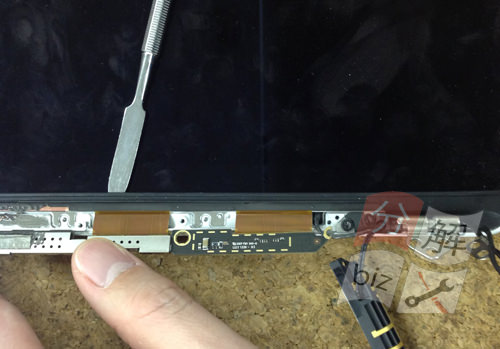
 Next, remove the rubber that is attached around the LCD panel.
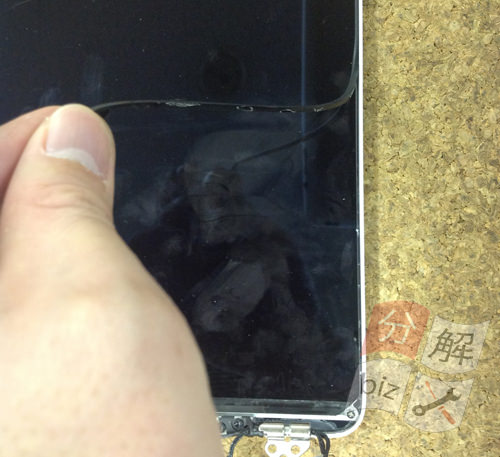
 It is necessary to remove only the lower side with a spatula, etc., but it is possible to remove it by hand with respect to the upper, left and right.
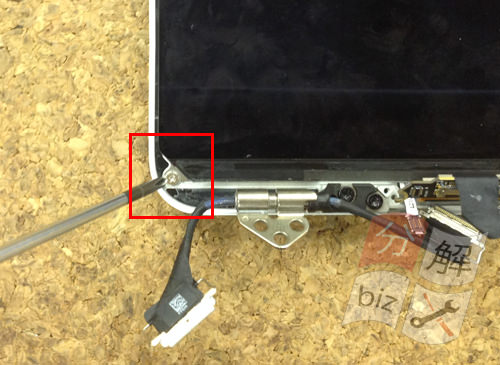
 Let's remove the screw of the red frame part after removing the rubber!(There is a left and right.))
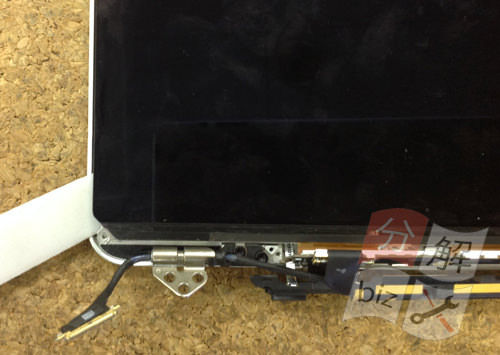
 This makes it possible to remove the LCD panel.
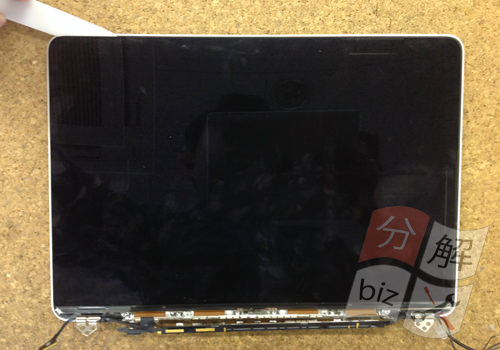
 Let's remove it while devising or putting a spatula from the upper side because there is no rubber around the liquid crystal panel!
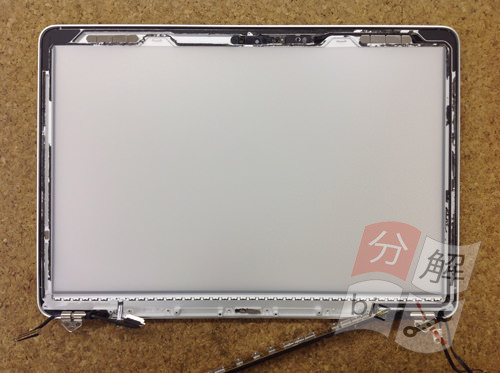


コメントを残す