How to repair when MacbookAir 11 does not start, does not turn on, falls, and disassembles
Please check the following decomposition method for SSD replacement of MacbookAir A1370!
[Macbook A1370 SSD replacement and disassembly method STEP 1]
After a while with macbookAir turned on, the apple mark does not appear, and if the folder mark has come out, it is proof that you have not read the hard disk.
Many of the causes in this case are due to hard disk failure, which makes it more likely that parts need to be replaced.
In addition, the hard disk of the A1370 is equipped with an SSD, so SSD replacement is performed as the contents.
I think that it is possible to confirm the decomposition method in the following contents, so I think that you can refer to it.
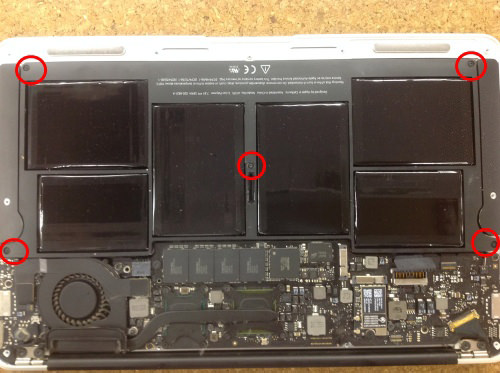
All disassemblies of the MacbookAir need to be removed from the back, but there are 10 small screws in total in the place surrounded by red.
Because it becomes a special shape called a Torx screw, all screws are removed with the Torx screwdriver.
[MacbookAir A1370 SSD replacement and disassembly method STEP 2]
It is hard to understand in the image, but it has a strange shape.
If you try to open it forcibly with a Phillips screwdriver, the thread will collapse, so be careful.
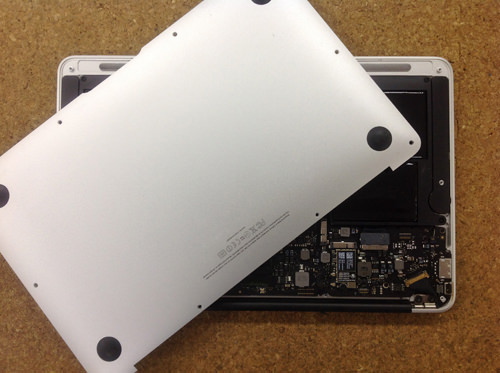
[MacbookAir A1370 SSD replacement and disassembly method STEP 3]
If you can remove all the screws of the previous, you can easily remove it if you try to cause the back cover.
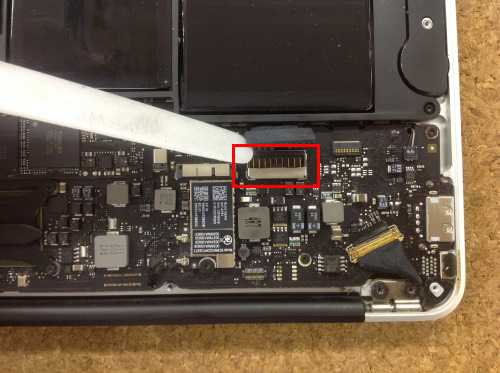
[MacbookAir A1370 SSD replacement and disassembly method STEP 4]
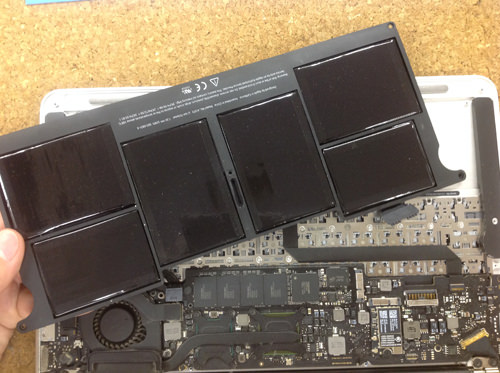
I think that the location of the SSD can be confirmed when the back cover can be removed, but remove the connector of the battery first.
[MacbookAir A1370 SSD replacement and disassembly method STEP 5]
Because it becomes the removal of the SSD this time, there is no need to remove the battery itself, but I will explain how to remove the battery.
Let's remove all because the screw is attached to the place which is enclosed in the red circle part!
[MacbookAir A1370 SSD replacement and disassembly method STEP 6]
I was able to remove the battery!
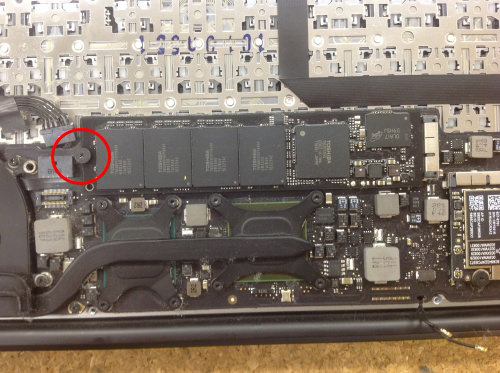
[MacbookAir A1370 SSD replacement and disassembly method STEP 7]
The SSD is only fixed with one screw, so you will use a dedicated screwdriver.
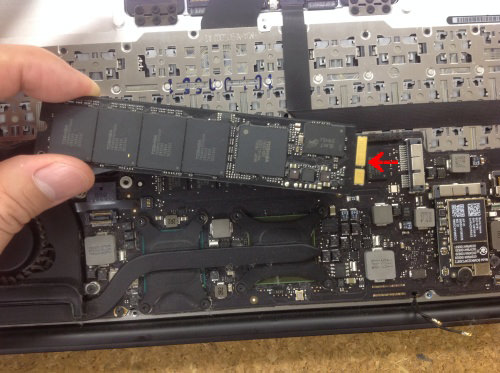
[MacbookAir A1370 SSD replacement and disassembly method STEP 8]
After removing the previous screw, you can easily pull it out by sliding it sideways.
I think that you can check in the image, SSD also because it will be a special shape, so it is not possible to install any SSD, so please be careful because it is necessary to replace the parts for MacbookAir 2010!

 Please check the following decomposition method for SSD replacement of MacbookAir A1370!
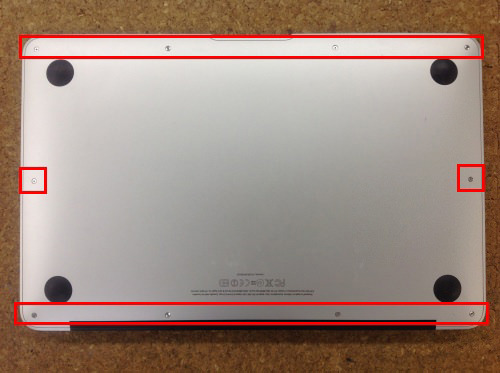
 After a while with macbookAir turned on, the apple mark does not appear, and if the folder mark has come out, it is proof that you have not read the hard disk.
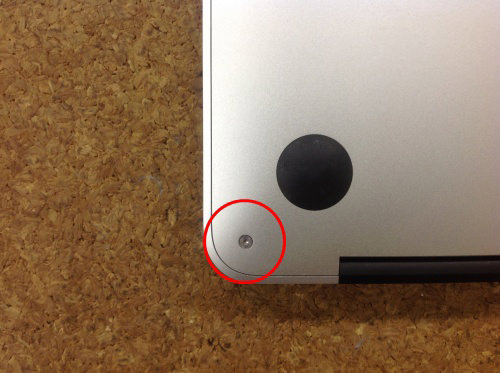


コメントを残す