how to repair and disassemble the logic board of the iMac 27
The most important part of the Mac is the logic board, but when removing the logic board with the A1419, you need to do almost all the bumps.
Of course, the decomposition process is much longer to remove the hard disk, the fan, and the power supply.
The lower iMac than the previous iMac has a higher disassembly difficulty, so be careful not to break down each part as you continue to disassemble it.
[iMac 27 Logic Board Replacement, Disassembly Repair Method 1]

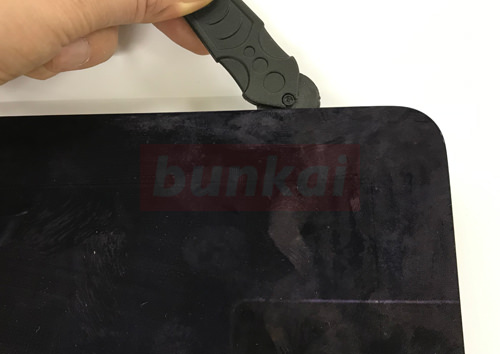
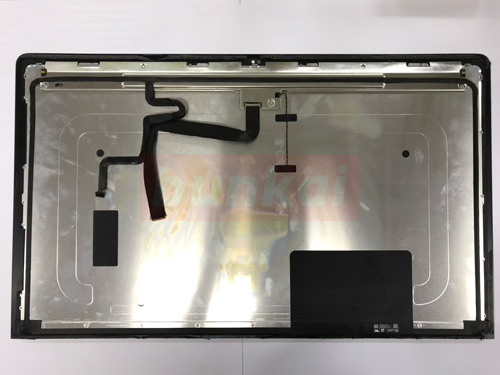
The flat iMac LCD is not threaded, but is attached to the main unit with very powerful double-sided tape.
How to peel off is to tear off the liquid crystal by inserting the tool into the gap between the liquid crystal and the main body as shown in the image, but this work is required in the case of logic board replacement, iMac 27 I feel that the decomposition of a1419 has become a higher hurdle than the previous model.
I think that there is something that can be substituted in addition to the tool of the image, but the tool of the image is very easy to use because it is a roller type.
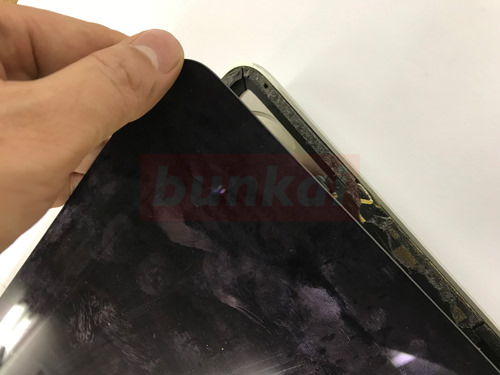
I think that it is per playing cards as a substitute, but it is not possible to insert it into the gap if it is not a fairly thin thing.
[iMac 27 Logic Board Replacement, Disassembly Repair Method 2 ]
Double-sided tape is attached to one lap of the liquid crystal, but the place where the tool is inserted is all right and left.
The lower side peels off without permission by the weight when opening the liquid crystal later.
[iMac 27 Logic Board Replacement, Disassembly Repair Method 3 ]
On top, you can float the liquid crystal a little as in the image when tearing the left and right double-sided tape, but please be careful because I think that there is a cable on the back of the liquid crystal when you look inside.
[iMac 27 Logic Board Replacement, Disassembly Repair Method 4 ]
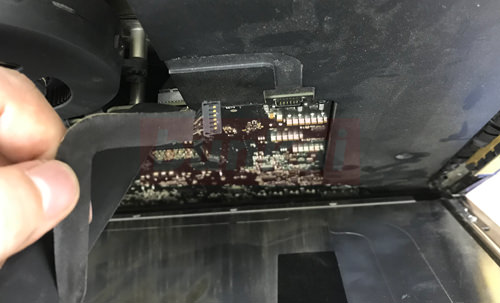
There are two cables on the back of the LCD, but first it is removed from the cable on the right side that you looked into.
It is how to remove the cable, but it has become possible to remove it easily if it pulls it upward as it is.
[iMac 27 Logic Board Replacement, Disassembly Repair Method 5 ]
This is the golden connector on the left side, but don't pull it out as it is.
There is a hook of "co-shaped", so let's pull out the cable itself after raising the hook with the nail.
Now that you can remove all the cable connections, let's remove the liquid crystal while slowly pulling it back to the front as it is.
[iMac 27 Logic Board Replacement, Disassembly Repair Method 6 ]
Only the liquid crystal was able to be removed.
Please note that there is a weight because there is a thing that the glass and the liquid crystal panel are integrated and 27 inches.
[iMac 27 Logic Board Replacement, Decomposition Repair Method 7]
The screws are in a row on the underside of the liquid crystal that I removed earlier, but all of them are removed.
[iMac 27 Logic Board Replacement, Disassembly Repair Method 8]
If the screw can be removed, the metal plate can be removed.
[iMac 27 Logic Board Replacement, Decomposition Repair Method 9]
This is the speaker, but remove the red circle screw.
[iMac 27 Logic Board Replacement, Decomposition Repair Method 10]
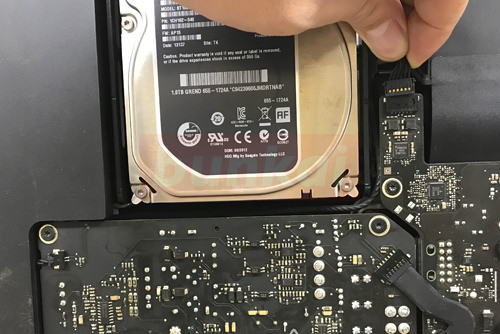
Pull the connector connected to the logic board next to the hard disk upward.
[iMac 27 Logic Board Replacement, Decomposition Repair Method 11]
This is the connector on the left side of the power board, but pull it out toward the left side.
[iMac 27 Logic Board Replacement, Decomposition Repair Method 12]
You can now remove the speaker on the left side.
[iMac 27 Logic Board Replacement, Decomposition Repair Method 13]
We will remove the power board, but the power board is connected by screws and connectors, so let's remove all screws in the four corners.
In addition, the cable on the right side can be removed by pulling out.
[iMac 27 Logic Board Replacement, Decomposition Repair Method 14]
There is a large connector on the back side of the power supply board, but there is a protrusion on the back side and you can remove it by pulling the wiring while waking it up with a finger.
[iMac 27 Logic Board Replacement, Decomposition Repair Method 15]
There is a connector under the connector and the back side of the previous, but it is possible to remove it if you pull it while causing the nail.
[iMac 27 Logic Board Replacement, Decomposition Repair Method 16]
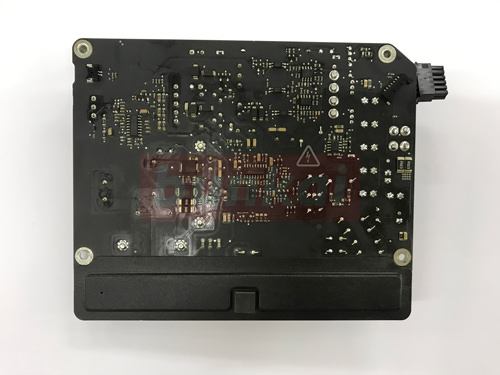
The power board could be removed.
[iMac 27 Logic Board Replacement, Decomposition Repair Method 17]
This is the speaker on the right side, but it is basically the same way to remove it as the speaker on the left side that I removed earlier.
First of all, let's remove the screw of the red circle part.
[iMac 27 Logic Board Replacement, Decomposition Repair Method 18]
The connector can be removed by pulling it out to the right side.
[iMac 27 Logic Board Replacement, Decomposition Repair Method 19]
I was able to remove the speaker on the right side.
Because the probability of speaker failure is high if the iMac seems to be made loud and the sound cracks, you can isolate the failure by replacing it once.
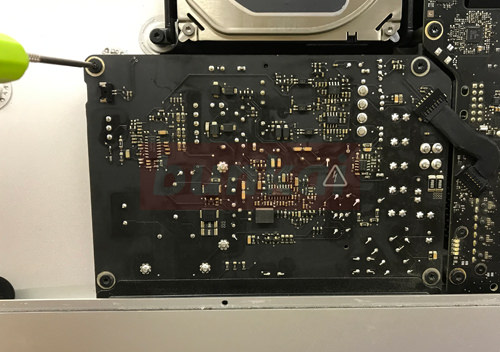
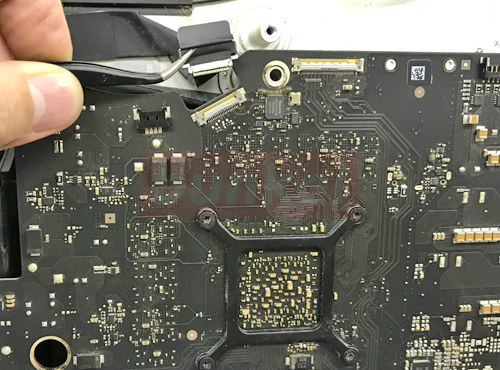
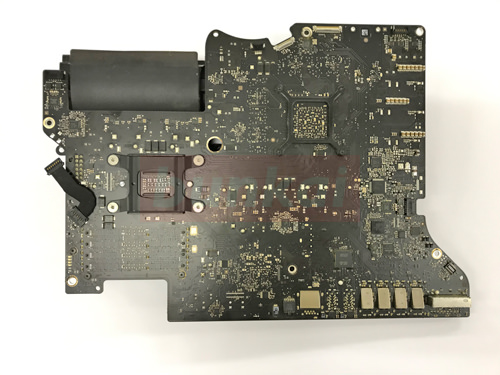
[iMac 27 Logic Board Replacement, Decomposition Repair Method 20]
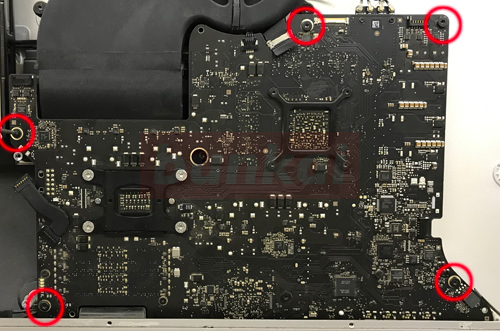
Logic board is the whole picture, but let's remove it because there is a screw in the red circle part.
[iMac 27 Logic Board Replacement, Decomposition Repair Method 21]
This is a fan connector, but you can remove it by pulling it up.
[iMac 27 Logic Board Replacement, Decomposition Repair Method 22]
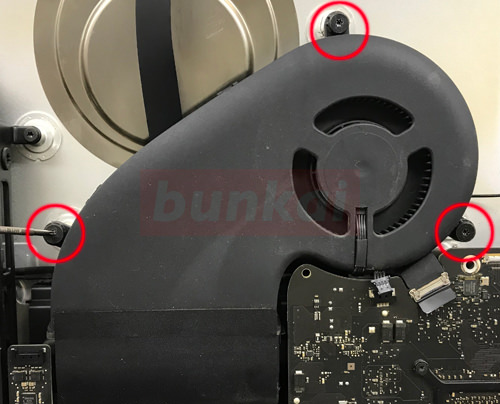
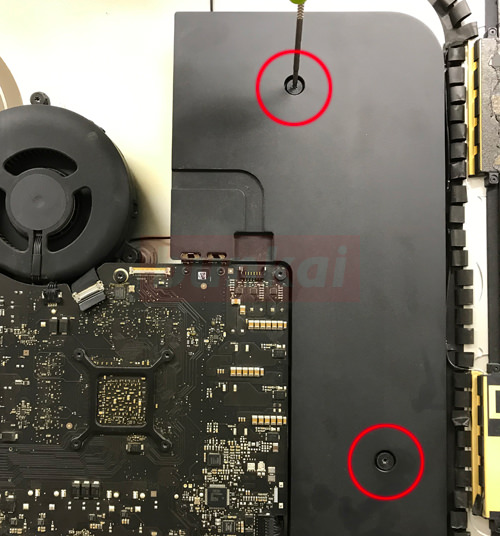
Since the fan is attached to the main body with screws, let's remove all the screws of the red circle part.
[iMac 27 Logic Board Replacement, Decomposition Repair Method 23]
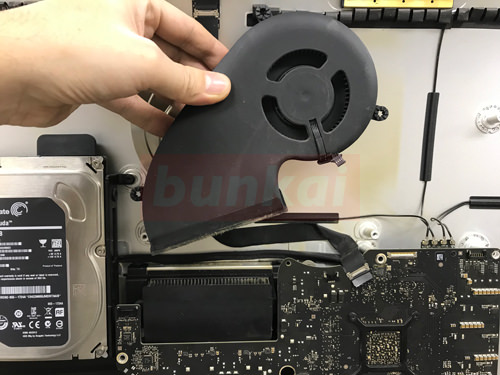
The fan could be removed.
[iMac 27 Logic Board Replacement, Decomposition Repair Method 24]
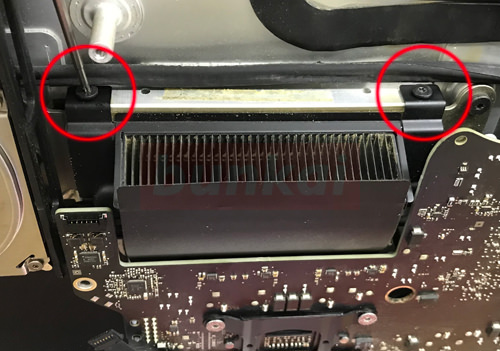
Let's remove both because there is a screw when it is possible to remove the fan.
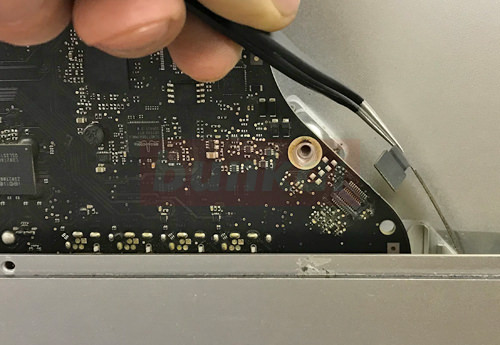
[iMac 27 Logic Board Replacement, Decomposition Repair Method 25]
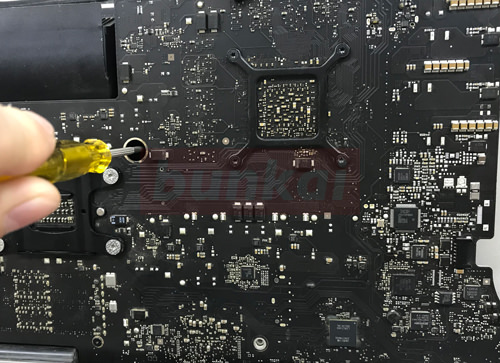
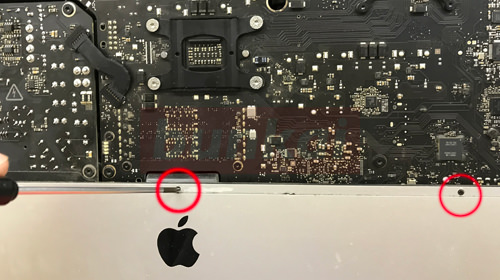
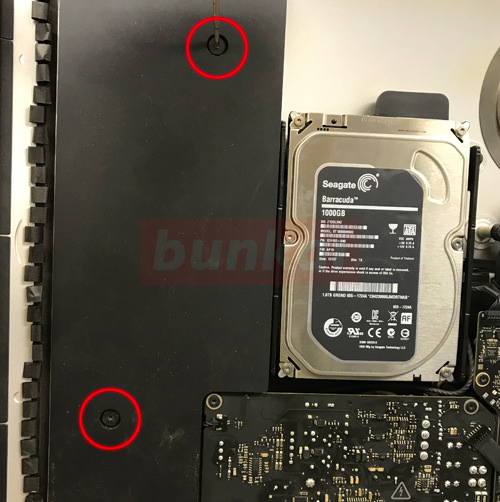
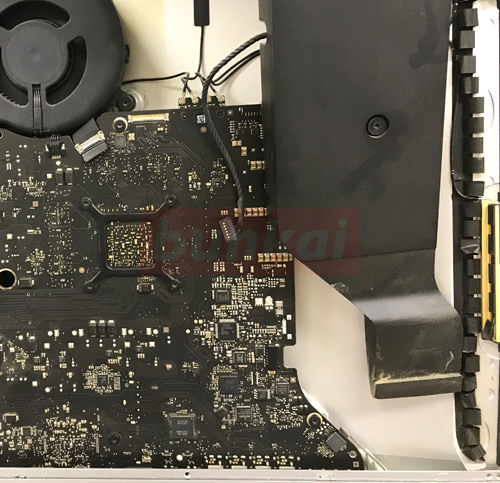
There is a hole in the center left of the logic board, and there is a screw when you look inside, so don't forget to remove it.
[iMac 27 Logic Board Replacement, Decomposition Repair Method 26]
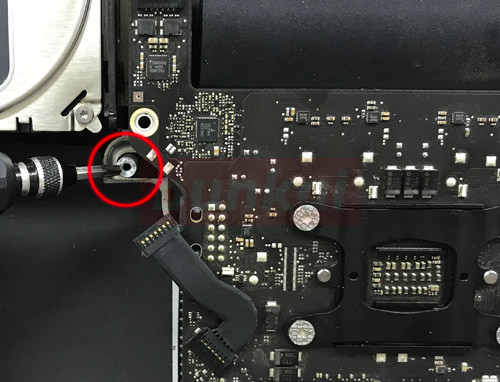
This part has the power board connector, but the Torx screwdriver (special screwdriver) is removed.
[iMac 27 Logic Board Replacement, Decomposition Repair Method 27]
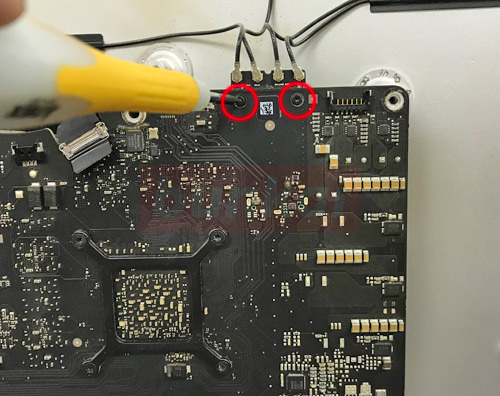
This is the terminal part of WIFI, but remove the red circle screw.
[iMac 27 Logic Board Replacement, Decomposition Repair Method 28]
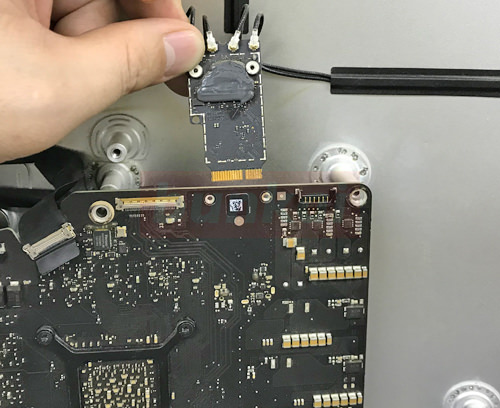
If you can remove the screw, you can pull it up as it is, but let's remove all wiring because the WIFI cable comes off easily when lifting it up.
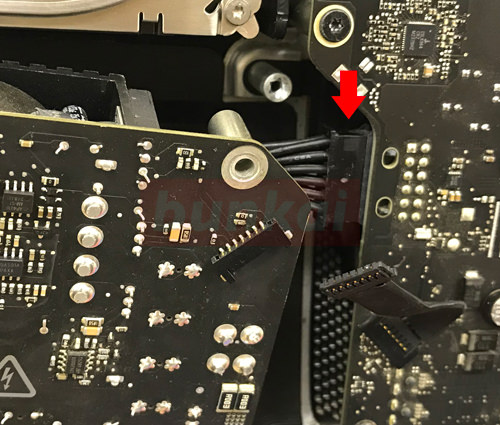
[iMac 27 Logic Board Replacement, Decomposition Repair Method 29]
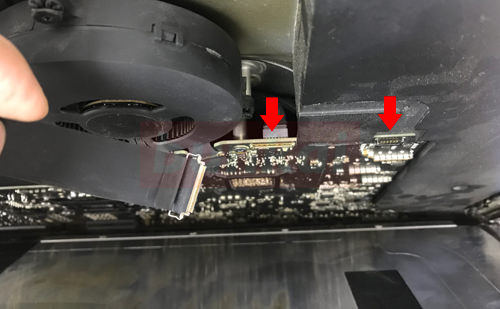
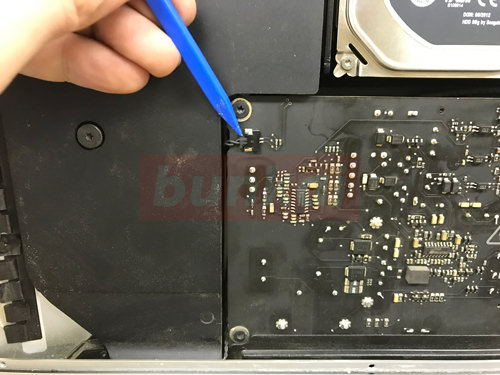
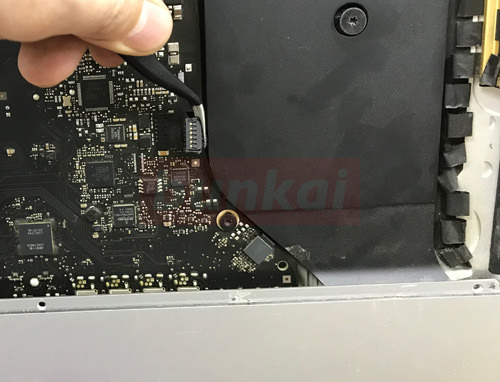
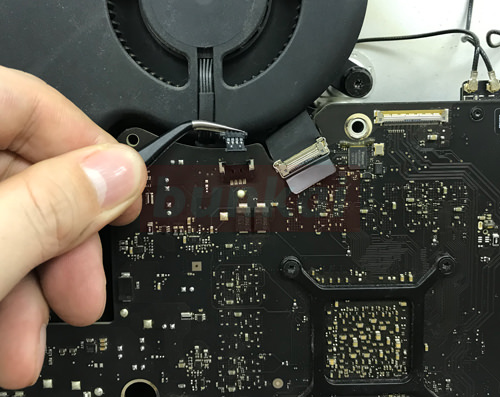
This is next to the fan connector.
The cable can be removed if pulled out, but because there is a hook of "co-shaped", raise the hook from the bottom to the top before pulling out the entire cable.
Please note that if you pull the cable without causing the hook of the "co-shaped", it will lead to a failure of the base.
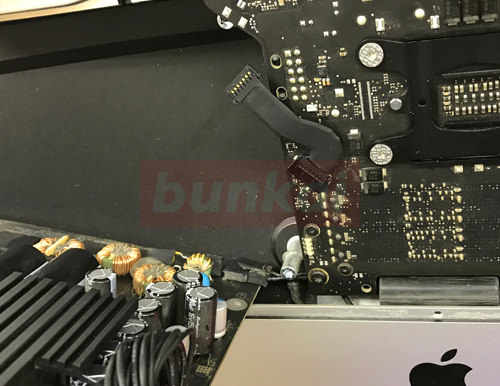
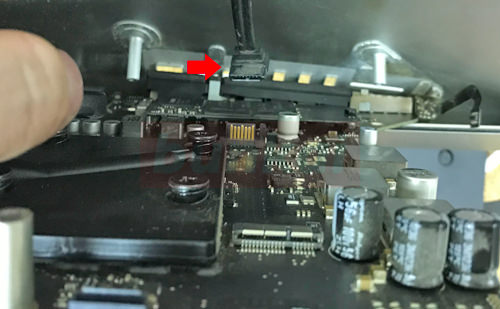
[iMac 27 Logic Board Replacement, Decomposition Repair Method 30]
This is the lower right, but remove it by lifting the connector from the bottom to the top.
Now the m screw connector on the surface side can be removed.
Make sure you don't forget to remove it from the screws and connectors.
[iMac 27 Logic Board Replacement, Decomposition Repair Method 31]

If all the screws and connectors on the logic board surface are off, you can raise the base slightly in front of you, but you can see that there is wiring on the back.
The wiring is to be able to remove it if it pulls it to the main body side.
[iMac 27 Logic Board Replacement, Disassembly Repair Method 32]
Let's remove the m wiring of the back side in the same manner.
[iMac 27 Logic Board Replacement, Disassembly Repair Method 33]
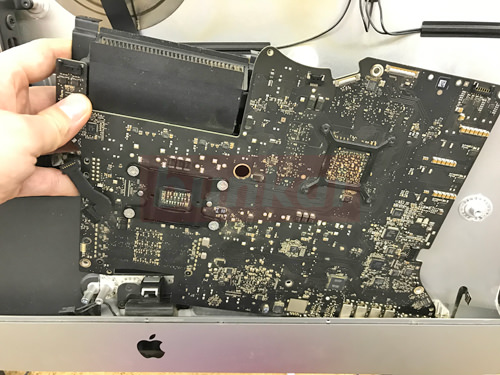
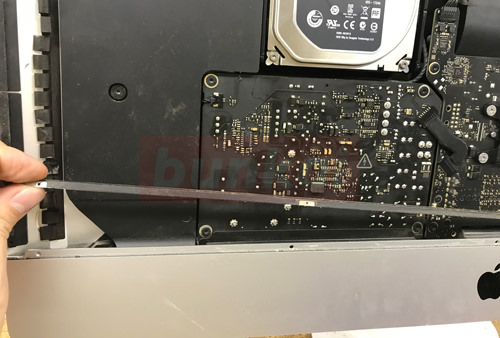
If you can remove the wiring, you can move the logic board itself, but instead of pulling it in front of you, let's remove it while pulling it up.
[iMac 27 Logic Board Replacement, Disassembly Repair Method 34]
I was able to take the logic board.
I do not think that it will be removed to the logic board unless the iMac fails, but it is necessary to be careful about handling it because it becomes a precision part.
In the case of a graphic failure with a line on the screen, it is necessary to disassemble up to this point.