How to disassemble and repair a motherboard failure that does not power on the PSP-3000
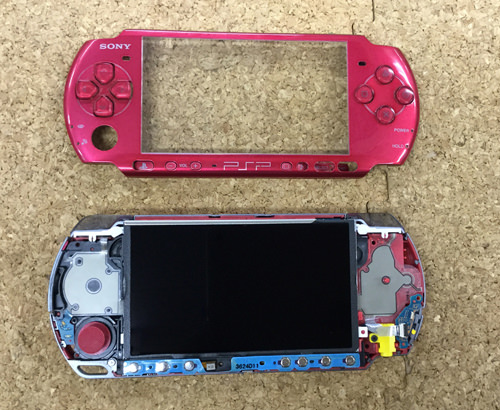
PSP-3000 Motherboard Replacement and Decomposition Procedures
[PSP-3000 motherboard replacement and disassembly method STEP 1]
Start from the place where you can open the cover in the left part of the image.
What is common to all the disassemblies of the PSP-3000 is that you don't need any particularly unusual or expensive tools!
[PSP-3000 motherboard replacement and disassembly method STEP 2]
I think that most people have opened this cover once, but please check the meaning of the review.
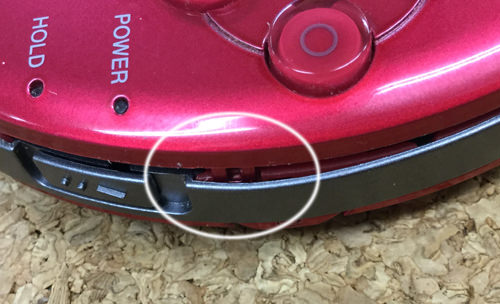
Because there is a small knob in the image part, you can remove the cover by removing the hook of this part.
[PsP-3000 motherboard replacement and disassembly method STEP 3]
There is a battery inside, but you can easily remove it.
PSP It is common to all disassembly, but please be sure to remove the battery before disassembling.
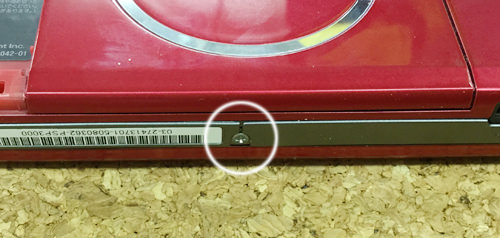
Seal seal on the white arrow part "Please do not peel off this label.Once the product has been peeled off, we refuse to repair any of them.", but if there is no problem because one screw is hidden under this, please proceed with disassembly.
[PSP-3000 motherboard replacement and disassembly method STEP 4]
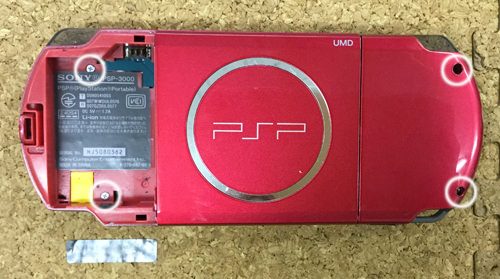
Remove all four screws in the white circle.
It is possible to remove it easily if there is a thin Phillips screwdriver of the tip.
[PSP-3000 motherboard replacement and disassembly method STEP 5]
There are screws on the side, so don't forget to remove them.
Because this fine parts become many, it is necessary to manage so as not to lose.
[PSP-3000 motherboard replacement and disassembly method STEP 6]
It is the opposite side of the side, but there are two here, so I will remove it.
[PSP-3000 motherboard replacement and disassembly method STEP 7]
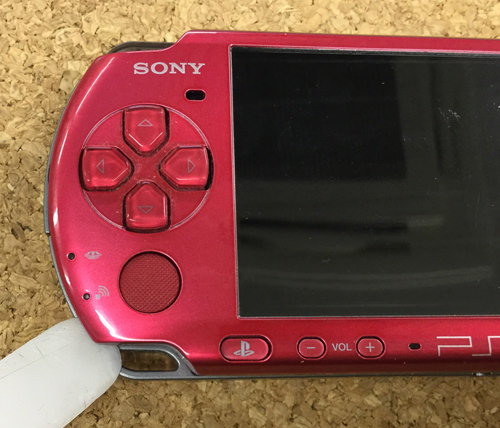
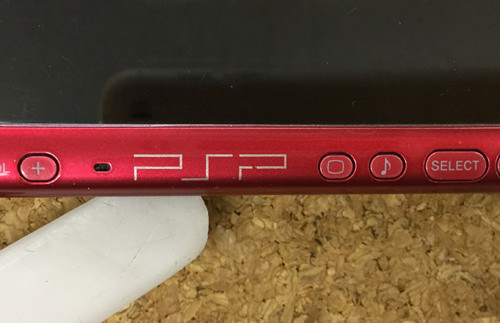
You can now remove the surface cover, but you can easily remove it by using a tool as shown in the image.
There is a thing that the mark and the volume part of the PlayStation come off on the way, but please proceed without worrying because this is a problem of the structure.
[PsP-3000 motherboard replacement and disassembly method STEP 8]
I put a tool around the middle and gradually float it, but I think it will come off even if I don't put any special effort into it.
[PSP-3000 motherboard replacement and disassembly method STEP 9]
Only the side of the ✖️ button is fixed with a hook, but it is possible to remove it if it is made to break lightly.
[PSP-3000 motherboard replacement and disassembly method STEP 10]
The surface cover of the PSP-3000 could be removed.
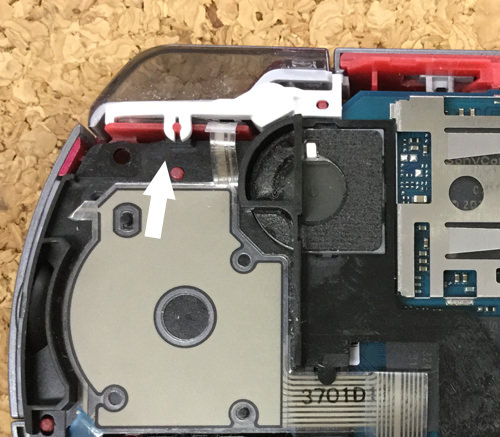
[PSP-3000 motherboard replacement and disassembly method STEP 11]
Because the black nail is fixed to the arrow part of the image, it opens to the outside using the tool.
[PSP-3000 motherboard replacement and disassembly method STEP 12]
I was able to remove it.
[PSP-3000 motherboard replacement and disassembly method STEP 13]
It becomes the opposite side from the previous, but it can be removed if it makes it to the bottom lightly.
[PSP-3000 motherboard replacement and disassembly method STEP 14]
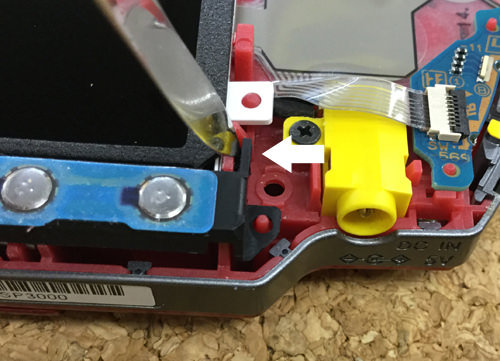
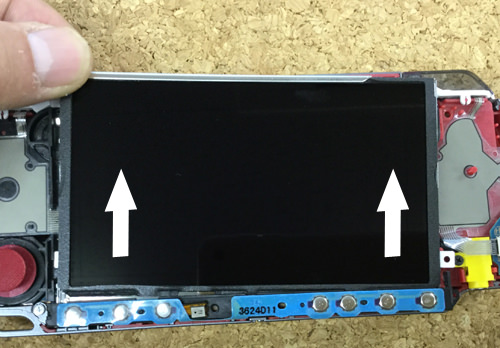
If you can remove both nails, shift them by about 1cm in the direction of the arrow.
[PSP-3000 motherboard replacement and disassembly method STEP 15]
It is in a state of shifting the liquid crystal panel, but you can see that there is a cable on the lower side.
Because the back side is connected by a cable, i will disassemble the back side this time.
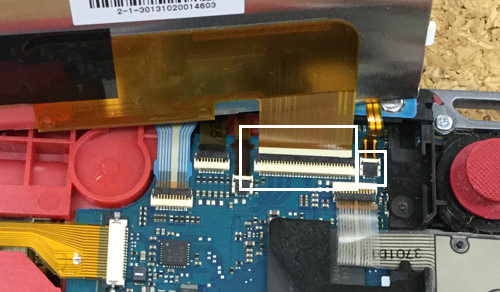
[PSP-3000 motherboard replacement and disassembly method STEP 16]
It becomes the back side of the liquid crystal, but you can see that many cables are connected to the connector.
I want to remove the cable of the liquid crystal because it becomes two which is enclosed in a white frame.
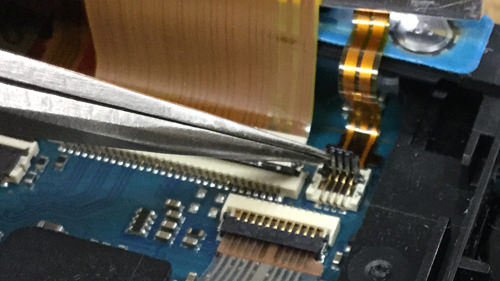
[PsP-3000 motherboard replacement and disassembly method STEP 17]
This part should be caused from the back to the front side though it is a place where a spatula (tool) is used to cause a black nail.
[PSP-3000 motherboard replacement and disassembly method STEP 18]
This part is a small connector part next to the previous, but this part should cause a black nail in the opposite direction (front to back) from the previous.
You can remove it if you slide the cable while the nail is raised.
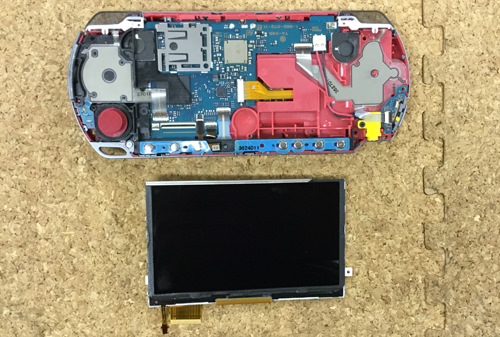
[PSP-3000 motherboard replacement and disassembly method STEP 19]
Only the LCD panel was able to be removed from the PSP body.
[PSP-3000 motherboard replacement and disassembly method STEP 20]
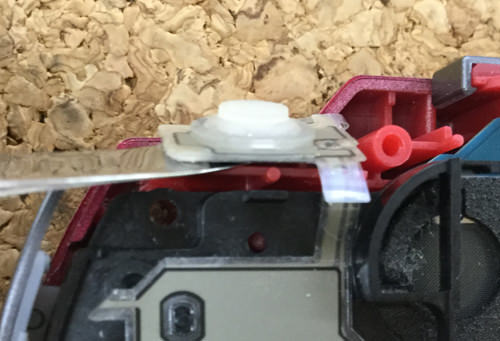
The action button is on the left and right, but I want to remove it from the cable of the cross button on the left side first.
There is a white part at the arrow, but you can easily remove it if you lift it from the bottom to the top, and you can remove the "L button" on the top left as it is.
[PSP-3000 motherboard replacement and disassembly method STEP 21]
The white frame is connected to the motherboard, so I will remove it.
It is possible to remove it easily by causing a black nail and then sliding the cable.
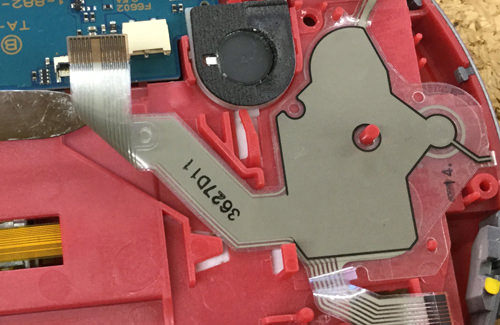
[PSP-3000 motherboard replacement and disassembly method STEP 22]
Under the cross button, it is only fixed with a light tape to the main body, so you can peel it off if you put the tool down and lift it as in the image.
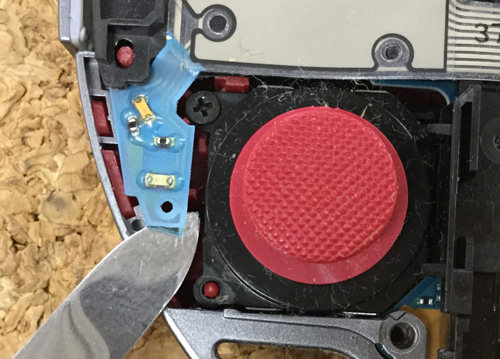
[PsP-3000 motherboard replacement and disassembly method STEP 23]
Because the blue part next to the analog stick becomes a cable, this part will also peel off from the bottom.
[PSP-3000 motherboard replacement and disassembly method STEP 24]
Since the cable is extended in the companion to the parts removed by [STEP 20], we will remove the tool inserted into the lower side.
[PSP-3000 motherboard replacement and disassembly method STEP 25]
I was able to remove the cable of the cross button.
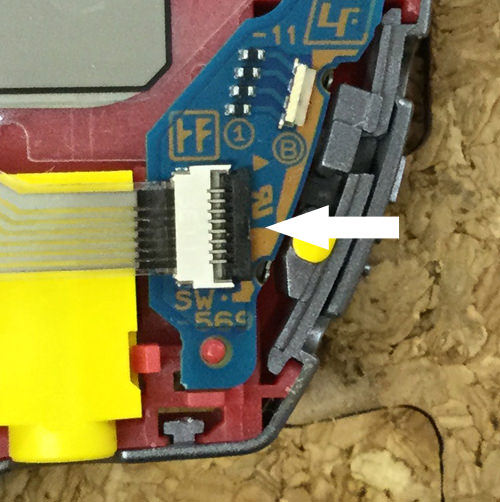
[PSP-3000 motherboard replacement and disassembly method STEP 26]
This time, I would like to remove the button ✖ on the right side.
The cable is connected to the connector of the power switch, so lift the black nail part and slide the cable.
[PSP-3000 motherboard replacement and disassembly method STEP 27]
I was able to remove the cable.
[PsP-3000 motherboard replacement and disassembly method STEP 28]
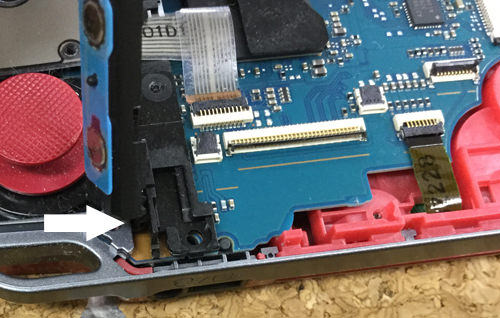
This place lies the earphone jack, but lift the black claws as before, then slide the cable out.
[PSP-3000 motherboard replacement and disassembly method STEP 29]
I was able to remove the cable.
[PSP-3000 motherboard replacement and disassembly method STEP 30]
The next is the removal of the R button in the upper right, but it is fixed with a nail at the arrow," so you can easily remove it if you lift it from the bottom to the top.
[PSP-3000 motherboard replacement and disassembly method STEP 31]
I was able to remove the R button.
[PSP-3000 motherboard replacement and disassembly method STEP 32]
Since there are no screws or connectors that are fixed in this, it is possible to remove the cable if you peel it off from the bottom to the top as shown in the image.
[PsP-3000 motherboard replacement and disassembly method STEP 33]
The cable extends to the inside of the R button, so try to remove the tool as shown in the image.
[PSP-3000 motherboard replacement and disassembly method STEP 34]
I was able to remove the cable of the ✖ button.
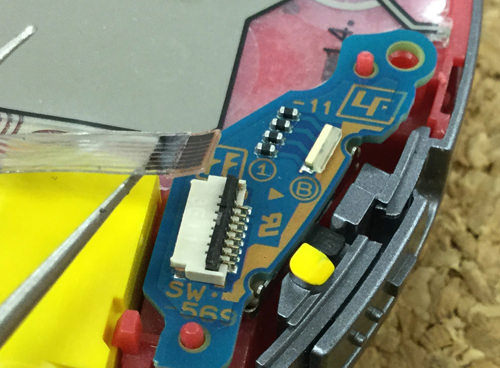
[PSP-3000 motherboard replacement and disassembly method STEP 35]
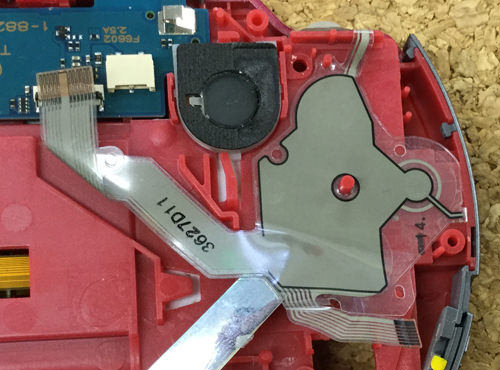
Remove the base of the PSP mark, volume, SELECT, and START buttons.
Because the cable is connected to the connector, it is removed first, but remove the connector of two white frame parts.
[PSP-3000 motherboard replacement and disassembly method STEP 36]
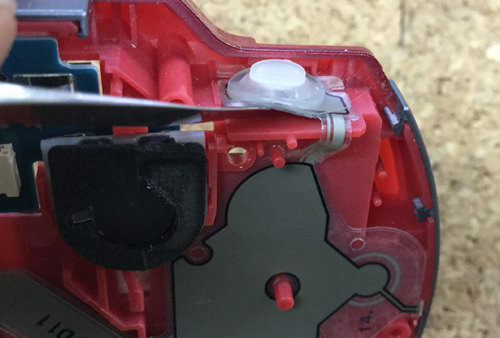
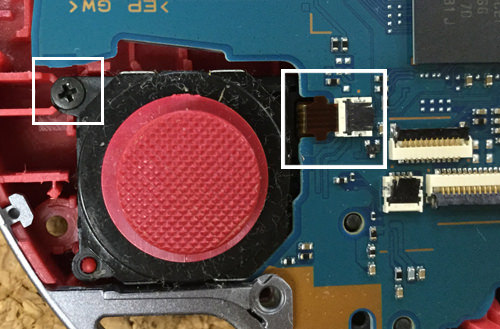
Next, remove one screw next to the analog stick.
After removing the screw, slowly wake up the blue base from the right side to the left side.
[PSP-3000 motherboard replacement and disassembly method STEP 37]
Because there is a nail in the arrow part, please remove it while checking well.
[PSP-3000 motherboard replacement and disassembly method STEP 38]
Next, remove the cable of the cross key, but remove it by raising the nail and sliding it.
[PSP-3000 motherboard replacement and disassembly method STEP 39]
Put the tool on the lower side as shown in the image and peel it off.
[PSP-3000 motherboard replacement and disassembly method STEP 40]
Try to peel off the blue base beside the analog stick.
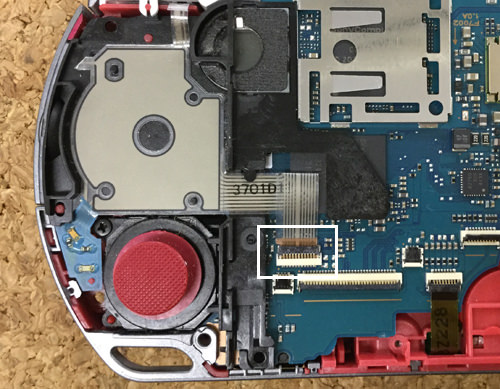
[PSP-3000 motherboard replacement and disassembly method STEP 41]
The FPC flexible cable is connected to the part under the L button.
[PSP-3000 motherboard replacement and disassembly method STEP 42]
I was able to remove the FPC flexible cable.
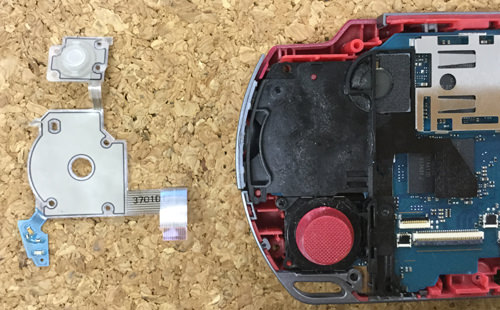
[PSP-3000 motherboard replacement and disassembly method STEP 43]
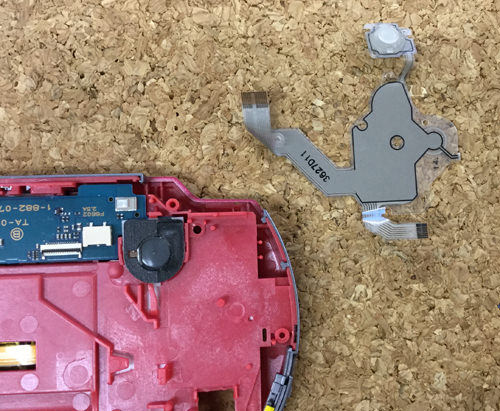
I was able to remove the pedestal of the FPC flexible cable.
[PSP-3000 motherboard replacement and disassembly method STEP 44]
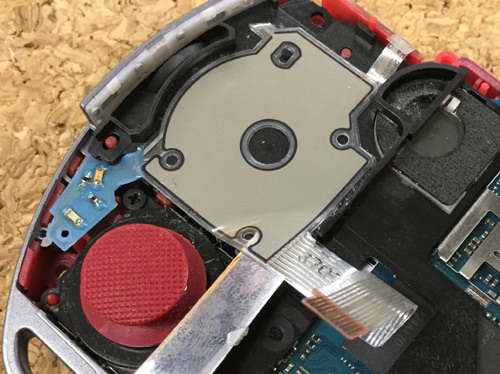
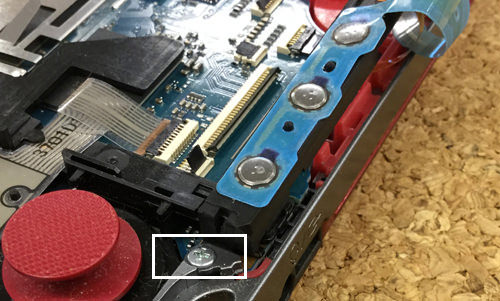
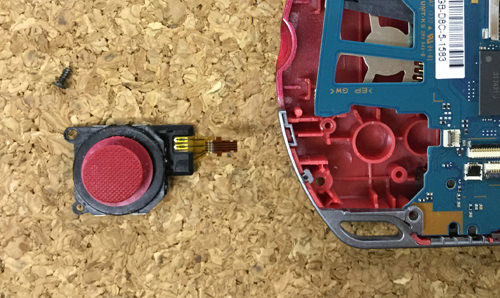
There are screws on the left side of the analog stick and cables on the right side, so remove them.
[PSP-3000 motherboard replacement and disassembly method STEP 45]
The analog stick could be removed.
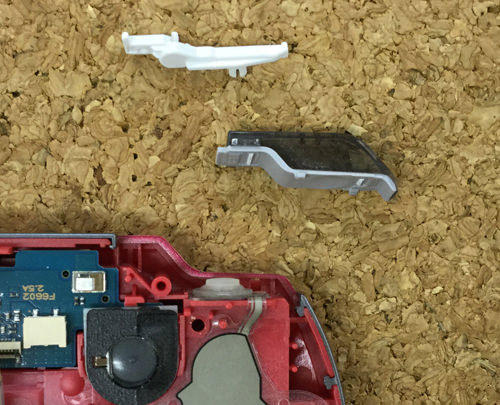
[PSP-3000 motherboard replacement and disassembly method STEP 46]
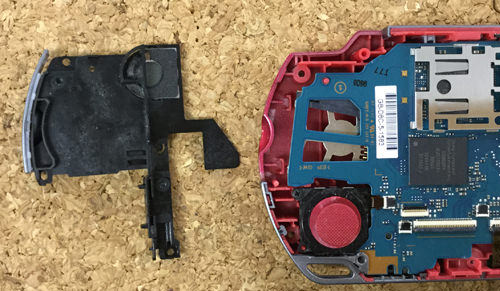
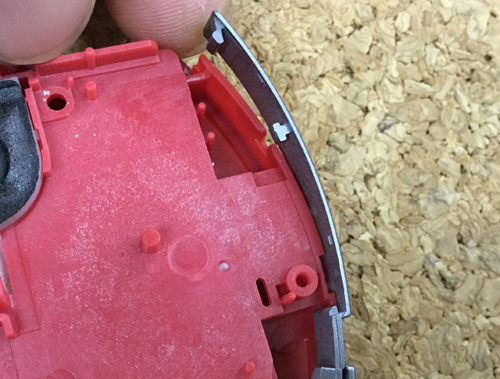
This part will be the exterior part between the liquid crystal side and the back, but you can remove it by hand as in the image.
It is only fixed with a nail, but you can easily remove it if you know the structure.
[PSP-3000 motherboard replacement and disassembly method STEP 47]
It is divided into three in all, but if it is hard, it is easy to remove it by inserting the tool from the bottom.
[PSP-3000 motherboard replacement and disassembly method STEP 48]
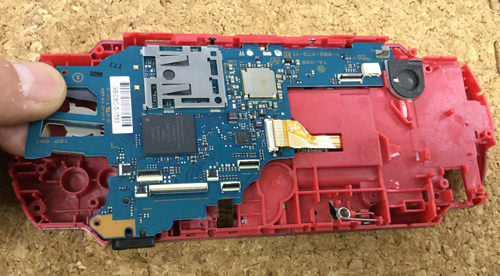
Most of the parts have already been removed, but please do not forget to remove it!
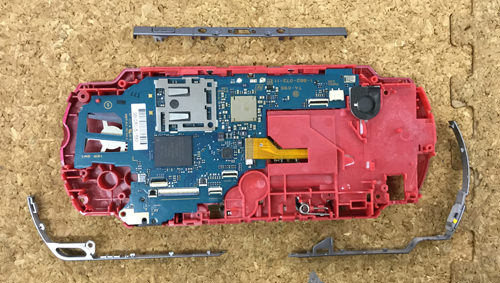
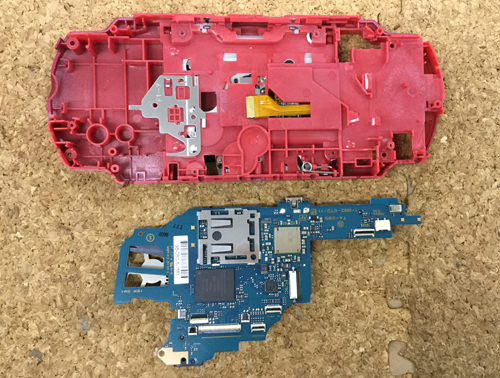
[PSP-3000 motherboard replacement and disassembly method STEP 49]
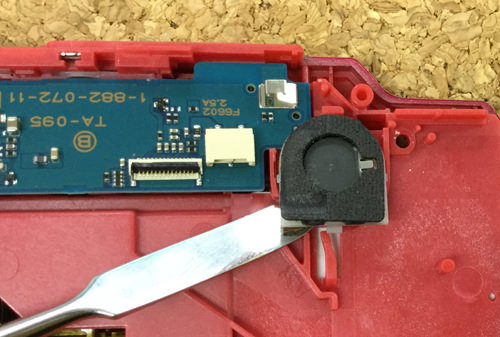
The parts on the motherboard tip are being removed.
[PSP-3000 motherboard replacement and disassembly method STEP 49]
The motherboard could be removed from the PSP body.

 PSP-3000 Motherboard Replacement and Decomposition Procedures
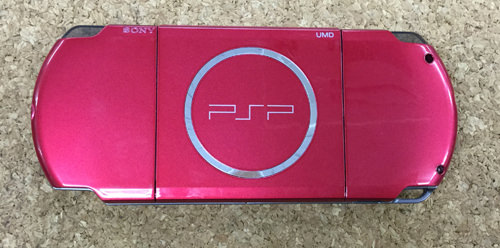
 Start from the place where you can open the cover in the left part of the image.
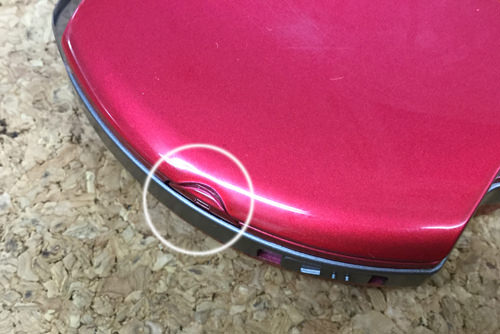
 I think that most people have opened this cover once, but please check the meaning of the review.
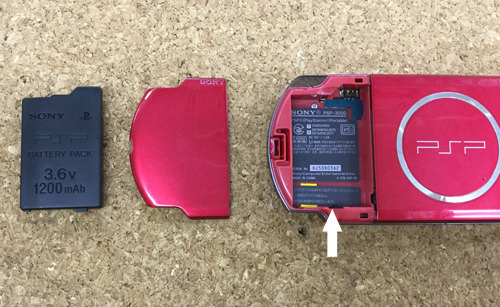


コメントを残す