iQOS decomposition method Red flashing of pocket charger, power does not turn on, etc.
I tried to disassemble the holder side of Philip Morris' e-cigarette iQOS!
- [iQOS (Aikos) holder decomposition method and repair STEP 1]

- Click here to learn how to disassemble the new iQOS2.4
- iQOS will be an e-cigarette released by Philip Morris, the world's largest tobacco manufacturer, but it has become impossible to buy easily because it has been very popular since it was released.
Cigarettes themselves have become easy to purchase at convenience stores, but I feel that the main body is still in a state of lack of goods.
Among them, many people are purchasing and using iQOS, but the battery life of some pocket chargers and iQOS holders is one year?What kind of structure is it because it is rumored?Or can I replace the battery myself when it comes to life?I decided to try to verify.
In order to make the decomposition easier to understand, I was allowed to publish a state that was completely separated first, but I can see that it is composed of fine parts.
Since disassembly seems to be relatively difficult, instead of starting repair and disassembly suddenly, after checking the situation one way
This disassembly will be a pocket charger, but the iQOS holder is here.
- [iQOS (Aikos) Pocket Charger Decomposition Method and Repair STEP 2]
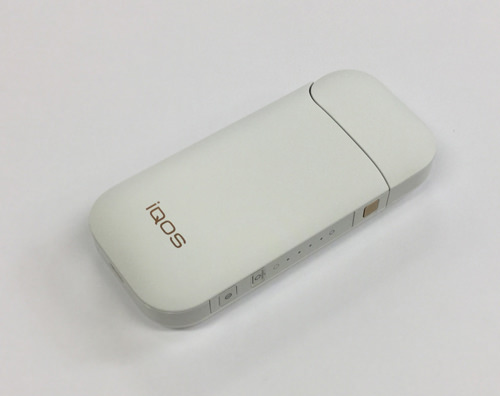
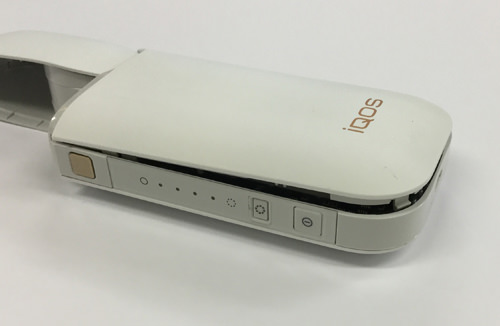
- First of all, iQOS and the stamp are removed from the panel part, but there is no screw as long as it overlooks the surroundings.
Please prepare it because it will decompose using the tool such as an iron spatula. -
- [iQOS (Aikos) Pocket Charger Decomposition Method and Repair STEP 3]
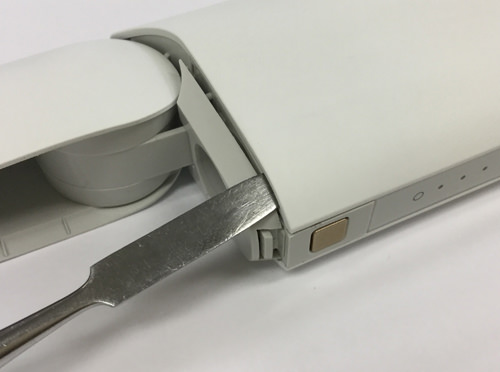
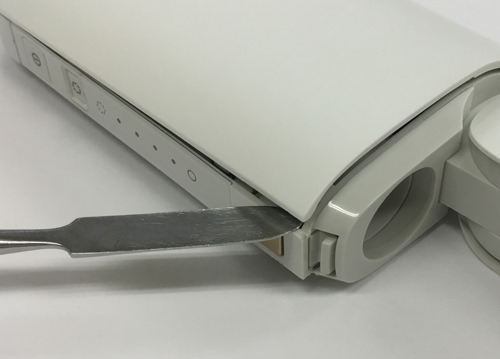
- While the lid is open and the tip of the tool is inserted into the image part, the pocket charger of iQOS is fixed with all plastic claws and double-sided tape without screws.
There is a plastic claw in the place where the iron spatula is inserted, so I make it float as if it is a strain.
Unlike laptops, it is not structured so that it can be easily disassembled, so be sure to disassemble it thinking that it will be damaged.
- [iQOS (Aikos) Pocket Charger Decomposition Method and Repair STEP 4]
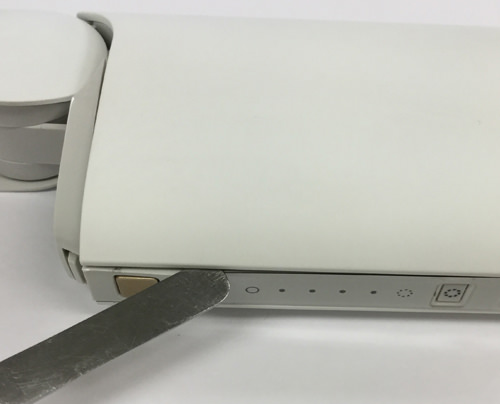
- If i can float even a little, I will try to float around a little bit in the same way, but I think that I can see that this part floats gradually as I try to slide the spatula.
Please proceed while checking how it breaks down in the next STEP5 and 6.
- [iQOS (Aikos) Pocket Charger Decomposition Method and Repair STEP 5]
- I was able to remove one of the panels, but I can see that there is a plastic claw in the lower right part of the cover.
It may feel a little stiff, but be careful not to use the tool well and break the nails.
Even if the nail breaks by any chance, it can be fixed by using double-sided tape.
- [iQOS (Aikos) Pocket Charger Decomposition Method and Repair STEP 6]

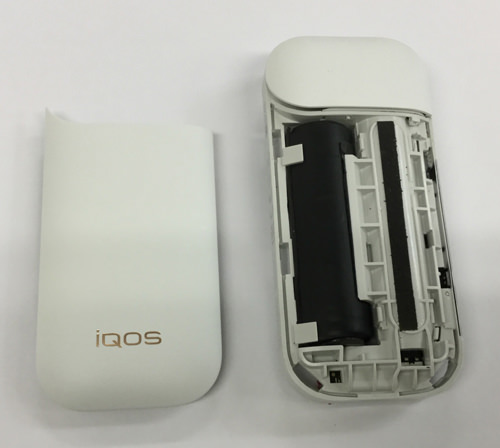
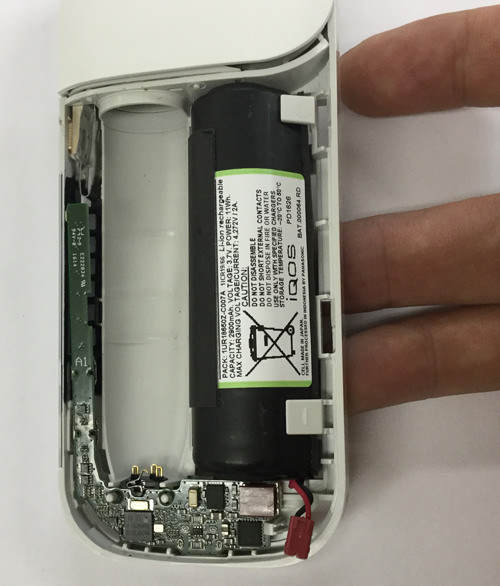
- Please understand the structure before proceeding with decomposition because it becomes such a feeling when the panel is removed.
The black object on the right side of the main body becomes a battery, and the part of the white tube on the left side is the space where the holder is stored.
It may be a little hard when removing the cover because black double-sided tape is attached to the holder space.
- [iQOS (Aikos) Pocket Charger Decomposition Method and Repair STEP 7]
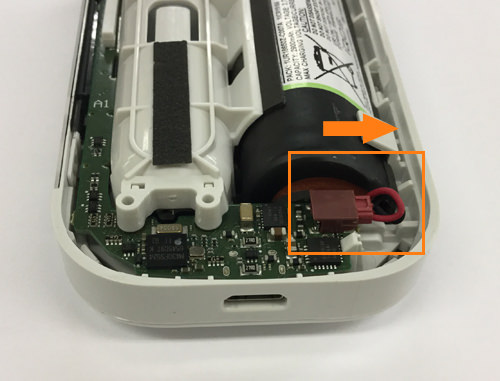
- The orange frame is where the battery connector is connected to the base, but you can remove it by pulling the connector in the direction of the arrow.
Please note that if you pull out with tweezers, etc., there is a possibility of shortcircuit if you touch the base.
- [iQOS (Aikos) Pocket Charger Decomposition Method and Repair STEP 8]
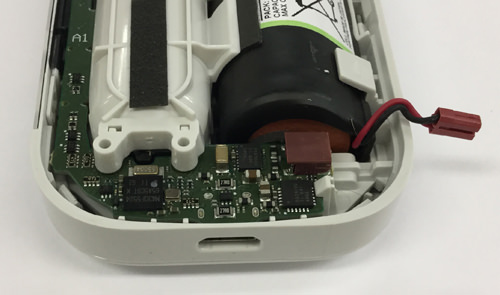
- The battery connector could be removed from the base.
- [iQOS (Aikos) Pocket Charger Decomposition Method and Repair STEP 9]
- Next, I will remove the opposite side of the panel that I removed earlier, but you can remove it if you disassemble it in the same manner as the one-sided cover above.
- [iQOS (Aikos) Pocket Charger Decomposition Method and Repair STEP 10]
- I was able to remove the panel on the opposite side.
- [iQOS (Aikos) Pocket Charger Decomposition Method and Repair STEP 11]
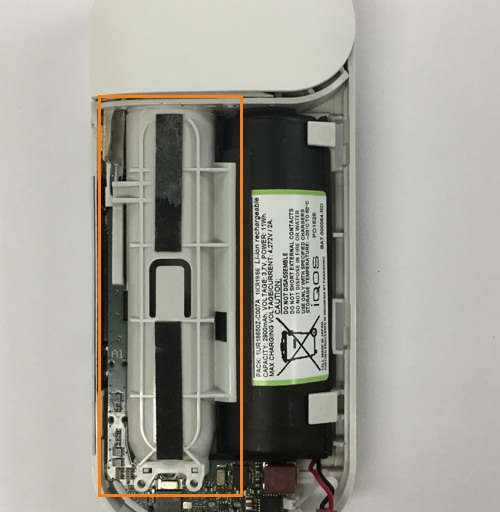
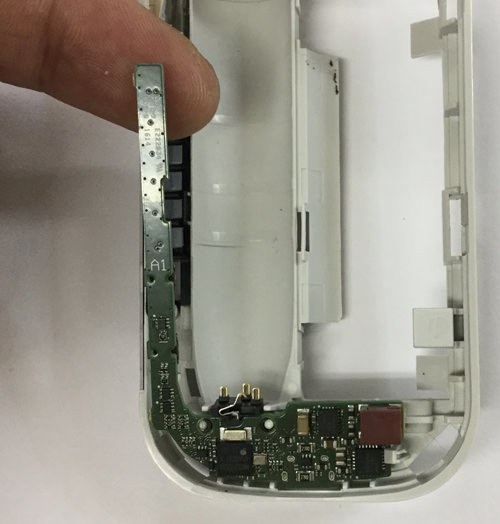
- Next, I will remove the parts of the orange part, but this is the side when I inserted the iQOS holder into the pocket charger.
Black double-sided tape is attached, but if the adhesive strength becomes weak at the time of decomposition, it is also good to re-paste the double-sided tape.
- [iQOS (Aikos) Pocket Charger Decomposition Method and Repair STEP 12]
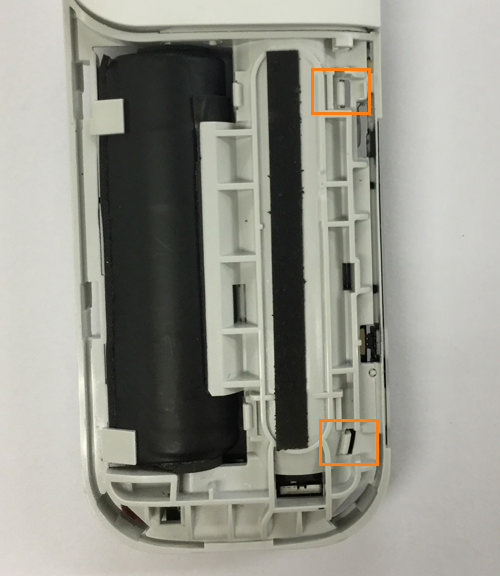
- Because it is fixed with the nail from the back side, i use a tool to push the nail part.
Because it is a plastic nail, there is a possibility that it will break if you put too much force, so please disassemble it with moderate force adjustment.
- [iQOS (Aikos) Pocket Charger Decomposition Method and Repair STEP 13]
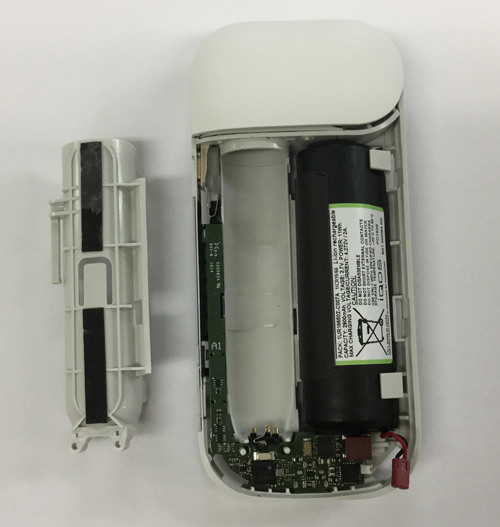
- I was able to remove the parts (holder part) of the side!
- [iQOS (Aikos) Pocket Charger Decomposition Method and Repair STEP 14]
- Next, remove the battery itself, but you can easily remove the battery by pushing it from the bottom to the front side as shown in the image.
- [iQOS (Aikos) Pocket Charger Decomposition Method and Repair STEP 15]
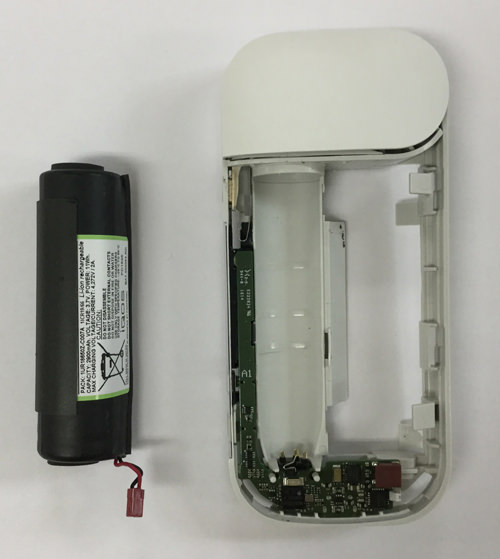
- Only the battery was removed from the pocket charger of iQOS.
- [iQOS (Aikos) Pocket Charger Decomposition Method and Repair STEP 16]
- The base part can be easily removed by hand.
This completes the disassembly of the pocket charger.
- [iQOS (Aikos) Pocket Charger Decomposition Method and Repair STEP 17]
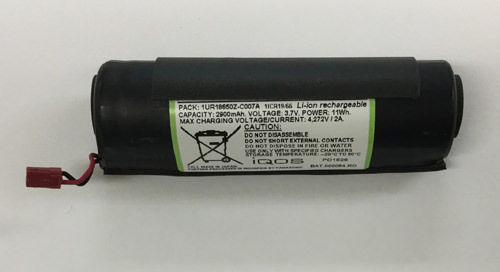
- It is an essential visceral battery, but I think that it is impossible to replace the battery alone at the present time (2016/9/3) because the information did not come out at all as far as the model number was examined.
I don't know if IQOS parts will be sold in the future, but when parts are not sold, the cost of spending is large because there is also a need to purchase each body again.
I think that there are few people who have come to life because it has not been many years since it was released yet, but I hope that only the battery can be bought for about 1,000 yen!
The only way to do this now is to send it to the manufacturer for repair.
The iQOS holder has failed in about one month after purchase, but when I contacted the customer center, I immediately exchanged it free of charge, and the next day I arrived at hand, so support is perfect!
The failure of this iQOS holder is LED flashing red at high speed, the lamp of the pocket charger has become a red display, so if you have similar symptoms please consult customer support!
- [How to send iQOS (Aikos) pocket charger to repair]
- One of the most common things about pocket charger failure is that you can't charge, but if you disassemble (repair) yourself, you may not be able to receive support.
The price of iQOS is more than 10,000 yen, so there is no doubt that you should consult with a purchasing store or iQOS support center.
If you register immediately after purchasing, there is a guarantee for one year, so please do not forget to register!
Customer Center phone number
0120-190517
Hours: 8:00-22:00