FRONTIER FRNX520/D screen failure (LCD cracking, screen with line, crack) requires LCD panel replacement.
I think that it is possible to refer to it because the decomposition method is open to the public.
[FRONTIER FRNX520/D LCD replacement 1]

Be sure to prioritize removing the battery before removing the LCD panel.
Be careful because there is a risk of shorting if you disassemble without removing the battery.
[FRONTIER FRNX520/D LCD Replacement 2]

The battery is on the back of the main unit, but you can easily remove it yourself, but slide the knob to the one with the key open as shown in the image.
[FRONTIER FRNX520/D LCD Replacement 3]

I'll slide the knob as well.
[FRONTIER FRNX520/D LCD Replacement 4]

I think that it was possible to remove it easily if I grasped the battery as it is and made it slide.
[FRONTIER FRNX520/D LCD Replacement 5]

I took a picture in advance, but it is a laptop that is cracked on the screen.
From here, we will break down the screen side, but if the monitor becomes like this, it is necessary to replace the LCD panel.
[FRONTIER FRNX520/D LCD replacement 6]
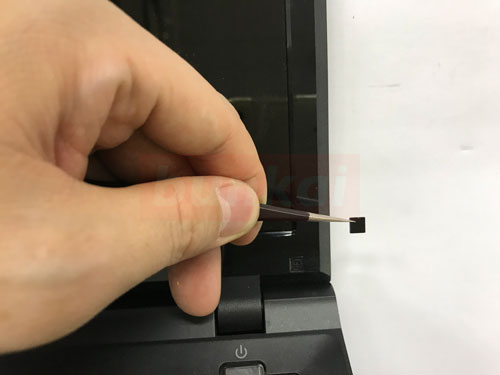
To remove the LCD panel, the frame must be removed first, but the frame is secured with several screws.
The image part will be in the lower right direction, but there is a rubber called screw concealation on the screw, so let's peel off using a sharp tool such as tweezers.
[FRONTIER FRNX520/D LCD replacement 7]
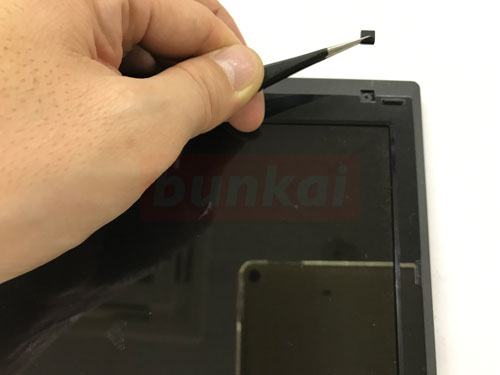
This is the upper right part, but it will peel off the rubber as before.
There is rubber on the four corners of the frame, so let's peel it all off.
[FRONTIER FRNX520/D LCD replacement 8]
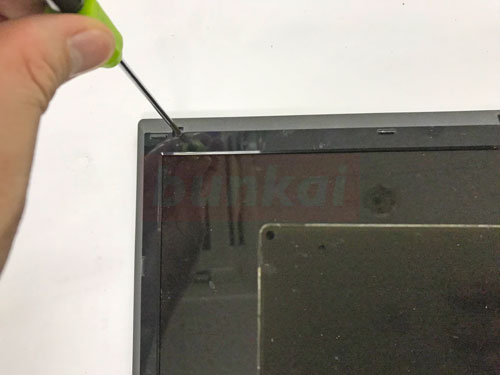
If you can remove the rubber, you will see the screw, so let's remove the screw using a Phillips screwdriver.
[FRONTIER FRNX520/D LCD replacement 9]
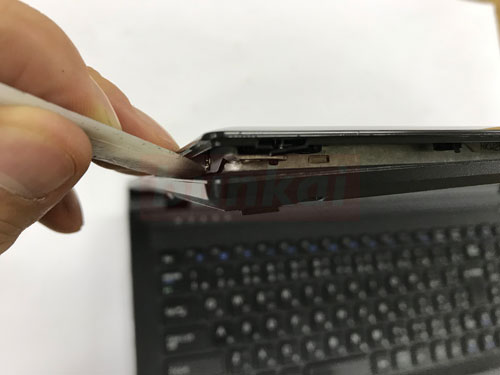
After removing the four screws, the frame itself is removed, but the frame is also fixed with plastic claws to the rear panel.
Let's break down by inserting the tool into the gap like the image.
[FRONTIER FRNX520/D LCD replacement 10]
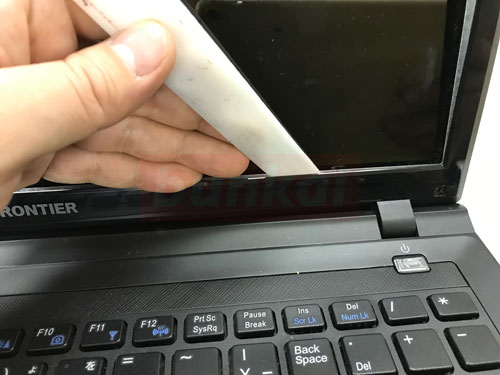
This is the lower side.
[FRONTIER FRNX520/D LCD replacement 11]
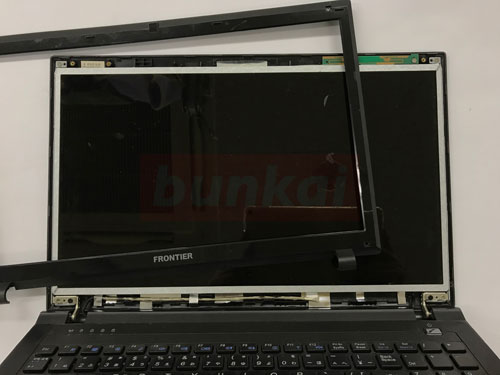
If you do the same work on one lap, you can remove only the frame like the image.
[FRONTIER FRNX520/D LCD replacement 12]
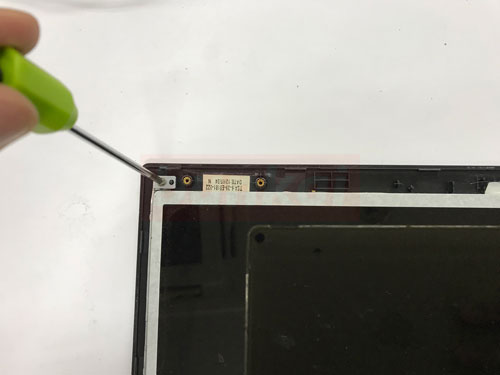
The LCD panel itself is also screwed to the rear panel, so it will be removed.
In the image, it will be the upper left, but there is a screw on the right side of the same position, so let's remove it.
[FRONTIER FRNX520/D LCD replacement 13]
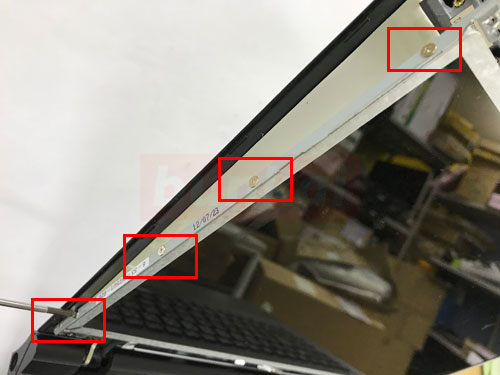
If you can remove both of the previous screws, you can knock them down in front of you.
Since the liquid crystal panel is fixed to an iron frame called a hinge, let's remove all the screws (red frame part) on the side.
Because it is on the left and right, it will remove eight screws in all.
[FRONTIER FRNX520/D LCD replacement 14]
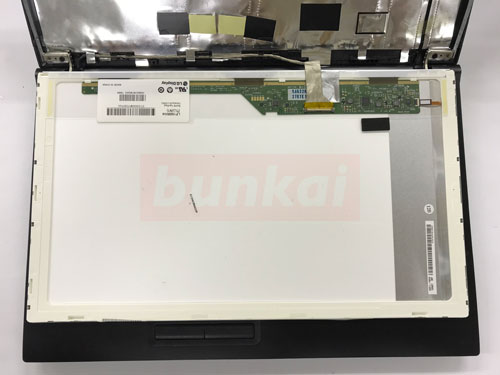
Then, let's slowly knock it down to the keyboard side because the liquid crystal becomes a state of movement.
Because there is a liquid crystal cable on the back, please be careful not to break it.
[FRONTIER FRNX520/D LCD replacement 15]
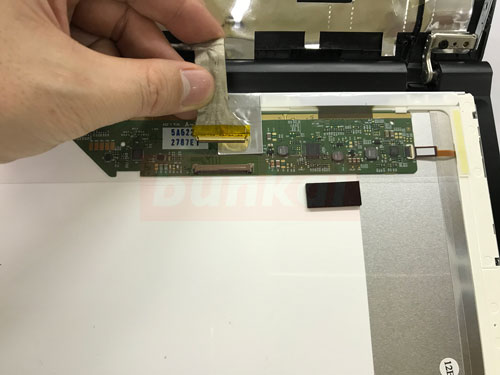
The LCD panel can be easily removed just by sliding it!
I think that it was possible to remove only the liquid crystal panel if the decomposition up to this point can be done accurately, but the PC repair will be completed if you replace it with the liquid crystal panel that you have prepared and reassemble it with the original procedure.
[FRONTIER FRNX520/D LCD replacement 16]
It becomes a state in which the pc is turned on by reassembling, but you can see that it came to be displayed normally.
In the image, the start screen of Windows 8 is out, but you can use the PC with the data as before because it remains with respect to the data!


