If you break the screen of the DELL Inspiron 7520, you need to change the LCD, but if you can repair your pc yourself, you can fix it cheaply.
It is a monitor exchange of the personal computer that often costs more than 50,000 yen in the manufacturer, but if you can fix it yourself, there is a possibility that you can fix it at half price to one-third of the cost, so please try to challenge it.
[DELL Inspiron 7520 LCD Replacement 1]
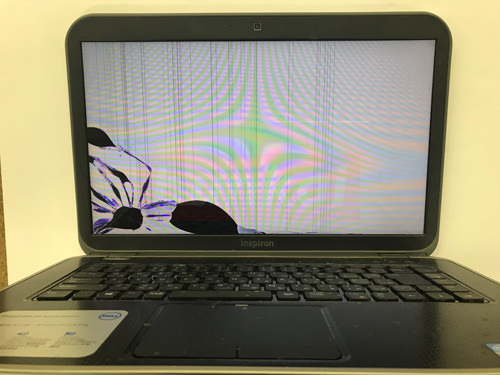
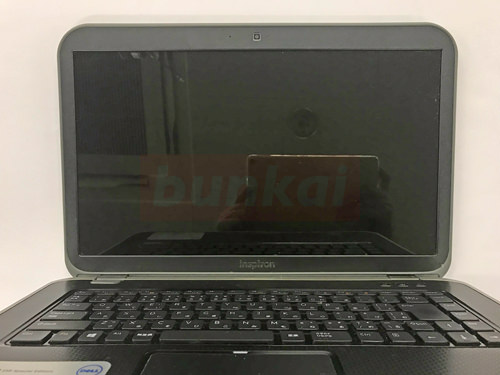
In the image, there is a liquid crystal leak in the lower left, and the display failure has occurred from here.
If it becomes like this, you will be worried about whether the data is left, but if you have an external monitor (TV is also possible), you can check the data yourself because you can project information in the personal computer from the HDMI terminal.
[DELL Inspiron 7520 LCD Replacement 2]
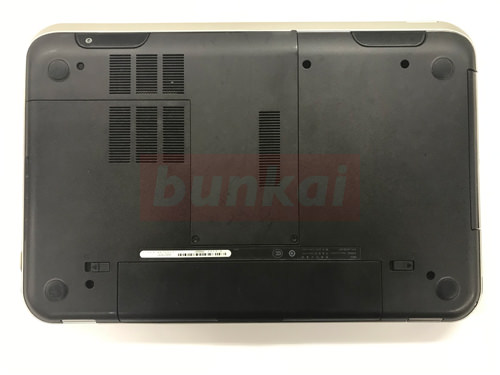
First of all, turn the body over.
[DELL Inspiron 7520 LCD Replacement 3]
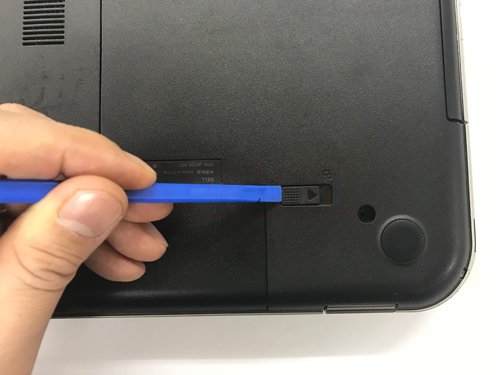
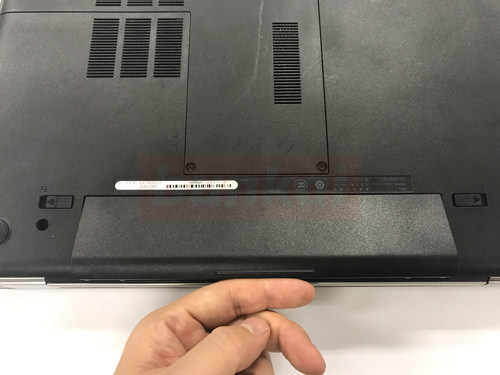
The first thing to do with PC repair is to remove the battery and shut off the electricity, so I would like to remove the battery first.
There is a knob next to the battery, but slide the knob to the person with the open key mark.
[DELL Inspiron 7520 LCD Replacement 4]
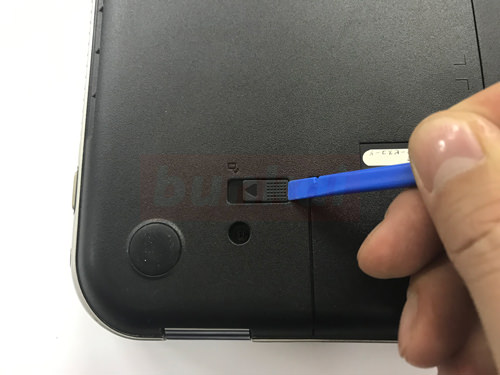
Slide the other side in the same way as before.
[DELL Inspiron 7520 LCD Replacement 5]
After sliding both knobs, you can remove the battery as shown in the image.
[DELL Inspiron 7520 LCD Replacement 6]
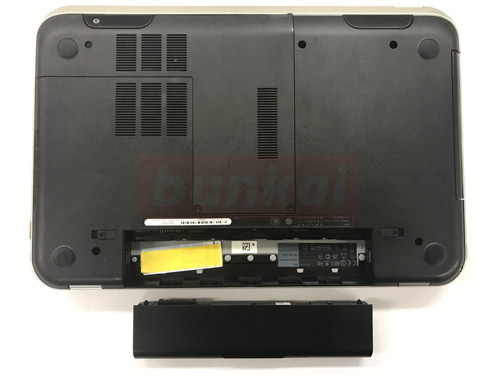
The battery could be removed.
[DELL Inspiron 7520 LCD Replacement 7]
From here, we will decompose the liquid crystal side.
[DELL Inspiron 7520 LCD Replacement 8]

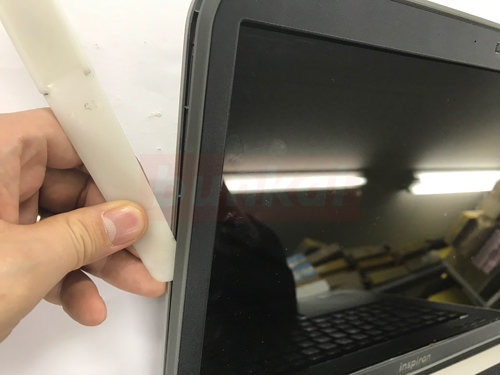
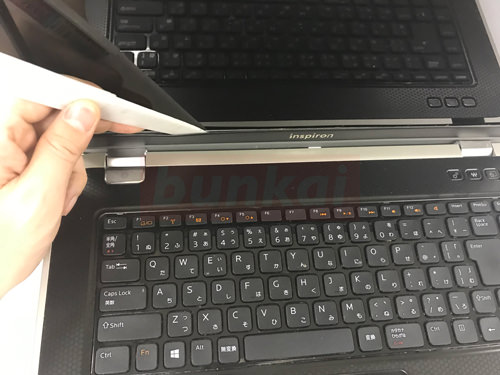
To remove the LCD panel, it is necessary to remove the frame first, but the tool is inserted into the gap between the frame and the back cover as shown in the image, and it is disassembled by sliding it.
[DELL Inspiron 7520 LCD Replacement 9]
It is a place where it is twisted while sliding from top to bottom.
[DELL Inspiron 7520 LCD Replacement 10]
The lower side will decompose in the same manner.
[DELL Inspiron 7520 LCD Replacement 11]
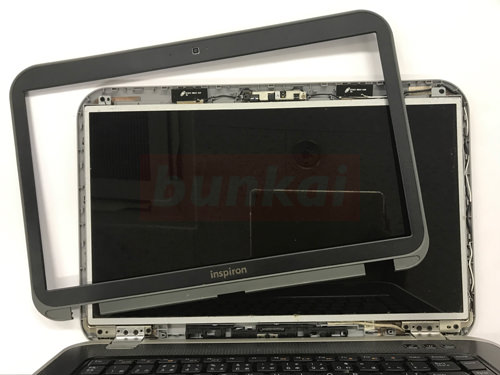
Only the frame around the liquid crystal was able to be removed.
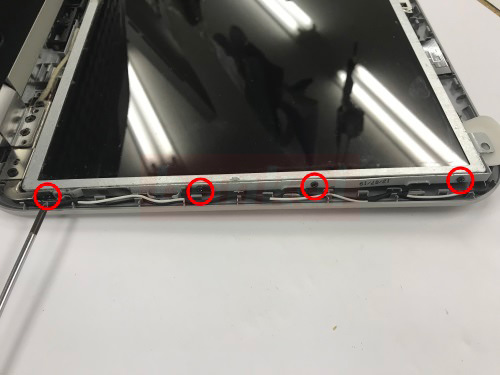
[DELL Inspiron 7520 LCD Replacement 12]
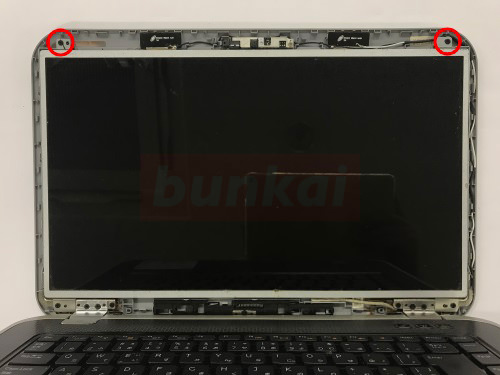
The LCD panel is now exposed, but the panel is secured with screws on the back cover, so let's remove the screw son of the red circle part.
[DELL Inspiron 7520 LCD Replacement 13]
Use a Phillips screwdriver to remove the screws.
[DELL Inspiron 7520 LCD Replacement 14]
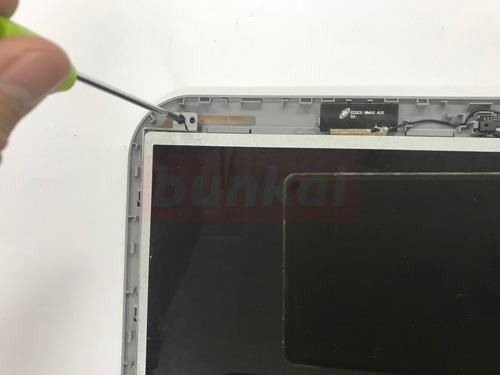
There are screws next to the panel, but let's remove all the screws on the left and right.
[DELL Inspiron 7520 LCD Replacement 15]
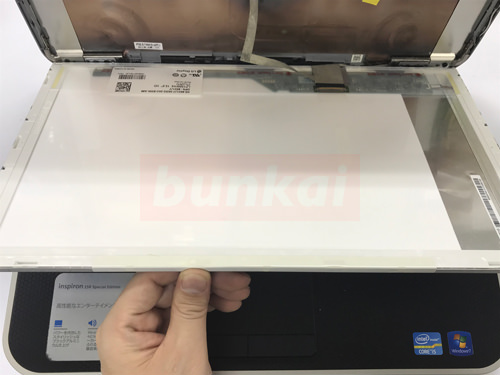
If all screws can be removed, the panel can be knocked down to the front side (keyboard surface) as shown in the image, but be careful not to break it because there is a cable on the back.
[DELL Inspiron 7520 LCD Replacement 16]
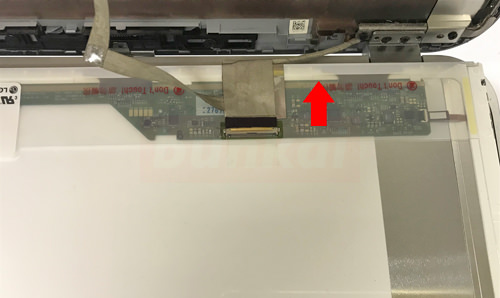
Pull the LCD cable toward the arrow.
[DELL Inspiron 7520 LCD Replacement 17]
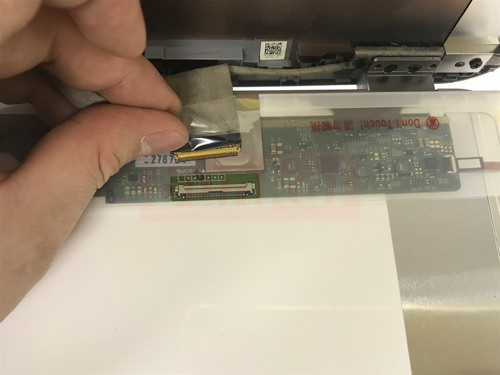
I think that the panel was able to be removed when the liquid crystal cable was able to be removed.
Replace the newly prepared LCD panel and assemble it with the original procedure and it is complete.