Exposes how to disassemble Amazon fire HD 8
You can see how to remove the LCD, battery, motherboard, and camera, so if you want to disassemble the fire HD 8, I think you can refer to it.
You can substitute the tools you use for disassembly at home, but please prepare anything that is missing.
There are 10 other Fire HD, but we also have a way to repair fire HD 10.
[Amazon fire HD 8 disassembly repair method 1]

We'll start disassembling the fire HD 8, but all decomposition starts with opening the back cover, followed by a flow of removing each part.
[Amazon fire HD 8 disassembly repair method 2]
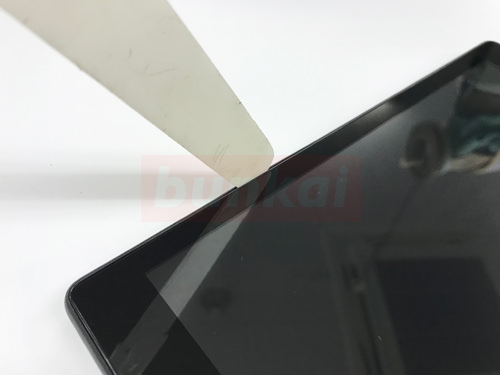
It is common to fire 7 and fire HD 10, but the tool is inserted into the gap between the screen and the back cover like the image and disassembled.
Because the body is damaged when using a metal tool, the tool used for disassembly should be made of plastic.
[Amazon fire HD 8 disassembly repair method 3]
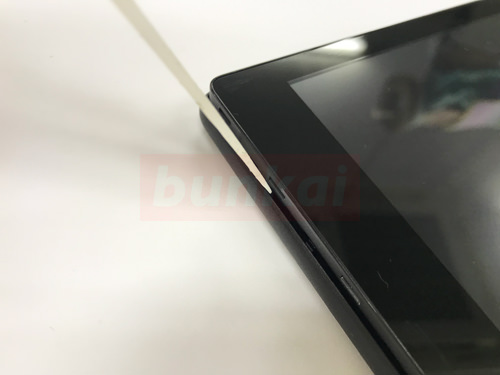
When the tool is inserted into the gap, it is made to twist lightly.
Then, the screen side floats slightly, so let's rub while sliding little by little so as not to close again.
[Amazon fire HD 8 disassembly repair method 4]
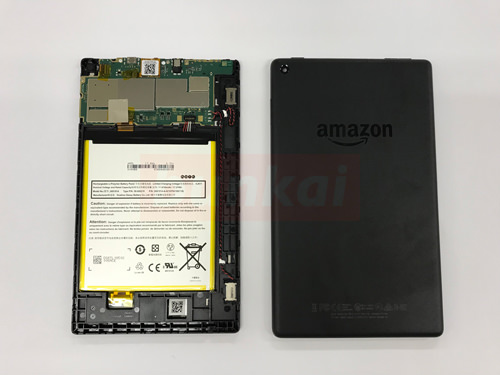
You can remove the back cover by inserting the tool around the liquid crystal, but you will be able to remove it well if you make the part of the plug of the power button and the charging mouth screw at the end at the end.
[Amazon fire HD 8 disassembly repair method 5]
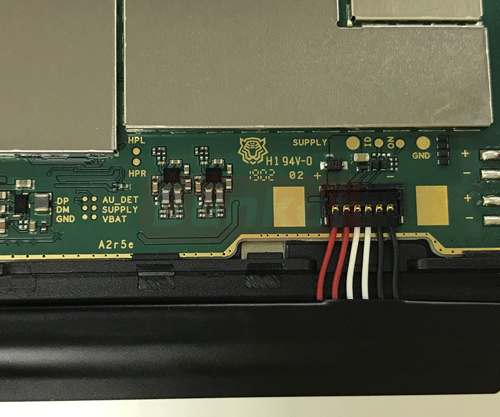
The next task is to remove the battery connector.
At this time, the main body is still energized, so please do not touch the base with a metal tool even if it is wrong.
If you touch the foundation by any chance, it will be short-circuited, and the worst power supply may not turn on.
[Amazon fire HD 8 disassembly repair method 6]
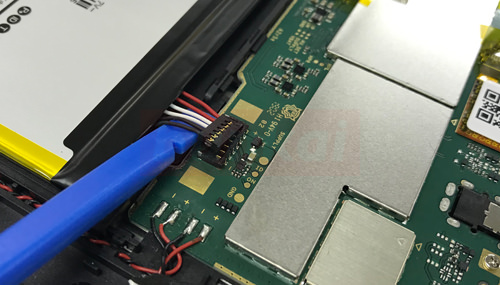
The part that connects the battery connector to the motherboard is connected, but the tool is set under the cable as shown in the image and it is lifted upward.
Please note that if you try to lift with only your finger without using a tool, you may lose disconnection or cable.
The blue tool in the image can be substituted with disposable chopsticks at home.
[Amazon fire HD 8 disassembly repair method 7]
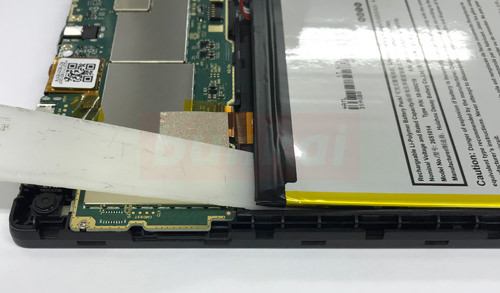
I removed the battery connector earlier, but now I want to remove the battery itself from the main unit.
The battery of the fire HD 8 is attached to the main unit with double-sided tape, so insert the spatula under the battery as shown in the image and tear the tape and peel it off.
Be careful not to damage the motherboard when inserting the spatula!
[Amazon fire HD 8 disassembly repair method 8]
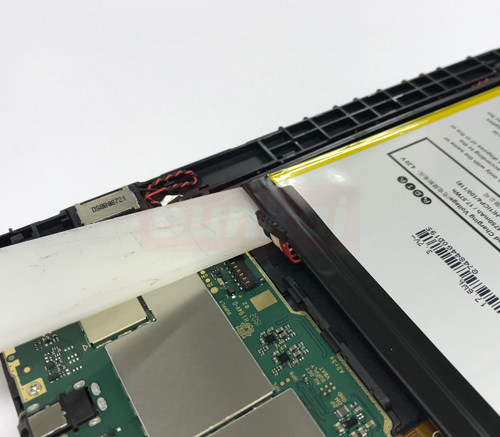
Remove the tape by changing the angle at which the spatula is inserted.
[Amazon fire HD 8 disassembly repair method 9]
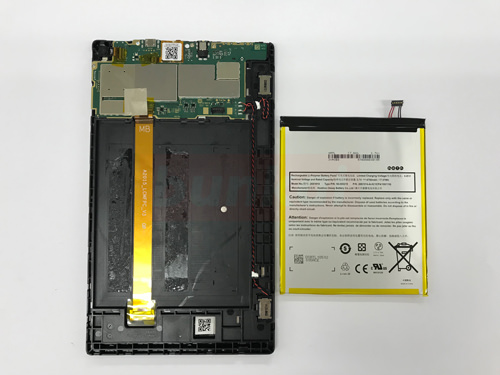
Only the battery was able to be removed from the main unit.
If the battery decreases quickly or expands, this may be the solution.
[Amazon fire HD 8 disassembly repair method 10]
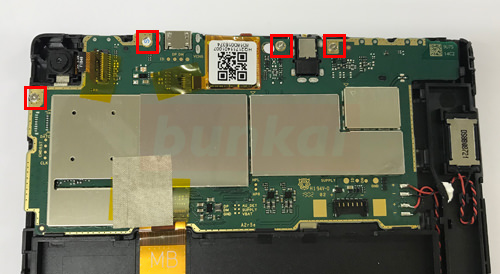
This is the most important part called the motherboard.
First of all, let's remove all the screws in the red frame part.
[Amazon fire HD 8 disassembly repair method 11]
In addition to screws, wiring is connected to the motherboard, so let's check each one.
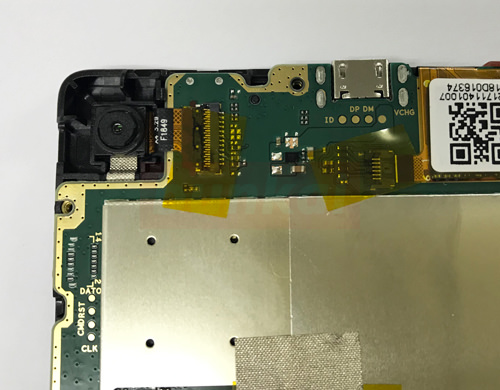
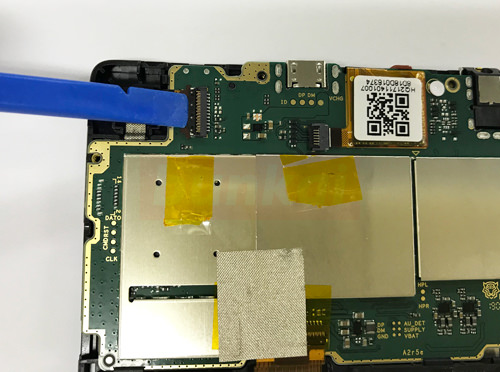
[Amazon fire HD 8 disassembly repair method 12]
The wiring is inserted into the base of the motherboard as in the image, but it should not be pulled out as it is.
There is a nail in the part where the blue tool hits, but raise the nail to 90 degrees, then slide the cable to pull it out.
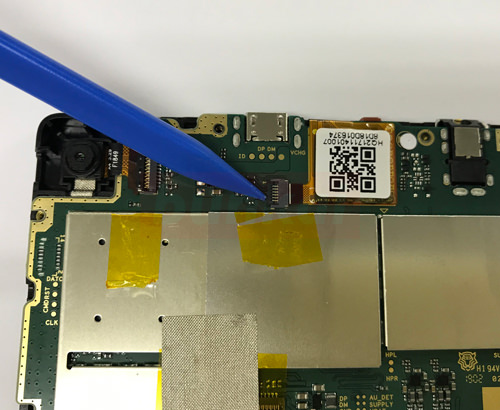
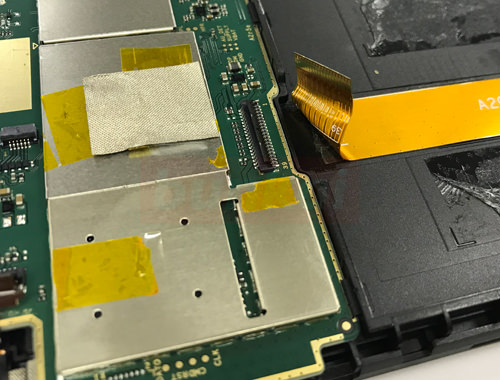
[Amazon fire HD 8 disassembly repair method 13]
The part where the blue tool hits will be the wiring of the camera, but let's remove the cable by the same procedure as before.
[Amazon fire HD 8 disassembly repair method 14]
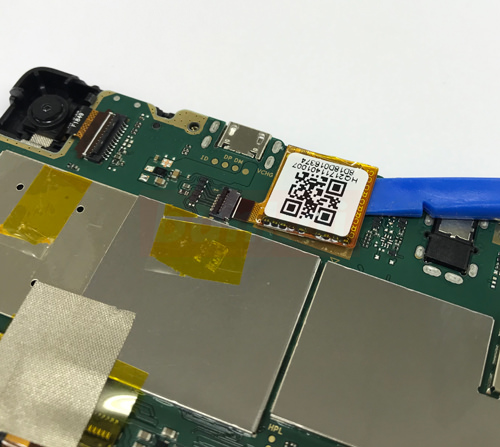
Because it is stopped lightly by double-sided tape, if it is hard, i put the tool like the image and float it little by little.
[Amazon fire HD 8 disassembly repair method 15]
I was able to remove the cable!
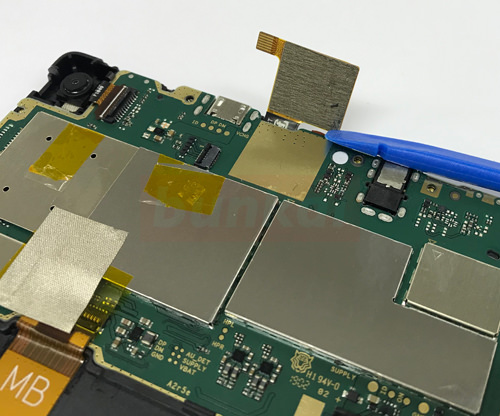
[Amazon fire HD 8 disassembly repair method 16]

This cable connects the LCD panel to the motherboard.
When you turn over the seal, there is a connector like the image, so remove it by the same procedure as before.
[Amazon fire HD 8 disassembly repair method 17]
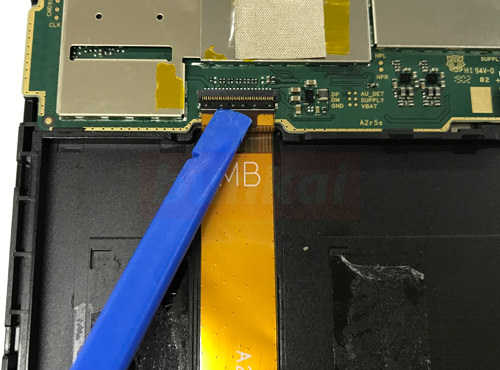
Push the nail up to 90 degrees and then slide.
[Amazon fire HD 8 disassembly repair method 18]
I was able to pull out the wiring.
[Amazon fire HD 8 disassembly repair method 19]
At the moment, I think that all screws and wiring are out of the motherboard, but it is fixed several places with plastic claws like the red frame part.
It is possible to remove it by grasping the motherboard itself with a finger and moving it up, down, left and right.
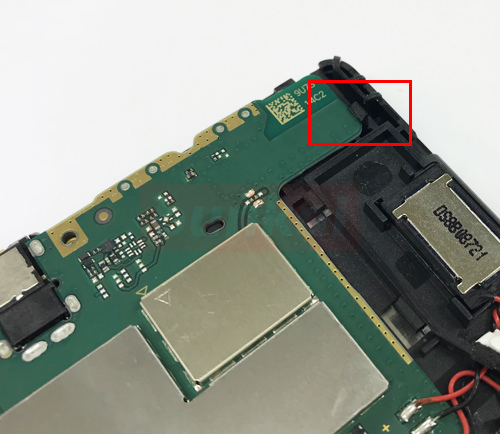
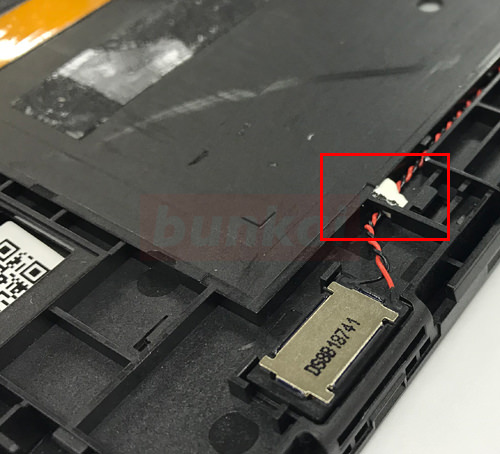
[Amazon fire HD 8 disassembly repair method 20]
Red and black wiring is soldered to the motherboard, but this wire becomes a speaker.
So, if you want to change the speaker, you will need to repair the solder.
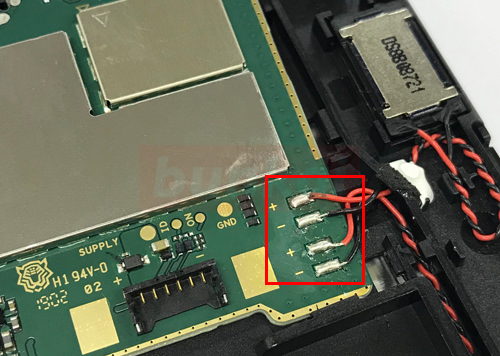
[Amazon fire HD 8 disassembly repair method 21]
The wiring is placed in the plastic rail and is arranged one up and down one by one, but it cannot be removed as it is on the structure.
As you can see from the red frame, it penetrates through the black plastic in the white silicone rubber.
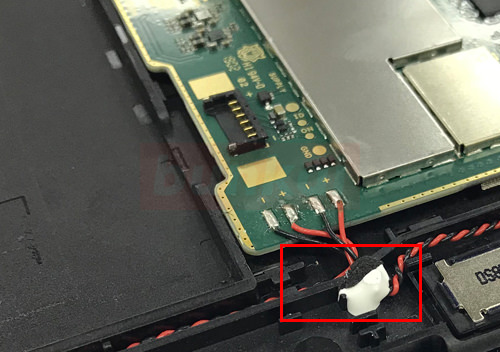
[Amazon fire HD 8 disassembly repair method 22]
This is also through the silicon rubber.
So, if you want to remove the speakercompletely from the motherboard, you have to remove the wiring from the motherboard and pull out the through plastic.
[Amazon fire HD 8 disassembly repair method 23]
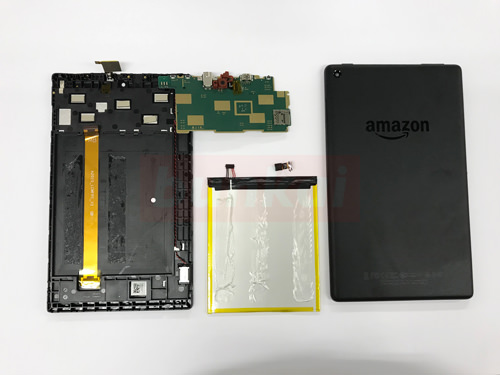
I was able to make it to the state of almost all balassi.
Because the price at the time of the fire HD 8 at the time of the new purchase is less than 10,000 yen, if it breaks down in the state that the backup is taken, it might be better to replace it rather than repair!