If the screen of the amazon brand Fire HD 10 is cracked, cracked, cracked, or has a line, you'll need to replace the LCD, but it will reveal how to disassemble it.
This decomposition method will tell you how to remove the LCD, battery, motherboard, camera, and speakers.
Because there are not many tools necessary for disassembly, I think that it can be substituted with the thing in the home to some extent, but please prepare the tool used if it is not below.
[Fire HD 10 disassembly repair method 1]

I will start disassembling from now on, but I think that it is not difficult after that if even the back cover can be opened.
[Fire HD 10 disassembly repair method 2]
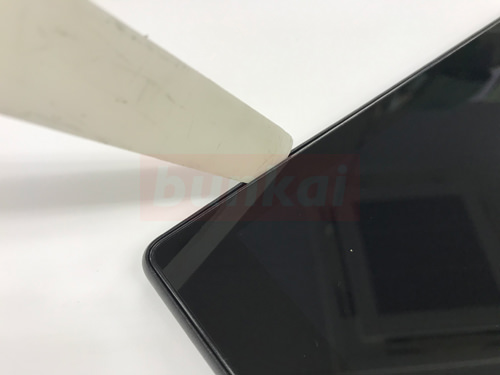
The caulking spatula is inserted into the gap between the screen and the back cover, but the location is good from anywhere.
In the image, the spatula is inserted vertically.
[Fire HD 10 disassembly repair method 3]
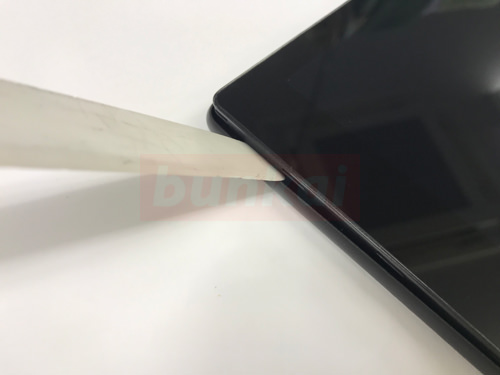
As shown in the image, the liquid crystal is fixed to the back cover with plastic claws, but I think that you can understand the feeling that comes off if you put a spatula and make it strain edging lightly.
[Fire HD 10 disassembly repair method 4]
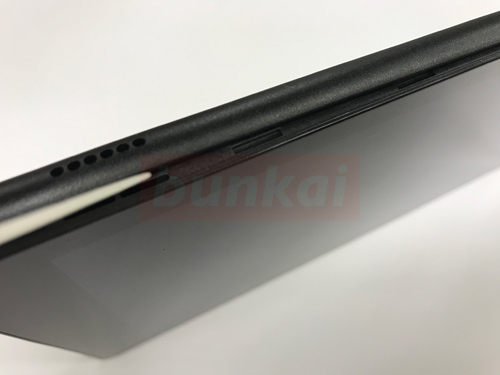
After the vertical direction is floated, the liquid crystal floats in the same way in the horizontal direction.
It is possible to remove the back cover by performing this work on one lap of the screen, but it may be easy to do it if you remove the upper power jack and earphone side at the very end.
[Fire HD 10 disassembly repair method 5]
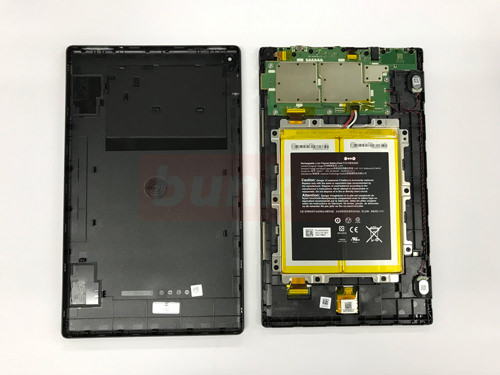
I was able to remove the back cover.
[Fire HD 10 disassembly repair method 6]
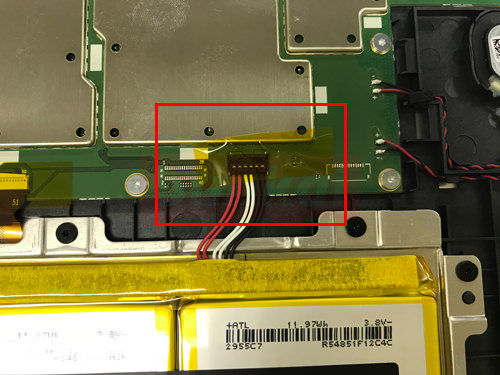
Next, remove the battery connector, but please give priority to this task in all disassembly.
If you proceed with the disassembly without removing the connector of the battery, there is a possibility that it will short-circuit at some timing, and if it is shorted, there is a possibility that the power will not turn on or a problem may occur, so be careful.
First of all, yellow kapton tape is attached on the connector, so let's peel it off.
[Fire HD 10 disassembly repair method 7]
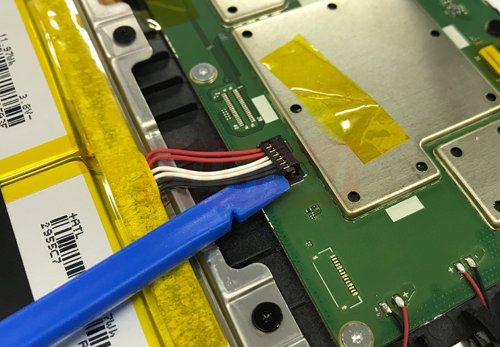
Remove the connector by lifting it from the bottom to the top as shown in the image.
If you try to grasp the cable part with your finger, only the cable may come out, so it is better to remove it with a tool if possible.
The tool uses something that is not made of metal, but I think that it can be substituted to some extent even with disposable chopsticks in the home.
[Fire HD 10 Disassembly Repair Method 8]

The battery itself will be removed, but this part cannot be removed without a dedicated tool.
In previous models such as Fire HD 8, screws were not used in the battery part and only fixed with double-sided tape,
The Fire HD 10 requires a Torx screwdriver because it is secured with special screws.
Please note that if you try to remove it with a Phillips screwdriver or a flat screwdriver, the screw will lick.
[Fire HD 10 Disassembly Repair Method 9]
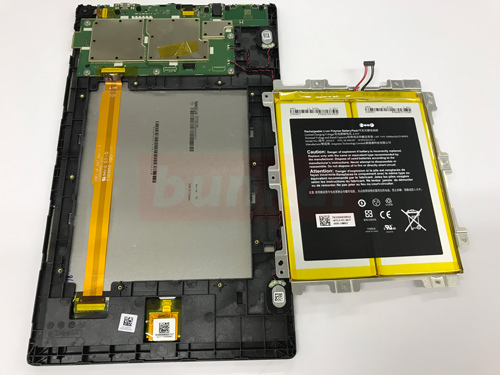
If you can remove all the black screws around the battery, it will be in the state of the image.
If the battery is bad, expansion, etc., I think that it will be improved by replacing the battery, so please replace it with a new battery.
[Fire HD 10 disassembly repair method 10]
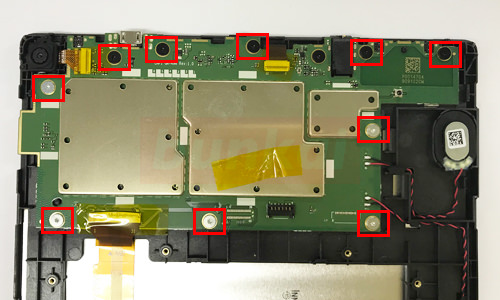
This part is the most important part of Fire HD 10 (motherboard), but be careful not to fail because all signals originate from this motherboard.
Let's remove all the screws in the red waku.
The screw of this part is also prepared because the Torx screwdriver is required.
[Fire HD 10 disassembly repair method 11]
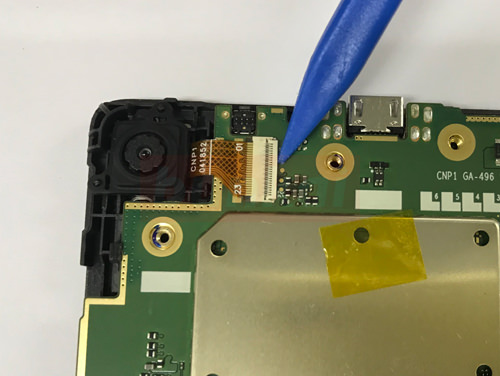
The rear camera part.
The orange cable is connected to the white connector, but lift the nail to 90 degrees before sliding the orange cable.
[Fire HD 10 disassembly repair method 12]
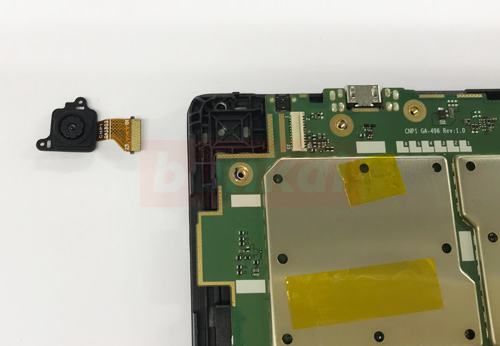
I was able to remove the rear camera.
If the rear camera is noisy or becomes a sandstorm, it may be improved by replacing the rear camera.
[Fire HD 10 disassembly repair method 13]
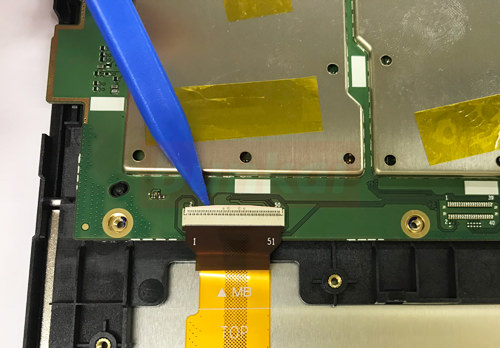
This cable becomes a liquid crystal cable, but it is the same way as the rear camera of the previous.
[Fire HD 10 disassembly repair method 14]
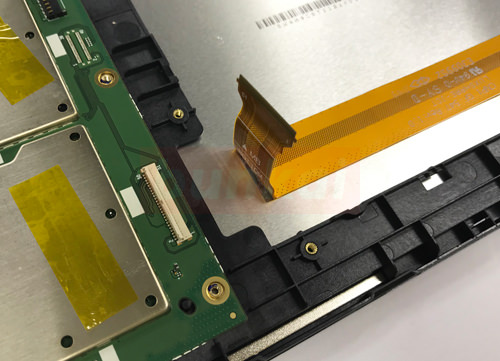
I was able to remove the cable.
If you damage the LCD cable, you will experience problems such as a line entering the screen or not displaying it, so be careful not to fail.
[Fire HD 10 disassembly repair method 15]
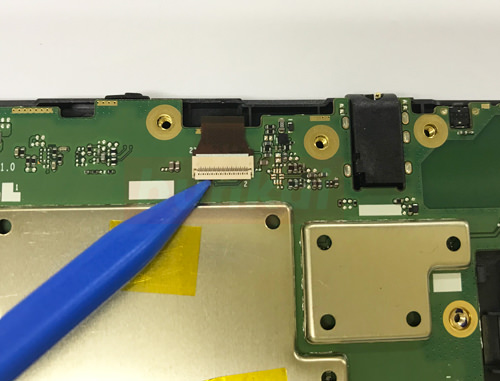
This is the cable of the front camera, but let's remove it in the same way as before.
If you can remove this cable, you will be able to move the motherboard.
[Fire HD 10 disassembly repair method 16]

Fire HD 10 has two speakers up and down.
Both are only fixed to the main body with double-sided tape, so it is possible to remove it easily if you plug the tool down and make it lightly strained.
Because only the speaker is not connected to the connector, but soldered to the motherboard, solder work is required when replacing the speakers.
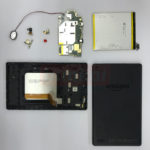
[Fire HD 10 disassembly repair method 17]
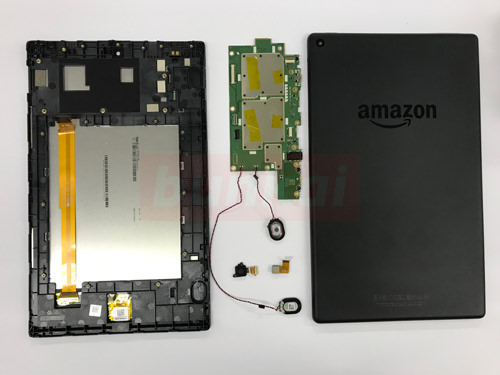
Fire HD 10 has been disassembled.
Since the price at the time of the new purchase becomes the cheap one as a tablet, it might be better to put the replacement in view if it seems to take too much repair fee.