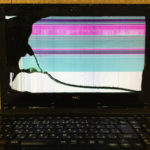
NEC LAVIE LX850/J LCD Cracking Screen Replacement Repair Method, Decomposition Procedure
I think that it is possible to confirm the decomposition method if it is to some extent, so please refer to it.
- [NEC LAVIE LX850/J LIQUID Liquid Crystal Repair and Decomposition Method STEP 1]
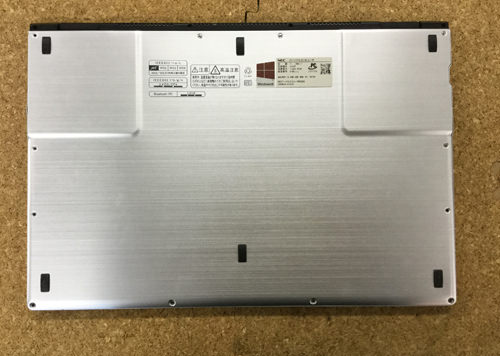

- It will be done from the removal of the battery, but in the case of LX850/J, it is not possible to remove the battery easily because it is built-in.
There is a cover on the back side of the main body, and the battery is embedded in it.
There are 12 screws on the back side, so let's remove the Phillips screwdriver.
- [NEC LAVIE LX850/J LIQUID Liquid Crystal Repair and Decomposition Method STEP 2]
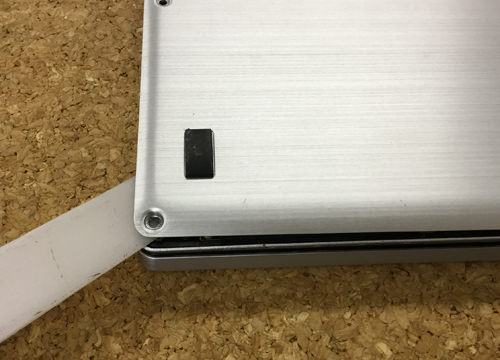

- When all the screws are removed, remove the back cover, but insert it into the gap using a plastic spatula as shown in the image.
- [NEC LAVIE LX850/J LIQUID Liquid Crystal Repair and Decomposition Method STEP 3]
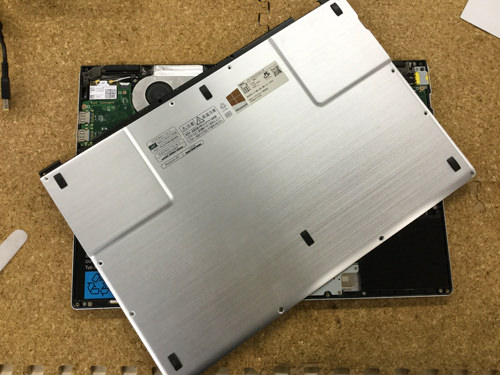

- I was able to remove the back cover easily!
- [NEC LAVIE LX850/J LIQUID Liquid Crystal Repair and Decomposition Method STEP 4]


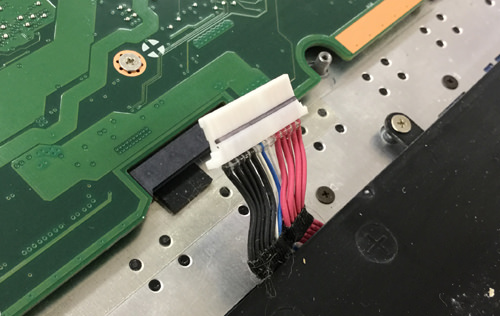
- When the back cover is removed, there is an image part in the middle just in the middle, but the battery connector is connected to the motherboard.
LX850/J is an ultrabook on the big screen, so compared to a standard PC, the inside of the PC is quite different.
It is how to remove the battery connector, but you can remove it if you pull it out from the motherboard side to the battery side.
If you do not pull out both sides of the connector together, the pins on the motherboard side may bend or break, so be careful.
- [NEC LAVIE LX850/J LIQUID Liquid Crystal Repair and Decomposition Method STEP 5]

- I was able to remove the connector.
I don't think it's that hard to break down so far.
Once you have removed the battery connector, cover it with the back cover once.
- [NEC LAVIE LX850/J LIQUID Liquid Crystal Repair and Decomposition Method STEP 6]
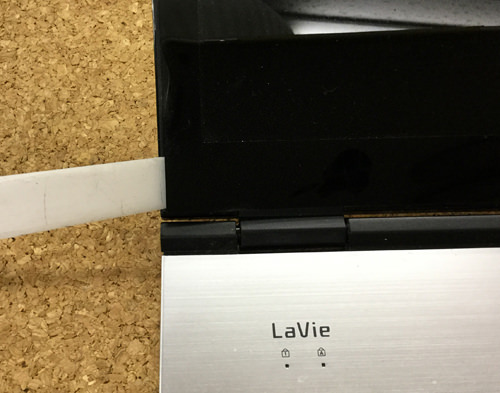

- The biggest challenge with disassembling the LX850/J is here.
Most laptops seem to have a frame around the LCD, but they are fixed with screws, and most of them are plastic.
In the case of LX850/J, it is fixed with double-sided tape instead of screws, and the material is different from a normal personal computer.
In the case of plastic, there is a slight elasticity, so it is strong for a certain degree of bending, but in the case of LX850/J, the material is a mixture of plastic and glass?Because it seems to be, the frame will break if you force it. - In the image, the spatula is inserted, but the frame part is lightly warmed with a dryer or heat gun before inserting the tool.
- By adding heat, the double-sided tape under the frame becomes soft erasing and makes it easier to peel off the frame.
- [NEC LAVIE LX850/J LIQUID Liquid Crystal Repair and Decomposition Method STEP 7]
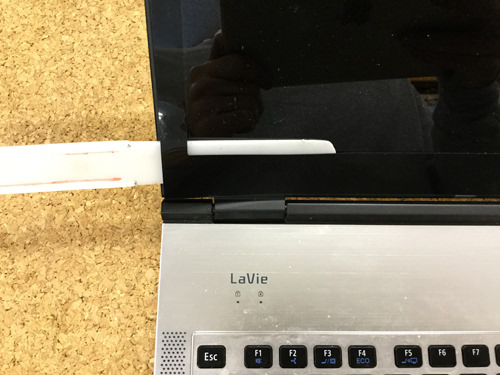
- After applying a dryer and softening the double-sided tape, the tool is inserted.
It is possible to remove the liquid crystal frame by performing this work around the liquid crystal per lap.
As a photograph, it's over, but I'll briefly explain the flow after this.
When the frame can be removed, the LCD panel seems to be exposed, but remove all four-corner edging screws that secure the LCD panel.
I think that it is possible to knock down the LIQUID panel to the keyboard side when the screw can be removed, but one cable is connected to the back side of the liquid crystal panel.
You can remove it if you pull out the cable after causing the pin that is "co-shaped" of the connection part.
Since I think that only the liquid crystal panel can be removed from the PC body, the liquid crystal panel replacement of LX850 / J will be completed if reassembling it with a weak procedure.
STEP 6 and 7 are the most important points, so it is important to take the time to peel them off slowly.