Lavie Z is lightweight for ultrabooks, there are many advantages such as high-speed start-up, but on the other hand, there are disadvantages.
It is that the screen is very thin and it becomes easy to cause the screen crack.
Models compared to the Lavie Z include Apple's MacBook Air, ASUS ZENBOOK, and so on, but these models have iron covers around the LCD, but the Lavie Z is plastic.
It is lighter than these models for plastic, but if you let it fall, screen cracking will occur.
If you request a PC repair at the manufacturer (NEC), it will be a very expensive estimate, but there is no doubt that it will be cheaper if you can repair it yourself.
Lavie Z's LCD replacement is divided into assembly replacement that replaces all LCDs and how to replace only lcd panels, but in this article I would like to introduce how to replace an assembly with a simple difficulty level.
PC-LZ550MSS, etc. released at the same time, etc. procedure will be exactly the same, so I think that it can be helpful.
[Lavie Z PC-LZ750JS LCD replacement 1]
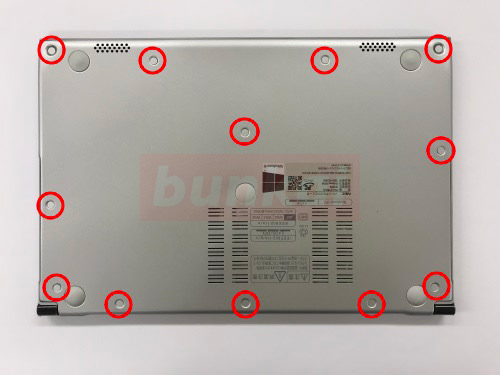
The first Lavie Z will be disassembled from the back of the main body, but it is necessary to remove a good screw to remove the back cover.
The part surrounded by a red circle has a seal of the same color as the body called screw concealation, so let's peel off the seal with a tool such as tweezers.
[Lavie Z PC-LZ750JS LCD replacement 2]

Screw concealation is easy to peel off because it is only affixed with light double-sided tape.
[Lavie Z PC-LZ750JS LCD replacement 3]
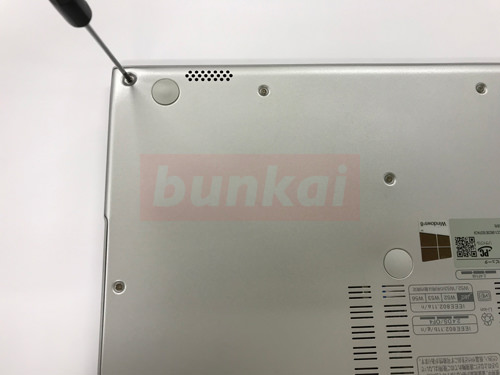
After you can peel off the screw hidden, let's remove the screw with a single-minded Lys screwdriver.
[Lavie Z PC-LZ750JS LCD replacement 4]
I was able to remove the back cover.
[Lavie Z PC-LZ750JS LCD replacement 5]
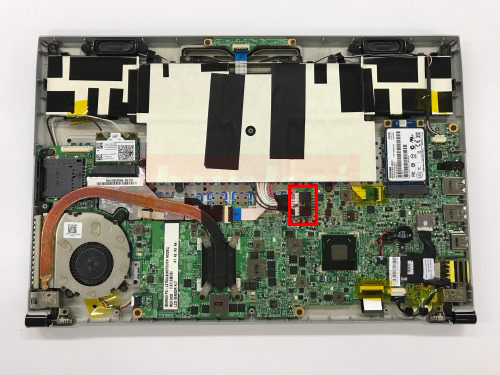
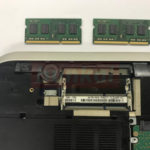
I think that it is possible to check the battery as soon as the back cover can be removed, but the battery connector is connected to the part surrounded by a red frame.
Be sure to remove the battery connector before removing the LCD before disassembling it.
[Lavie Z PC-LZ750JS LCD replacement 6]
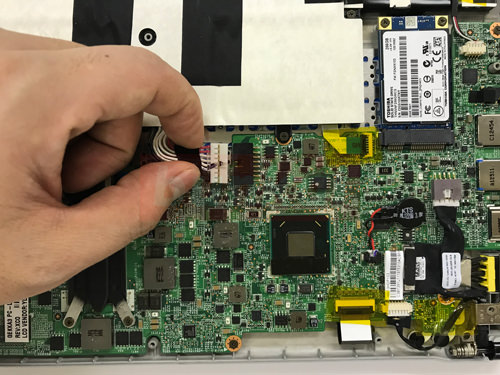
Remove the battery connector as shown in the image by sliding it sideways.
[Lavie Z PC-LZ750JS LCD replacement 7]
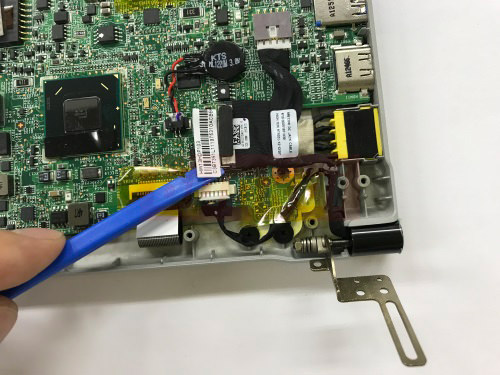
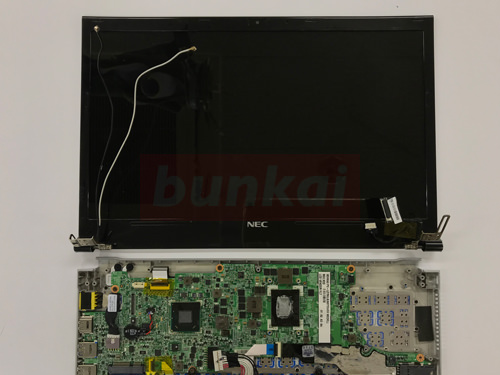
From here, we enter the decomposition of the liquid crystal side.
The image is always called a hinge on the left and right for the laptop, but it is fixed to the main body with screws.
Let's remove the screw of the red circle part.
[Lavie Z PC-LZ750JS LCD replacement 8]
You can lift the hinge when you can remove the screw.
[Lavie Z PC-LZ750JS LCD replacement 9]
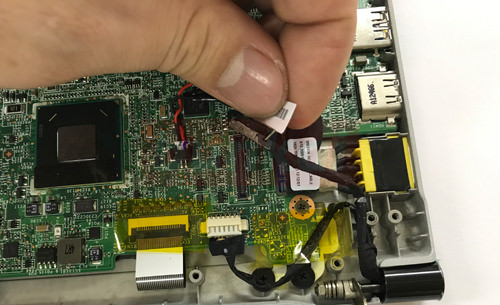
The cable extends from the base of the hinge, but this cable is called a liquid crystal cable and connects the LCD panel to the motherboard.
Please note that if you break the LCD cable or scratch it, the line will enter the screen or will not be reflected.
To remove the LCD cable, raise the hook of the "co-shaped" of the connector and then lift the connector itself up.
If you don't know how to remove the cable, please do the structure well.
[Lavie Z PC-LZ750JS LCD replacement 10]
The LCD cable could be removed from the motherboard.
[Lavie Z PC-LZ750JS LCD replacement 11]
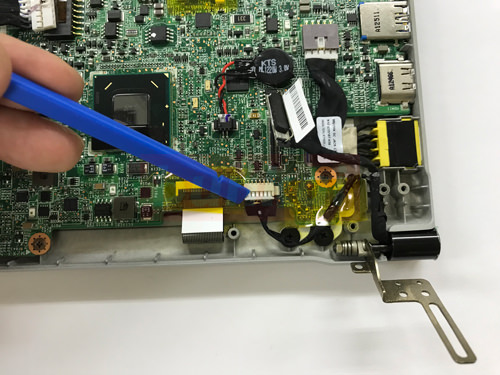
In the same way, another connector is connected to the motherboard, but this is different from the previous connector.
You can remove the cable by sliding it sideways and pulling it out.
[Lavie Z PC-LZ750JS LCD replacement 12]
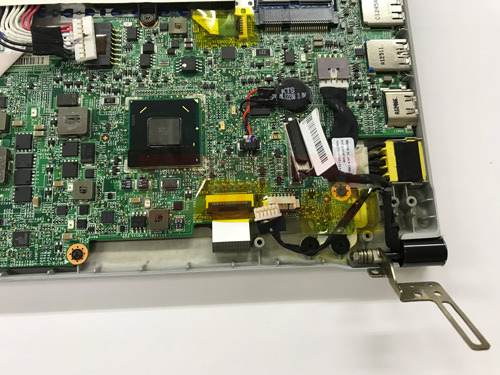
The two connectors could be removed from the motherboard.
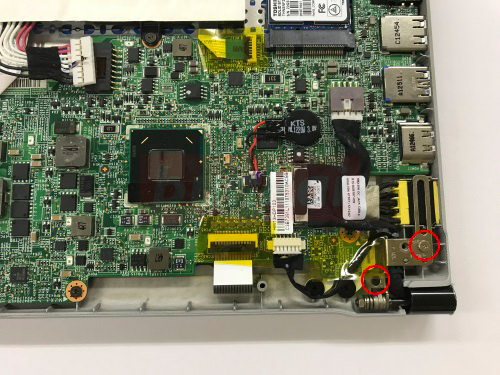
[Lavie Z PC-LZ750JS LCD replacement 13]
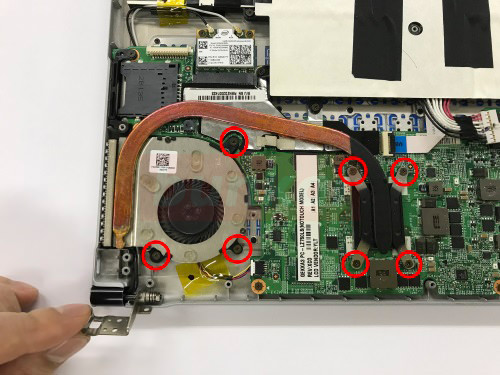
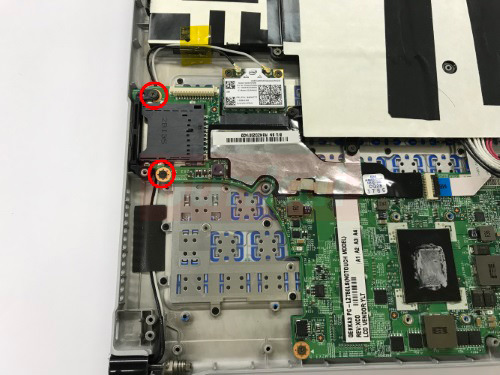
This is the opposite side, but let's remove the screw of the red circle part in the same manner as before.
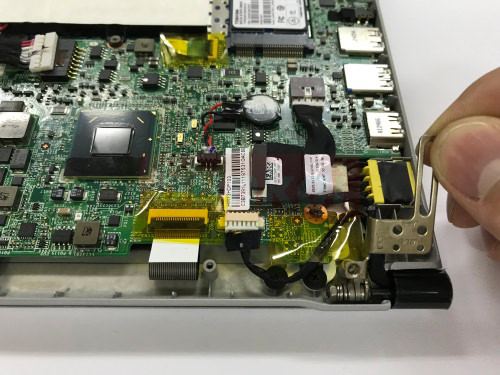
[Lavie Z PC-LZ750JS LCD replacement 14]
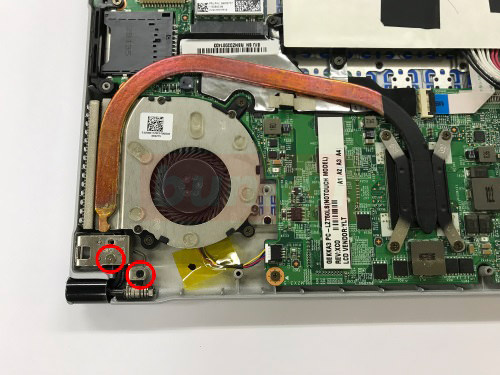
Why do we need to remove the fans?It seems, there is a wiring (Wi-Fi cable) on the hinge side here, and the wiring is in a state that does not come off by the fact that there is a fan.
So I will remove the fan, but let's remove all the screws of the red circle part.
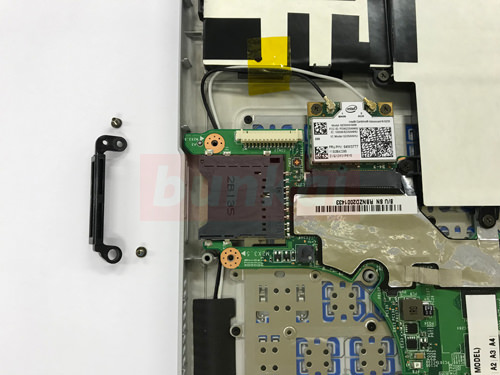
[Lavie Z PC-LZ750JS LCD replacement 15]
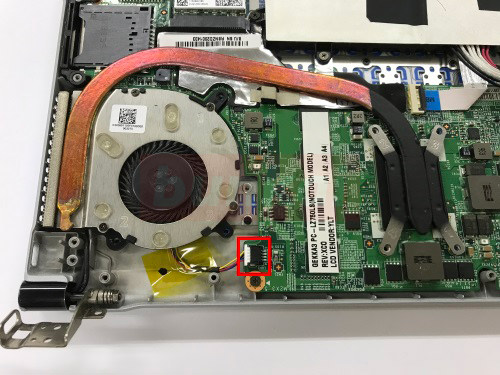
The fan connector and the motherboard are connected, but they are pulled out and disconnected.
[Lavie Z PC-LZ750JS LCD replacement 16]
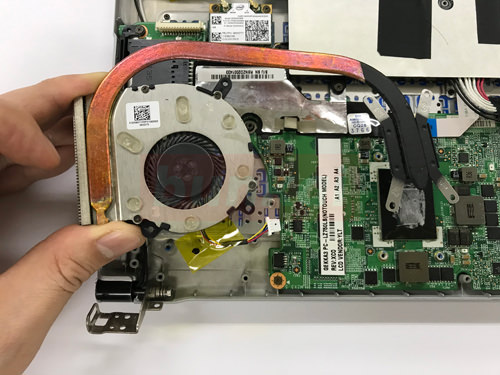
The fan could be removed.
[Lavie Z PC-LZ750JS LCD replacement 17]
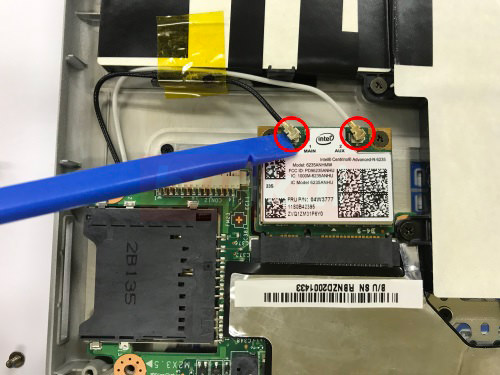
The Wifi cable (black, white) which was not seen earlier has come into view, but it has also slipped under the base (motherboard).
Let's remove the screw of the red circle part.
[Lavie Z PC-LZ750JS LCD replacement 18]
When the screw is removed, the black part comes off as it is.
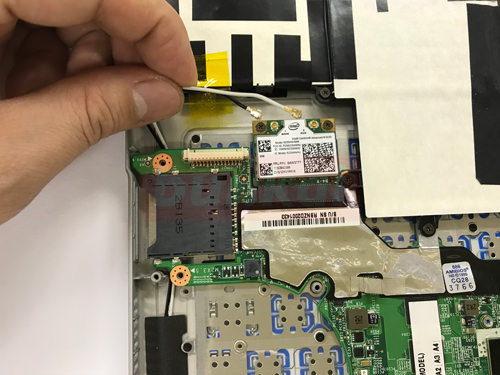
[Lavie Z PC-LZ750JS LCD replacement 19]
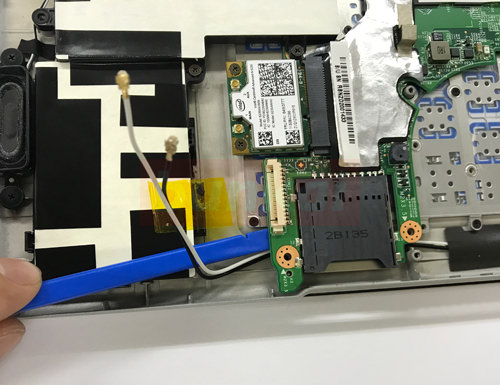
This is a Wifi terminal and a cable extending from the liquid crystal is connected, but it is possible to remove both if you lift from the bottom to the top as shown in the image.
[Lavie Z PC-LZ750JS LCD replacement 20]
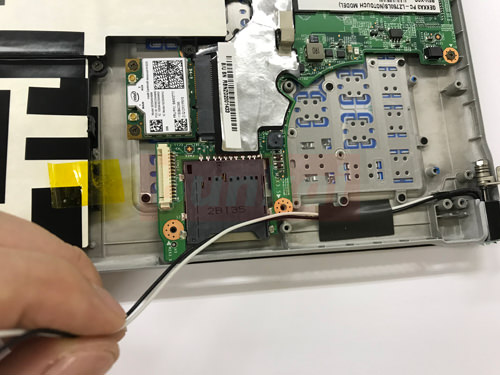
The Wifi cable could be removed from the terminal.
[Lavie Z PC-LZ750JS LCD replacement 21]
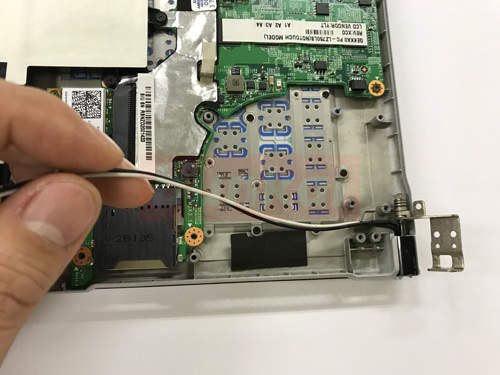
The cable is still lurking under the motherboard, but when you remove all the motherboards, it's hard, so it's a little bit sloppy.
Lift the motherboard as shown in the image and pull the cable out of the gap.
[Lavie Z PC-LZ750JS LCD replacement 22]
If you can pull the cable out from under the motherboard, then peel off the black tape on the way.
[Lavie Z PC-LZ750JS LCD replacement 23]
I was able to remove the Wifi cable.
[Lavie Z PC-LZ750JS LCD replacement 24]
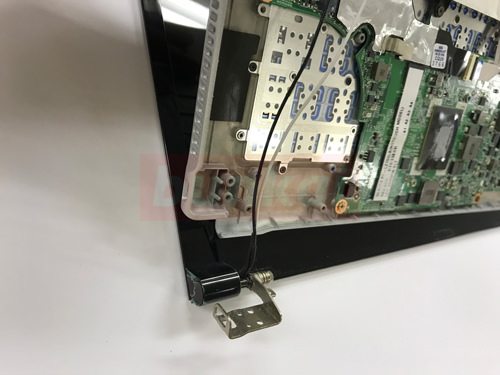
The rest is pulled out from the liquid crystal side of each body as shown in the image.
(It's OKAY to do the opposite.))
[Lavie Z PC-LZ750JS LCD replacement 25]
It was possible to separate the liquid crystal and the main body side.
In the case of upper body replacement (assembly replacement), replace it with the prepared part, and it is completed if it is incorporated in the original procedure.