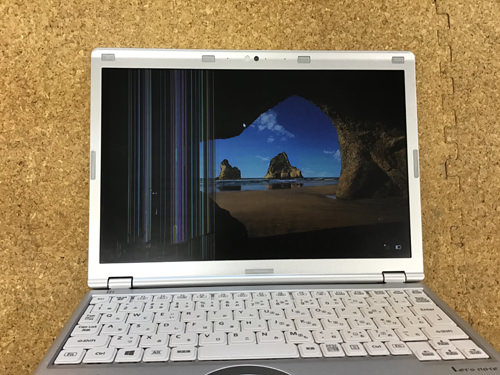
We have repaired the lcd crackof Panasonicn laptop Let's note CF-SZ6.
I would like to publish the decomposition method, but if liquid crystal replacement is necessary, such as liquid crystal cracking, there is a line on the screen, liquid crystal replacement of CF-SZ6 is possible if it can be performed according to the following procedure.
I can't repair it myself!You can request from the banner below.
Tool used to disassemble Let's note CF-SZ6
[Let's note CF-SZ6 LCD repair and disassembly method 1]
Panasonic Let's note CF-SX6 has various types, and there are models ranging from 150,000 yen to 300,000 yen due to differences in CPU and specs!
If you can change the LIQUID Crystal by yourself, you can do cheap repairs, so if you are confident in your arm, please try it.
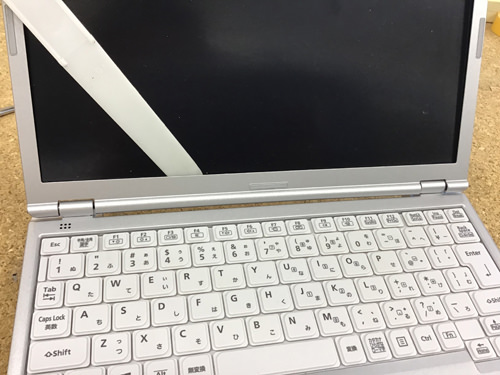
First of all, it is a state in which the power is turned on to check the state of the PC, but you can confirm that Windows is activated in the part reflected.
In such a case, it is possible to use the laptop as usual by replacing only the liquid crystal panel.
If there is nothing on the screen and you are concerned about whether there is any data left, it is recommended to look at it on an external monitor.
A dedicated cable for HDMI and D-SUB15 pins is required, but it is possible to check the presence or absence of data by projecting it on a TV or monitor.
[Let's note CF-SZ6 LCD repair and disassembly method 2]
Be sure to remove the battery first when disassembling your computer.
The battery comes off by sliding the knob of the arrow part inside the inside of the main body.

[Let's note CF-SZ6 LCD repair and disassembly method 3]
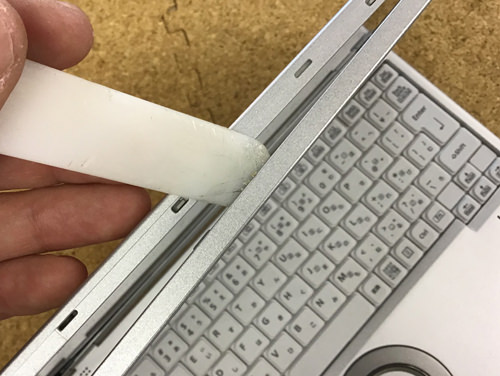
From here, the liquid crystal side is disassembled, but the first step is to remove the frame attached to the surroundings of the liquid crystal.
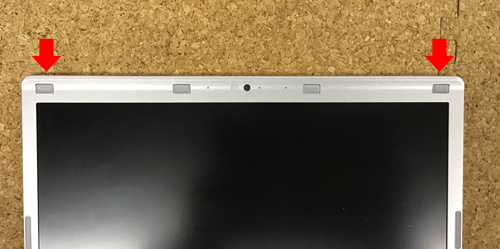
Because the screw is hidden in the arrow part, I use a sharp tool such as a tweezer to remove the rubber of gray.
[Let's note CF-SZ6 LCD repair and disassembly method 4]
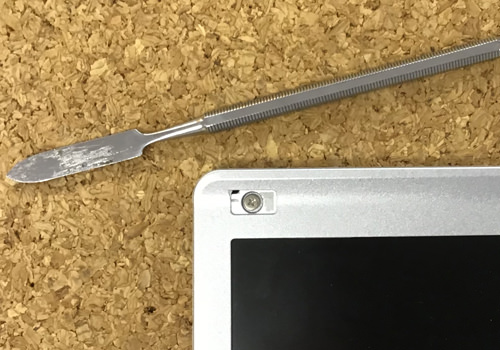
I was able to confirm that there is a screw when I use a tool like the image and remove the rubber.
There are four rubber stakes in all, but there are no screws because the part other than the arrow becomes a dummy.
So remove the leftmost, rightmost rubber and remove the screw using the Phillips screwdriver.
[Let's note CF-SZ6 LCD repair and disassembly method 5]
If it is possible to remove the screw, the frame itself will be disassembled with a special tool.
If you are new to disassembling a personal computer, this may be difficult, but if you can remove the nails in one place, you will only have to repeat the same task.
The structure is only fixed with plastic claws on the frame and back cover.
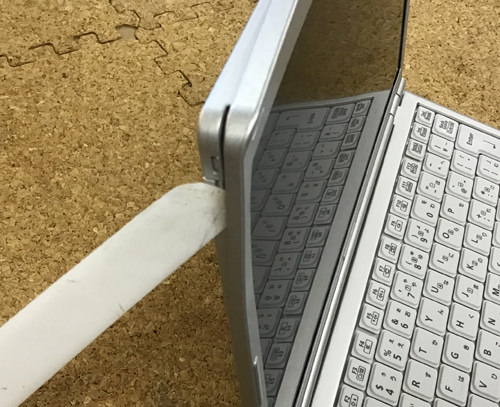
First, insert the plastic tool into the gap between the frame and the back cover as shown in the image and slide it down.
I think it will be pinched soon, but there is a plastic claw inside there.
I think that there is a feeling that the nail comes off if I make it twist lightly while grasping the frame.
[Let's note CF-SZ6 LCD repair and disassembly method 6]
If you can remove the plastic nail sparingly, please remove the nail to the lower side as it is.
I think that there is a recess on the side side of the back panel, but it will be that the claw of the frame side is caught in the part.
Let's remove the opposite side by the same procedure.
[Let's note CF-SZ6 LCD repair and disassembly method 7]
This is the upper side, but it is exactly the same as the capacity that removed the side side of the previous, so we will disassemble it.
[Let's note CF-SZ6 LCD repair and disassembly method 8]
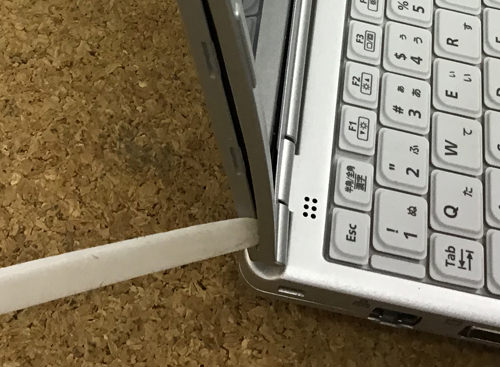
The lower side must also be removed, but the procedure is a little different from the top and left and right.
It is an image that pulls the frame toward the front by inserting the tool as in the image, but it is necessary to be careful because the frame will break if you apply too much force.
[Let's note CF-SZ6 LCD repair and disassembly method 9]
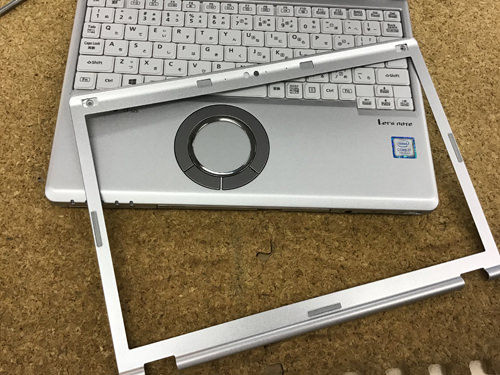
I was able to remove the frame from the main body.
[Let's note CF-SZ6 LCD repair and disassembly method 10]
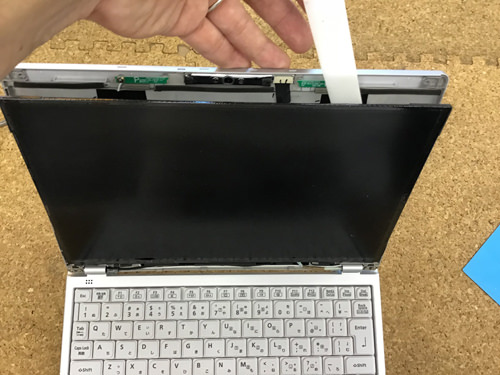
The CF-SZ6 LCD panel is not screwed.
(Most laptops are secured with screws.))
It is made to knock down slowly from the upper side to the keyboard side (front) as shown in the image, but because the cable is connected to the back side of the LIQUID PANEL, it knocks it down while paying attention to disconnection etc.
[Let's note CF-SZ6 LCD repair and disassembly method 11]
The LCD panel is completely laid on the keyboard.
There is a black sponge, and if you look closely, the back side of the LCD panel is mirrored.
There are various types of LCD panels on laptops, but it is very rare that the back is mirrored.

[Let's note CF-SZ6 LCD repair and disassembly method 12]
The LCD cable extending from the motherboard is still connected to the LCD panel.
Please note that if you damage or disconnect this cable, you will have a line on the screen or the screen will not be reflected.
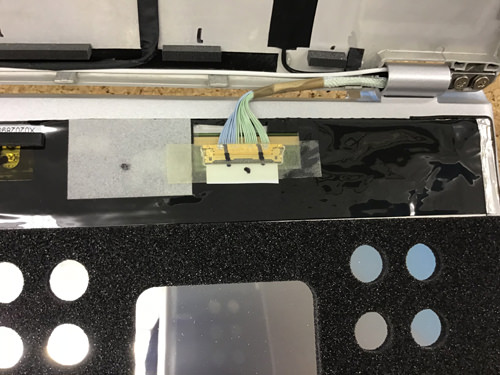
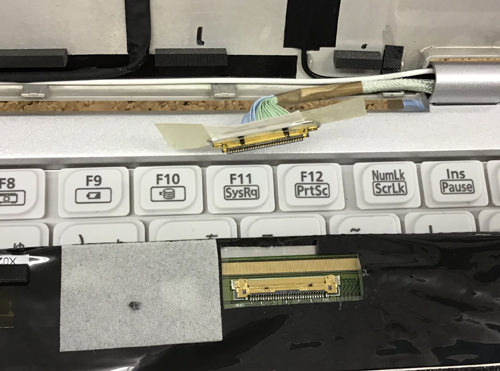
[Let's note CF-SZ6 LCD repair and disassembly method 13]
Instead of pulling out the cable as it is, first peel off the tape that covers the connector.
Can you confirm that silver nails are also happening when you peel off the tape?
In the image, it is an image to peel off the tape, cause a silver claw (hook) and pull out the cable though it is happening together.
So, please slide the cable after this state.
If you pull out the cable even though the silver claws (hook) are not occurring, it will damage the cable, so be careful!
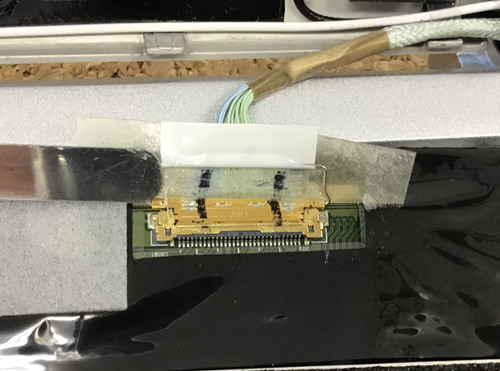
[Let's note CF-SZ6 LCD repair and disassembly method 14]
The LCD cable could be removed from the panel.
I think that only the liquid crystal panel was able to be removed from the main body if the process up to this point was able to be done accurately.
After that, the liquid crystal replacement will be completed if the parts attached to the original liquid crystal such as a black sponge are transplanted into the liquid crystal panel prepared, and incorporated in the original procedure.