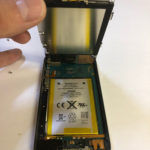
Let's replace the battery by yourself when the battery (battery) of iQOS decreases quickly!I think that there are many people who think, but there is no official parts sale as iQOS genuine product.
So I'm looking for a way to replace the battery by relying on the information of the Internet and my intuition,
Be careful because replacing the battery in the wrong way is very dangerous.
Check the structure of the iQOS battery
[iQOS battery replacement, battery replacement 1]
The decomposition method up to this point can be confirmed by the pocket charger decomposition method.
Only the battery has been removed from the ICOS Pocket Charger.

[iQOS battery replacement, battery replacement 2]
Peel off the cushion tape covering the battery.

[iQOS battery replacement, battery replacement 3]
Peel off the coating covering the battery body.

[iQOS battery replacement, battery replacement 4]
It is a state in which the cover covering the battery body is peeled off, but this is the prototype.

[iQOS battery replacement, battery replacement 5]
It is fixed with tape to the part extending from the lead wire as in the image when the coating is peeled off,
Let's peel off the white paper tape.

[iQOS battery replacement, battery replacement 6]
When it was possible to remove the protective film sheet of orange, the part where the lead wire was soldered came into view.

[iQOS battery replacement, battery replacement 7]
There are parts made of black sponge at both ends, but it is possible to remove it easily when the tape is pulled outward because it is only fixed with double-sided tape.

[iQOS battery replacement, battery replacement 8]
Both are in a state of removing the black parts of the sand.
The battery used at home has a projection on the positive side and the negative side is flat, but when you check it, both are flat, and you can see that the tip part has an iron part called a tab.

[iQOS battery replacement, battery replacement 9]
The battery on the left is tabless and the battery on the right side has a tab.
There is a tab with an iron plate at the tip.
The left side is the battery used for the pocket charger, and the right side is the battery used for the holder.

[iQOS battery replacement, battery replacement 10]
This is the disassembly of the iQOS holder.
The decomposition method up to this point can be confirmed by the pocket charger decomposition method.
The battery of the pocket charger is a connector connection, but the battery of the holder is soldered to the base.
The suppressed bracket in the arrow part is able to be removed when lifted to the upper side.

[iQOS battery replacement, battery replacement 11]
It is a state in which the metal fittings are removed and the battery itself is lifted up a little.

[iQOS battery replacement, battery replacement 12]
It is a state in which the battery was raised further as it is.

[iQOS battery replacement, battery replacement 13]
The battery tip (tab) is soldered to the base.

[iQOS battery replacement, battery replacement 14]
It is a photograph from an angle, but I can see that it is soldered to the base, but I remove it here.

[iQOS battery replacement, battery replacement 14]
If you use soldering soldering and remove it cleanly, you will form a cavity like this.
Insert the tab of the battery to be used for replacement, assemble the solder as the original, and finish.

[iQOS battery replacement, battery replacement 14]
The upper side is a battery of iQOS genuine, it is a battery prepared by the lower side.

[iQOS battery replacement, battery replacement summary]
ICOS has batteries in both the pocket charger and holder, but honestly it is not recommended to do it yourself.
I think that it is not a problem if anyone can easily replace it like the battery used at home, but it is not for beginners when soldering as described above is necessary.
If you don't have any specialized knowledge, please don't do it because there is a risk of battery explosion or injury!
You can buy useful items such as the following now!


