If you're having trouble with symptoms such as the iPod Touch 6th generation battery is fast and you can't have a charge, you might be able to solve it with this disassembly repair method.
Although there is a high probability that the above contents will be improved by replacing the battery, the iPod Touch 6th generation battery is not a connector connection like the iPhone, repair difficulty is high because it is soldered to the base.
So, let's replace the battery of the iPod Touch 6th generation by yourself!If you think that it is better to make a decision after having you look through the eyes.
If you can't replace the battery well, it's possible that the power won't turn on or the data will fly, so if you're even a little worried, please consult a repair shop!
The tools used to disassemble are as follows:
[iPod Touch 6th generation battery replacement 1]
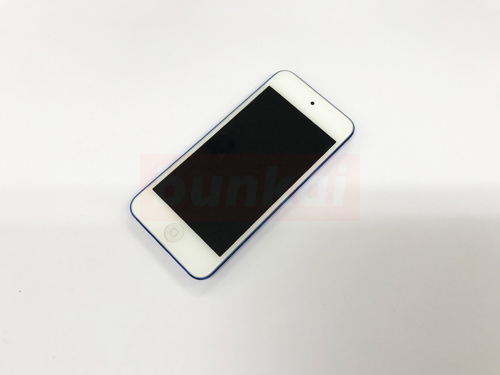
The iPod Touch 6th generation looks very much like the iPhone, but no screws are used for the exterior.
In the case of an iPhone, there are two screws on the bottom of the home button and decomposition starts from there, but the iPod Touch 6th generation will start disassembling as it is.
Since the battery cannot be removed without disassembling it to the deepest part of the main body, I would like to remove it from the liquid crystal side first.
[iPod Touch 6th generation battery replacement 2]
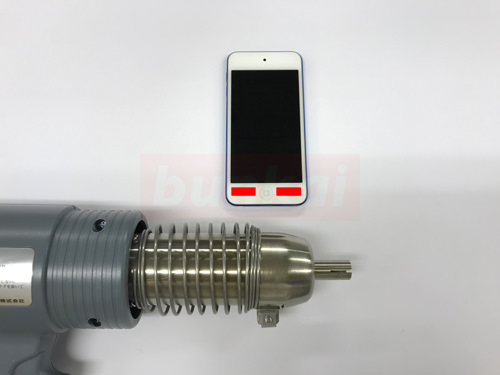
The iPod Touch 6th generation screen is attached to the main body with double-sided tape, so you can remove it while softening the tape by adding heat.
Underneath the iPod is called a heat gun, but if you make it easy to understand, it is a powerful thing of the dryer.
I use this heat gun to apply heat, but i will add heat because the tape is attached to the lower red part of the iPod.
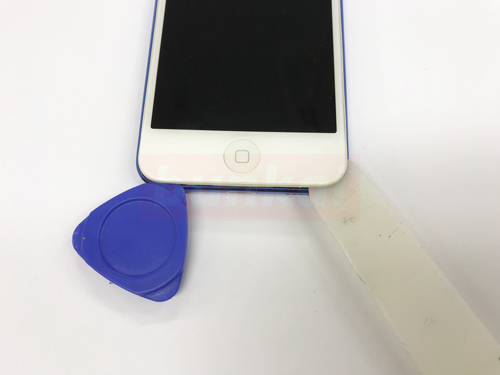
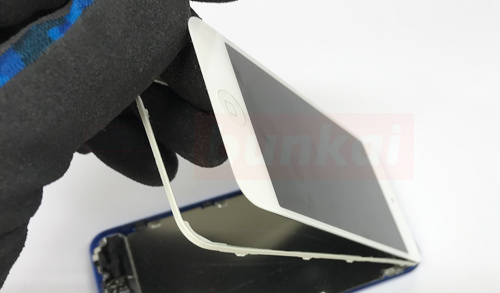
[iPod Touch 6th generation battery replacement 3]
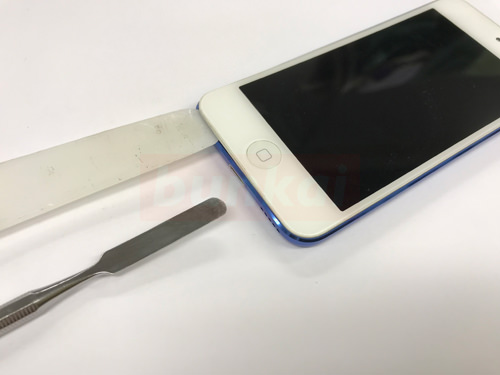
After applying heat, the tool will be used to open it, but because the gap to insert the tool is narrow, it is easy to disassemble if you use different tools.
In the image, a metal tool is inserted at first, and a plastic spatula is replaced where it is raised even a little.
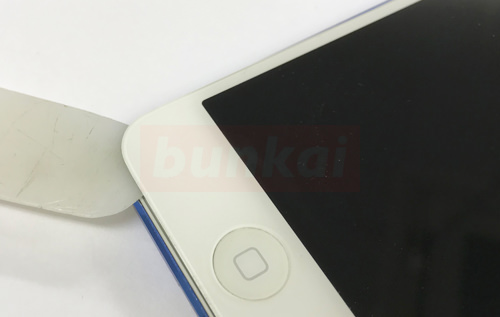
[iPod Touch 6th generation battery replacement 4]
This time we are opening the opposite side.
Because the part that i opened earlier will close if nothing is inserted, it is good to put a pick, a card, etc. between.
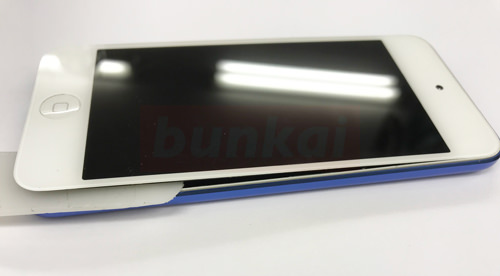
[iPod Touch 6th generation battery replacement 5]
It also seems to have a tool plugged in the same place, but it's not really.
Since it is better to check the structure of this area in the image first, please check the structure in STEP 8 once.
There is a frame under the LCD panel, but this STEP 6 plugs it directly below the liquid crystal, not below the frame.
[iPod Touch 6th generation battery replacement 6]
The tool is inserted between the LCD and the frame.
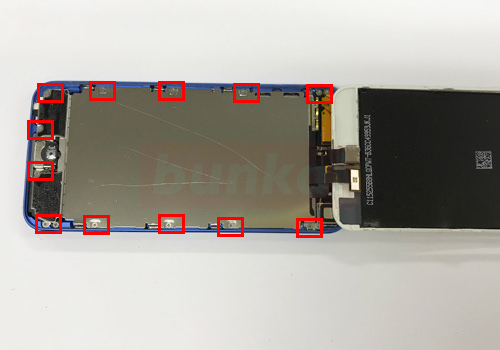
[iPod Touch 6th generation battery replacement 7]
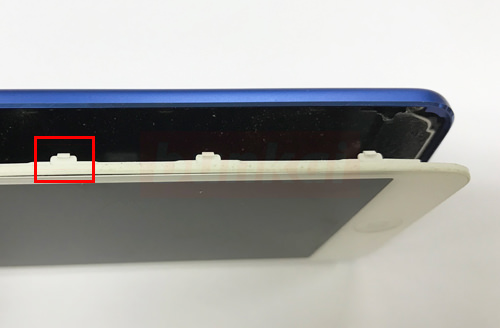
In the image, the liquid crystal is removed for each frame, but the frame is caught in the main body with a plastic claw in the red frame part.
[iPod Touch 6th generation battery replacement 8]
The structure of the liquid crystal is like this.
Originally, it is easier to understand if you remove each frame, but the claws of the frame may be hard, so this time I am taking a picture like this.
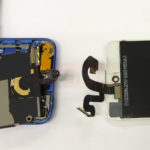
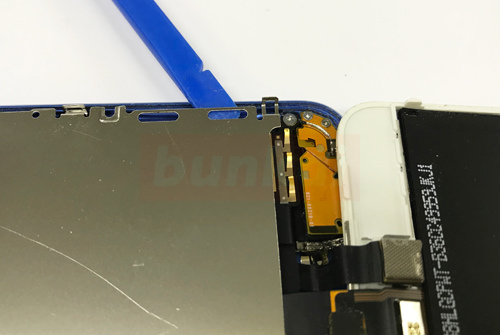
[iPod Touch 6th generation battery replacement 9]
It is possible to remove the liquid crystal for each frame, but the cable of the liquid crystal is still connected to the base, but it is necessary to be careful because it leads to the disconnection of the cable if you pull it forcibly.
Let's slowdown it like the image.
The battery is not visible yet, but it is under the silver plate.
The plate is secured with screws, so let's remove all the screws in the red frame.
[iPod Touch 6th generation battery replacement 10]
The part that is caught by the nail can be easily removed by using a tool.
[iPod Touch 6th generation battery replacement 11]
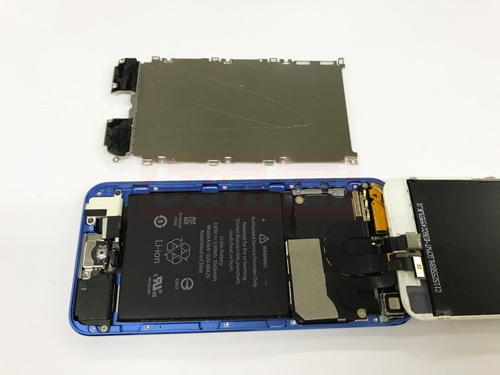
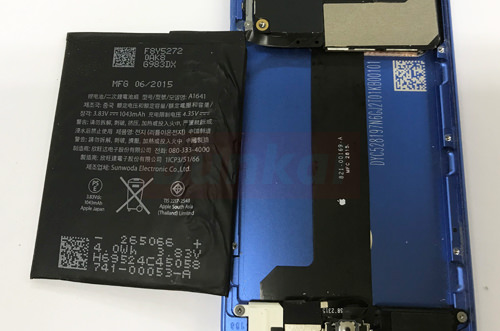
If you remove the plate, you can see that there is a battery.
[iPod Touch 6th generation battery replacement 12]
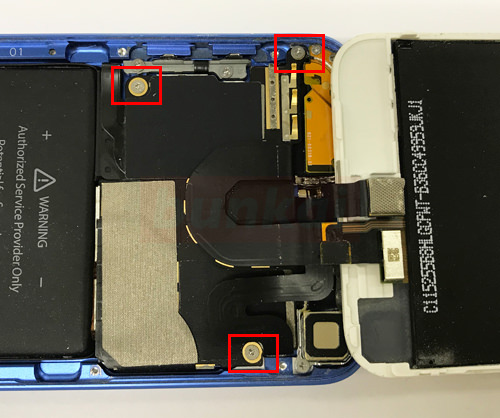
This part is where there is a base of the iPod, but first let's remove all the screws of the red frame part.
[iPod Touch 6th generation battery replacement 13]
The battery is affixed to the main unit with two double-sided tape rows, but only one side can be easily peeled off.
You can see the tape-like at the tip of the tool, but the tape is grabbed and peeled off.
[iPod Touch 6th generation battery replacement 14]
The tape is elastic, but if you pull it slowly, it will stretch like an image.
[iPod Touch 6th generation battery replacement 15]
If you try to pull it quite slowly, it will stretch to this point.
If you continue to pull further while maintaining this state, the tape will eventually peel off cleanly.
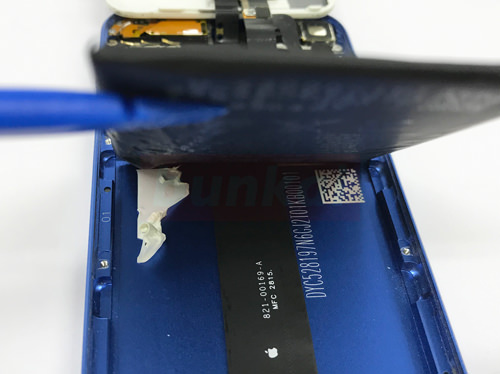
[iPod Touch 6th generation battery replacement 16]
A spatula is inserted under the battery, but the tape is attached here as well.
However.Because there is no tape that extends earlier, there is no choice but to peel it off by oneself.
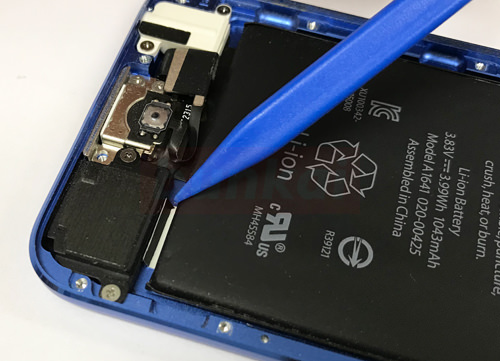
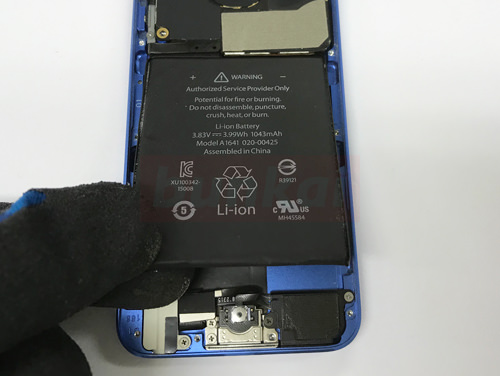
[iPod Touch 6th generation battery replacement 17]
The battery will lift when it peels off to some extent, but the battery connector is connected to the base, so be careful when handling it.
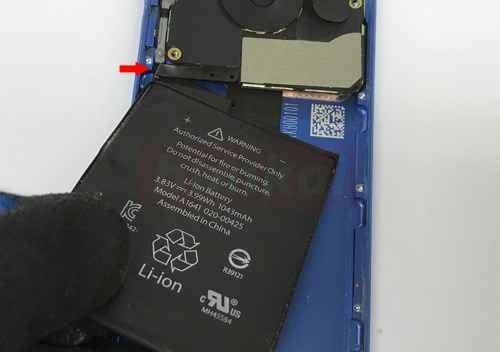
[iPod Touch 6th generation battery replacement 18]
Even if the tape under the battery can be peeled off, it is still connected.
Let's move a little because it is difficult to disassemble as it is.
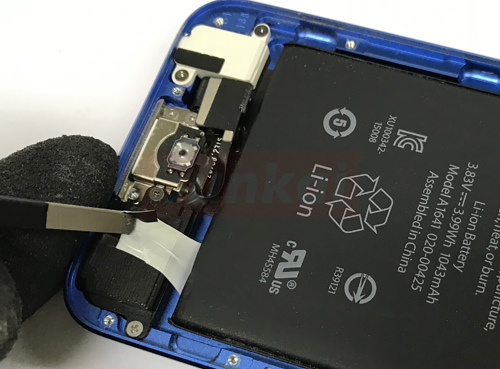
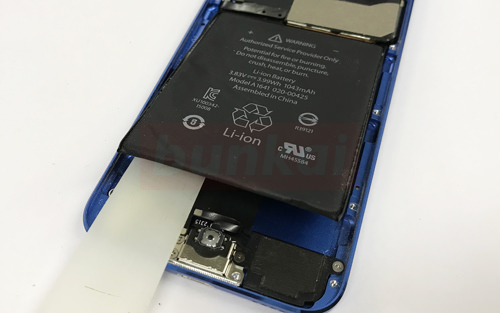
[iPod Touch 6th generation battery replacement 19]
Pull it out to the left side of the body while pulling it back a little like the image.
However, if it is left as it is, there is a possibility that the wiring (arrow part) in the middle will be cut, so let the cable out so as not to twist the reverse.
How to do, if you grab the battery body and rotate it from the left side to the right side, the cable will extend and the battery can be released.
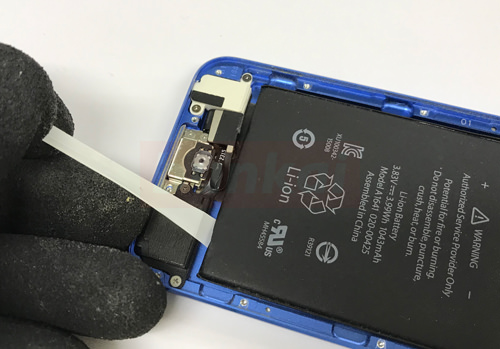
[iPod Touch 6th generation battery replacement 20]
In this way, i was able to take the battery out of the body, but the battery is still connected.
The work ahead is that the repair difficulty is high, and it is necessary to repair using solder.
Because the battery is very dangerous when installed or peeled off in the wrong way, it is impossible to disassemble any more!If you think that, let's put it back.
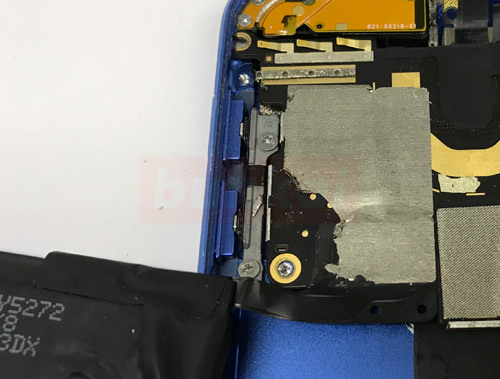
[iPod Touch 6th generation battery replacement 21]

The connection part of the battery is hidden by black tape, so turn it over and peel it off, but don't peel it off with a metal tool.
In addition, please be careful because there is a possibility that it will shortify if the metal touches the base by any chance.
[iPod Touch 6th generation battery replacement 22]
Because the tape did not peel off neatly, there is a wreckage of the tape.
[iPod Touch 6th generation battery replacement 23]
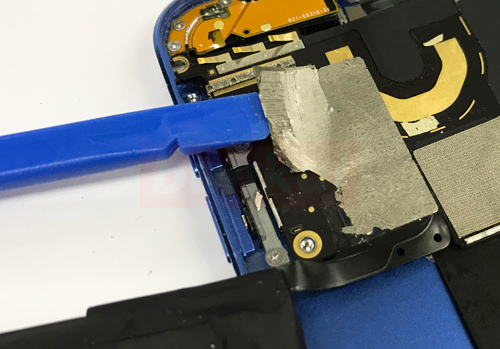
Using plastic tools and infants, the tape is peeled off cleanly until the connection part is visible.
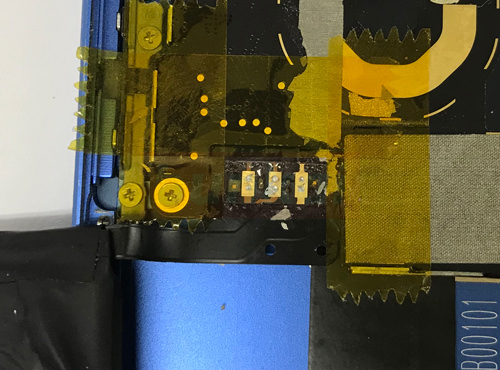
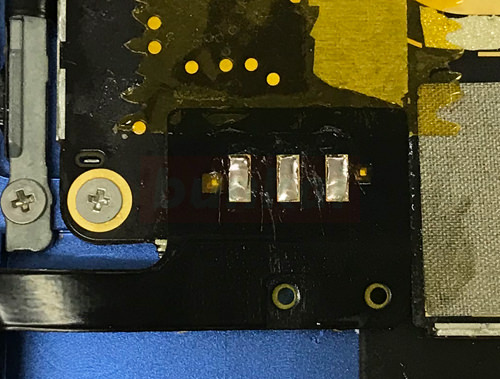
[iPod Touch 6th generation battery replacement 24]
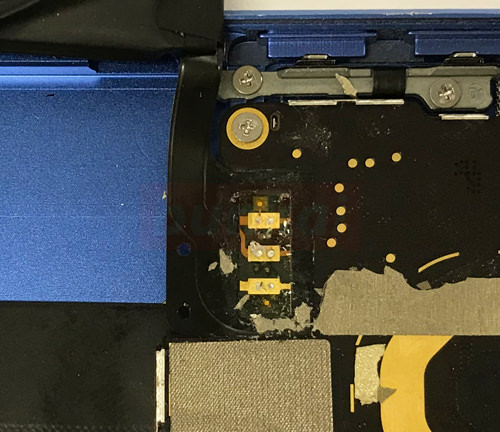
The connection point is now visible.
There are three golden parts, but this part is attached with a solder, and electricity is supplied.
It is the flow of work to be done from now on, but this part is removed using a solder or heat gun, and it becomes the flow to install a new battery.
[iPod Touch 6th generation battery replacement 25]
Because there is a possibility that the heat hits the unrelated part, I cured the surroundings with Kapton tape.
[iPod Touch 6th generation battery replacement 26]
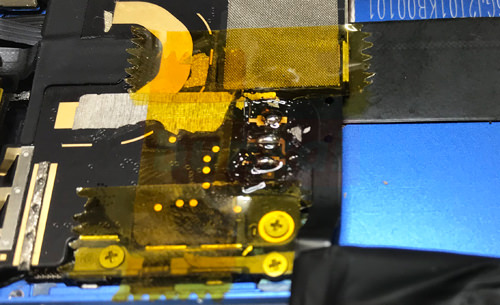
It is a state in which the solder is piled up on three foundations.
I will clean this solder using a binge line.
[iPod Touch 6th generation battery replacement 27]
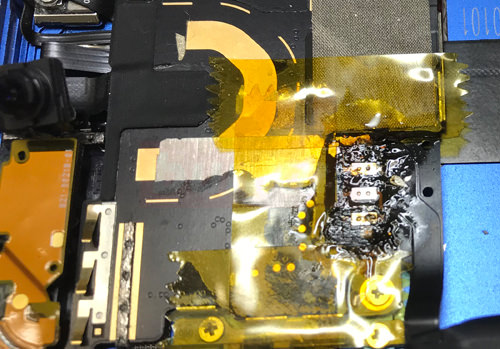
It is a state in which the solder was removed by the solder suction line.
After that, I apply a heat gun and pull it and remove it.
[iPod Touch 6th generation battery replacement 28]
The cable could be removed, so it was able to completely shut off the electricity.
[iPod Touch 6th generation battery replacement 29]
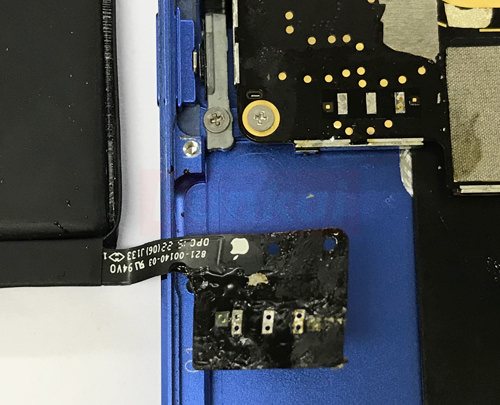
The new battery cable is installed on the ground.
If you do not recognize the battery even if you can solder well on the outside, please check once because there is a possibility that the initial failure of the battery or the solder is not done well.
[iPod Touch 6th generation battery replacement 30]
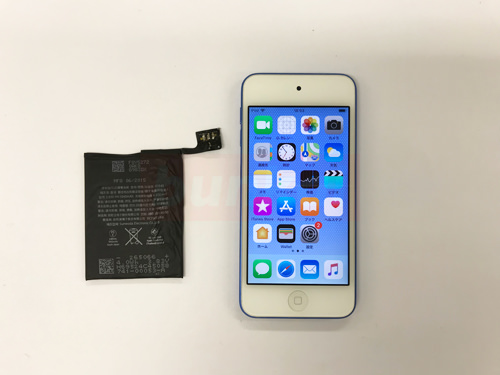
I was able to check the start-up safely though it is a state in which the battery was replaced and the power was turned on.