Microsoft Tablet PC Surface Go will be released how to change the LCD.
Screen cracking, the line has entered the screen, if the touch panel does not respond, there is a high possibility that a liquid crystal replacement is necessary, but data remains just by changing the LIQUID crystal, so if repair is successful Surface as before It is possible to use Go.
If you still have a warranty such as Microsoft Complete, please contact Microsoft once.
If the warranty applies, it is better to ask Microsoft without repairing it yourself, but the data will be erased, so you need to back it up yourself.
On the other hand, if you want to repair it yourself, or if you want to repair it at a private repair shop, you can repair it with data left behind, so please refer to it if you don't want to lose the data.
[Surface Go LCD replacement disassembly repair method 1]

Surface Go's LCD screen is attached to the main unit with a powerful double-sided tape, so it cannot be easily removed.
First of all, let's remove all accessories connected to the main unit, such as Micro SD and USB, before disassembling.
A special tool is required to remove the liquid crystal, but the orange one is the suction cup and the other is called a heat gun.
Suction cups are often used in glass shops, but they are used to pull up glass.
The heat gun of another tool is a powerful thing of the dryer if it says clearly, but it is necessary to be careful because there is a risk of burns if the temperature of the heat can be considerably higher than the dryer.
In addition, it is possible to substitute even dryers in the home, but considering the work efficiency, we recommend a heat gun.
Suction cups cannot be used if the touch panel is broken or the touch panel is cracked, so there is no need to prepare them.
[Surface Go LCD replacement disassembly repair method 2]
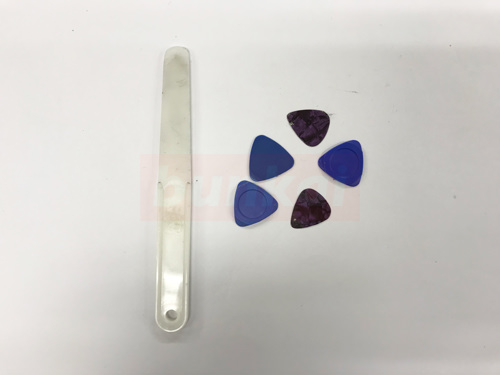
This is also a tool, but it is a plastic spatula and a pick.
There are many things that can be substituted for picks, and if it is thin and somewhat hard, it can be substituted, and it is convenient to have a point card that is no longer needed.
[Surface Go LCD replacement disassembly repair method 3]

It is the flow of decomposition, but because there is double-sided tape in the red line part, it is an image that peels off the display by applying heat.
In addition, instead of warming the entire screen at once, if you peel off from the upper right, try to heat only the upper right part.
[Surface Go LCD replacement disassembly repair method 4]
The touch panel is not cracked, and the peeling method is slightly different because it is cracked, but if it does not crack, the suction cup will increase the efficiency of the work.
However, please note that if you try to pull the touch panel forcibly with a suction cup while the heat is not hit too much, it will crack.
If the touch panel is broken and the suction cup cannot be used, there is no other way but to peel off the tool such as a spatula to force it.
Even if the liquid crystal is broken or not, it will be very difficult to peel off if you do not heat it, so be sure to prepare a dryer or heat gun.
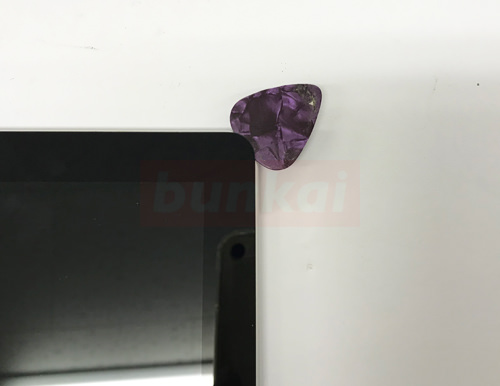
If you can float the screen in one place, let's slide the pick and spatula to the starting point there and float one lap of the screen!
[Surface Go LCD replacement disassembly repair method 5]

I was able to peel off the double-sided tape by putting the tool in one lap.
However, even if this situation is in this state, the cable is still connected internally, so please do not force the display to move.
[Surface Go LCD replacement disassembly repair method 6]
It is a state that was raised slowly in front, but you can confirm that the wiring is connected internally.
It will slowly knock down the screen and put it to sleep completely.
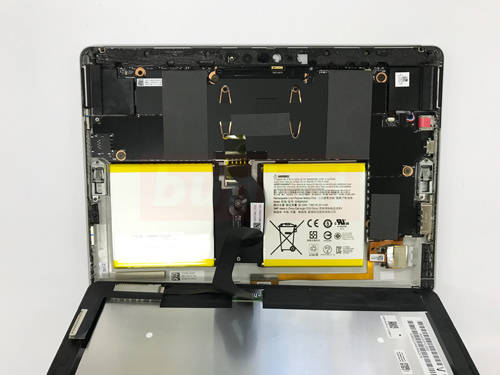
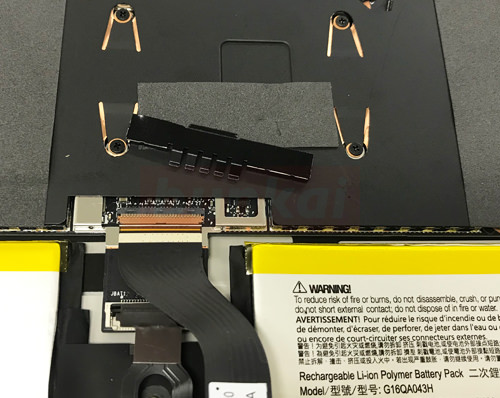
[Surface Go LCD replacement disassembly repair method 7]
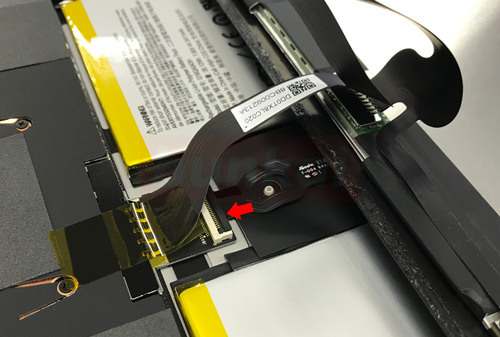
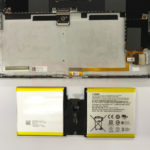
It is wired from the liquid crystal side to the base side, but the wiring of the battery is removed first.
The battery wiring is located on the underside of the LCD cable, but is connected to the connector.
Let the black nails in the arrow are raised to 90 degrees before sliding.
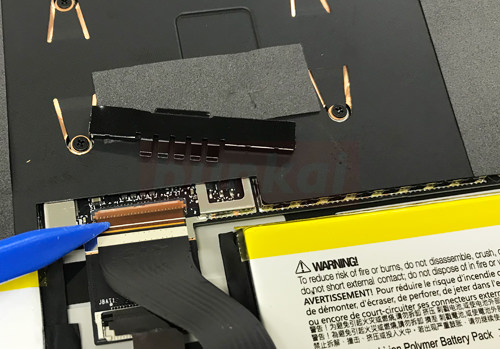
[Surface Go LCD replacement disassembly repair method 8]
I was able to remove the wiring.
[Surface Go LCD replacement disassembly repair method 9]
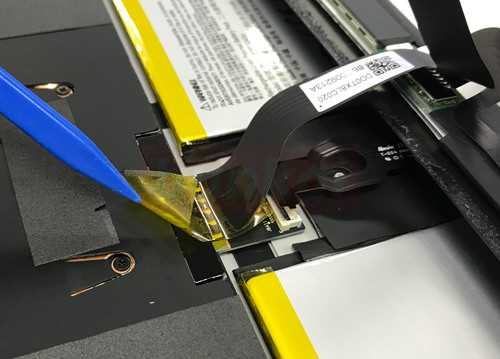
Next, remove the LCD cable, but let's peel off the yellow kapton tape.
The battery can be removed without removing the LCD completely, but it is better to remove the display considering the work efficiency.
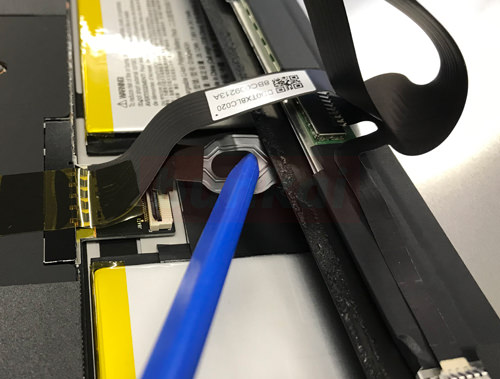
[Surface Go LCD replacement disassembly repair method 10]
There is a black cover on top of the connector, but you can remove it if you put the tool down and lift it up like the image.
[Surface Go LCD replacement disassembly repair method 11]
You can remove the cover like this.
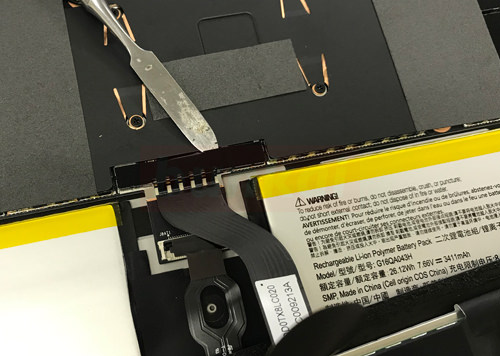
[Surface Go LCD replacement disassembly repair method 12]
The wiring is connected to the connector, but you can remove it by lifting the brown nail to 90 degrees and then pulling out the cable.
[Surface Go LCD replacement disassembly repair method 13]
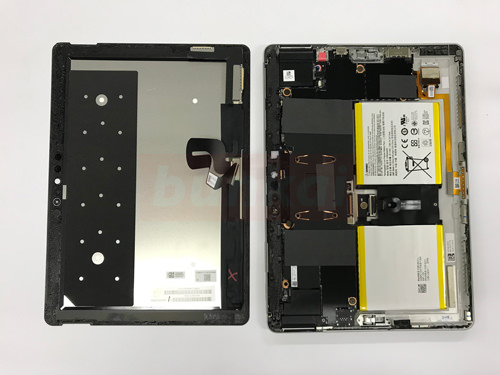
It was possible to separate the liquid crystal and the main body side.
When changing the screen, install the newly prepared liquid crystal and return it by the original procedure.
However, because the adhesive of the double-sided tape is weak, please re-attach the double-sided tape to the part where the tape was attached before fitting the liquid crystal.