Nintendo 3DS does not turn on, does not start, etc.
Nintendo 3DS Motherboard Replacement and Decomposition Procedures
[Nintendo 3DS motherboard replacement and disassembly method STEP 1]
The screw of the round part is removed by turning the inside out of the main body, but this screw does not completely go off.
[Nintendo 3DS motherboard replacement and disassembly method STEP 2]
After removing the screw, you can easily remove it by sliding the cover.
Then, I think that the battery was seen, so let's remove it.
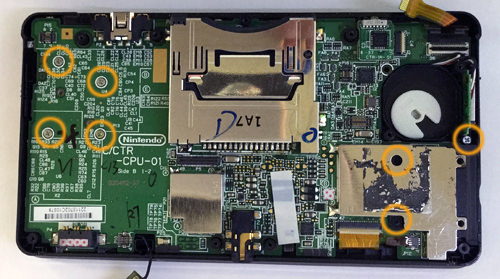
[Nintendo 3DS motherboard replacement and disassembly method STEP 3]
Be careful not to lose them because there are many screws next time.
All screws in the place surrounded by a circle will be removed, but the length and shape are slightly different, so it is necessary to check the location at the same time.
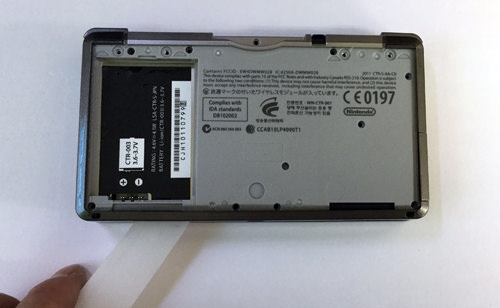
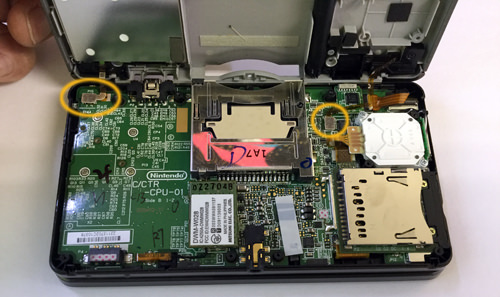
[Nintendo 3DS motherboard replacement and disassembly method STEP 4]
Even if all the screws of the previous part can be removed, the connector is connected internally, but it causes it to lift the tool into the image part.
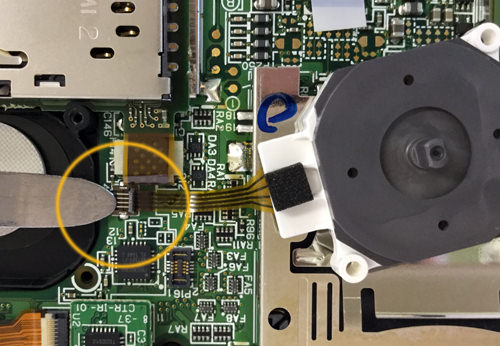
[Nintendo 3DS motherboard replacement and disassembly method STEP 9]
The slide pad is also connected by a connector, so remove the connector of the round part.
You can easily remove it if you let it slide after raising the nail.
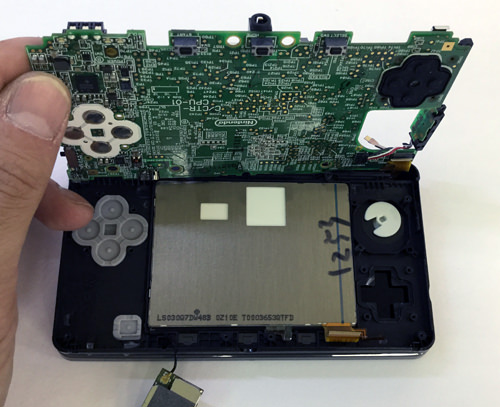
[Nintendo 3DS motherboard replacement and disassembly method STEP 10]
I was able to remove the slide pad.
There is a disk mat inside, so let's remove this at the same time!
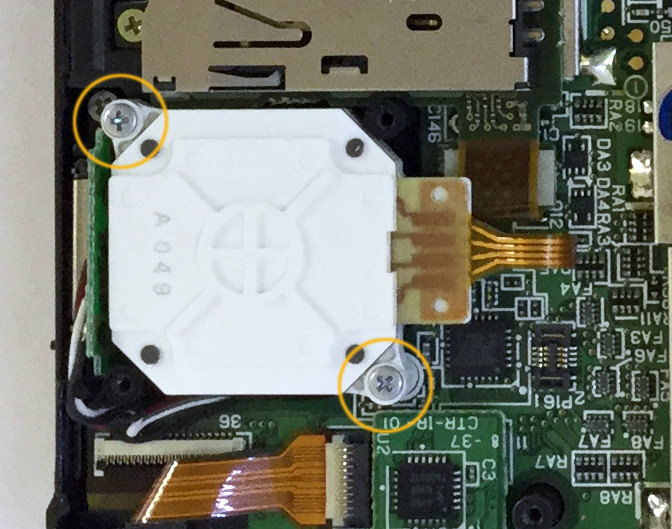
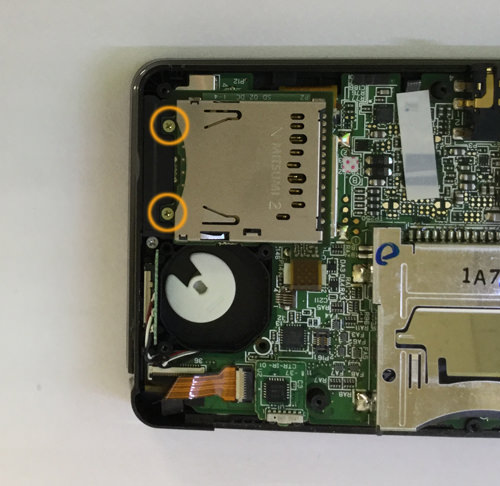
[Nintendo 3DS motherboard replacement and disassembly method STEP 11]
Next, I will remove the SD card slot, but first remove the two screws.
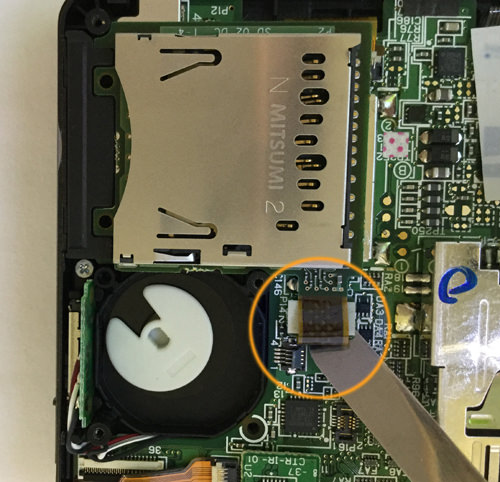
[Nintendo 3DS motherboard replacement and disassembly method STEP 12]
The connector of the SD card slot is connected to the motherboard right next to it, so let's remove the tool!
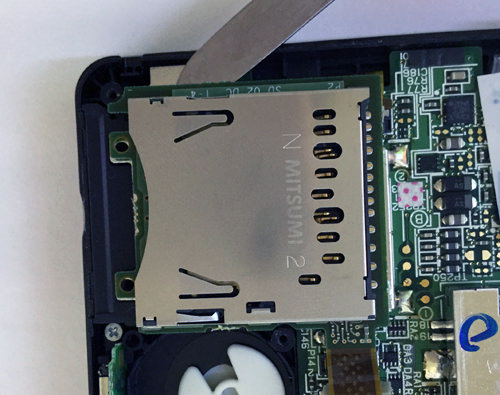
[Nintendo 3DS motherboard replacement and disassembly method STEP 13]
The SD card slot is taped to the iron plate on the motherboard, so use the tool to peel it off.
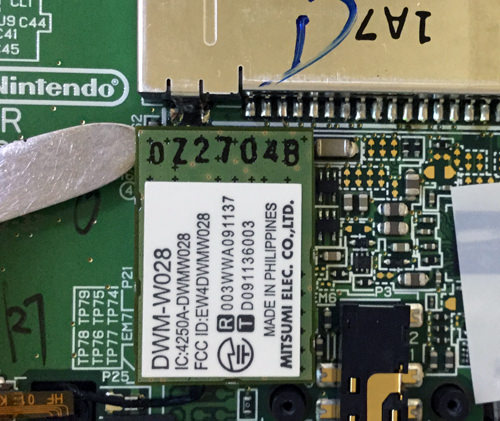
[Nintendo 3DS motherboard replacement and disassembly method STEP 14]
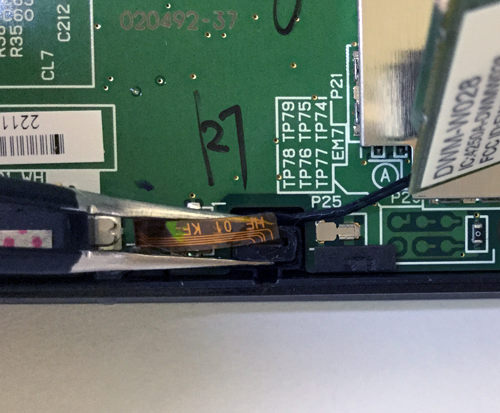
Next, I will remove the wireless LAN card, but it is easy here.
The connector is connected to the motherboard, but you can remove it if you use the tool to wake it up.
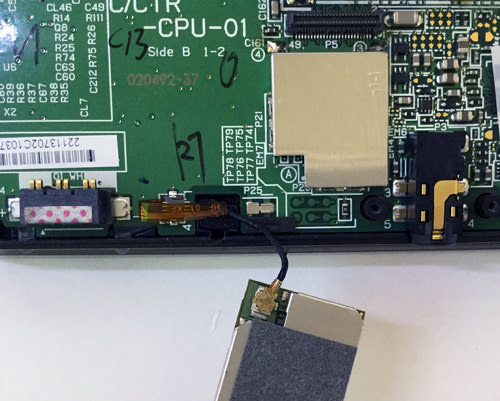
[Nintendo 3DS motherboard replacement and disassembly method STEP 15]
I was able to remove the wireless LAN card.
The antenna is connected to the LAN card, but you can easily remove it.
[Nintendo 3DS motherboard replacement and disassembly method STEP 16]
This part will be the microphone.
The orange cable is in the black rubber, but i use tweezers and pull out all the black rubber.
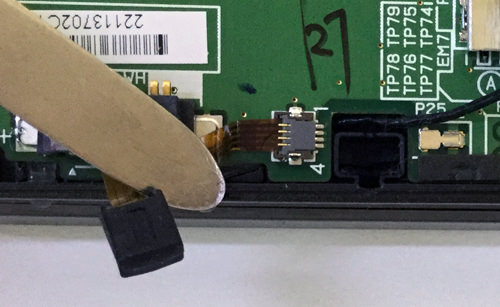
[Nintendo 3DS motherboard replacement and disassembly method STEP 17]
If you flip the orange cable above, there is a part connected to the motherboard, but you can remove it by causing the nail and then sliding it.
[Nintendo 3DS motherboard replacement and disassembly method STEP 18]
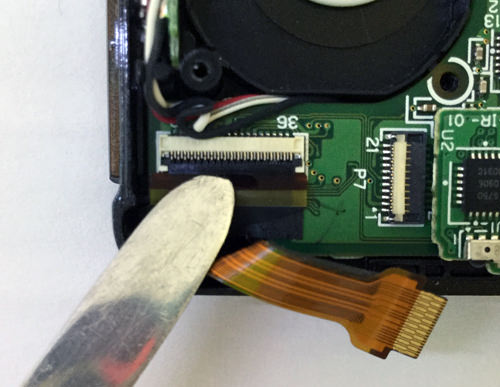
The speaker and camera cables are in this location, but they are removed.
Both can be easily removed if you pull it out from the nail of the connector.
[Nintendo 3DS motherboard replacement and disassembly method STEP 19]
The other one is removed in the same way.
[Nintendo 3DS motherboard replacement and disassembly method STEP 20]
Remove all screws in the circle.
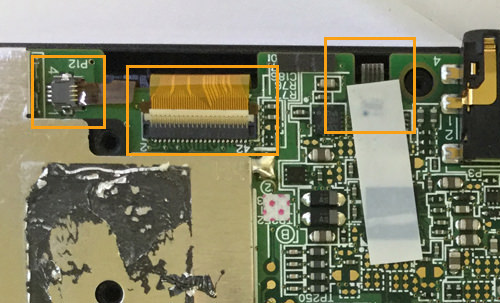
[Nintendo 3DS motherboard replacement and disassembly method STEP 21]
Remove the connector in the square, but the right part is hidden by white tape, so there is a connector when you peel off the tape.
[Nintendo 3DS motherboard replacement and disassembly method STEP 22]
You can wake up the motherboard if you try to lift it from the earphone part.
However, the back side is still connected by a cable, so please do not pull it forcibly.
It is a part that can work without putting force, but if you feel even a little hard, please check again because I think that you forget to remove the cable and screw.
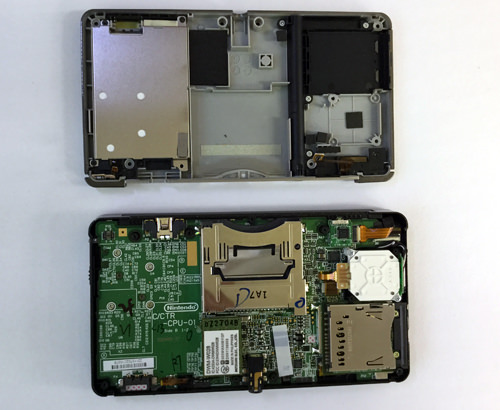
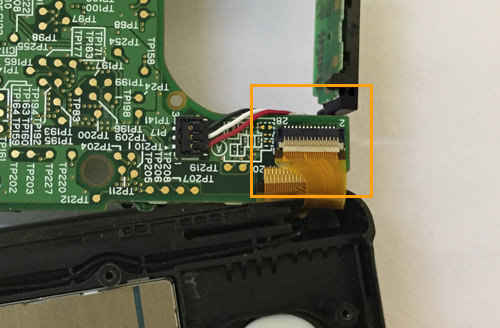
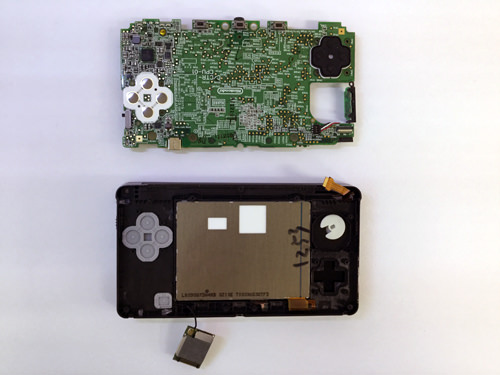
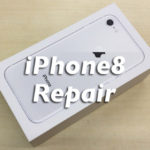
[Nintendo 3DS motherboard replacement and disassembly method STEP 23]
It is the cable connection part of the back side, but try to remove it after the nail is raised.
[Nintendo 3DS motherboard replacement and disassembly method STEP 24]
The motherboard could be removed from the main unit.

 Nintendo 3DS Motherboard Replacement and Decomposition Procedures
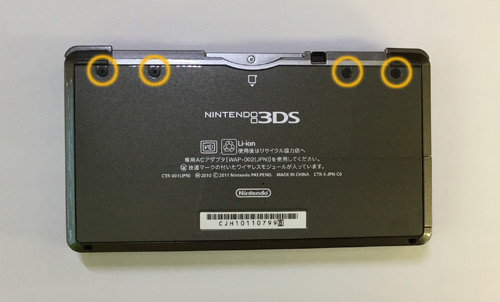
 The screw of the round part is removed by turning the inside out of the main body, but this screw does not completely go off.
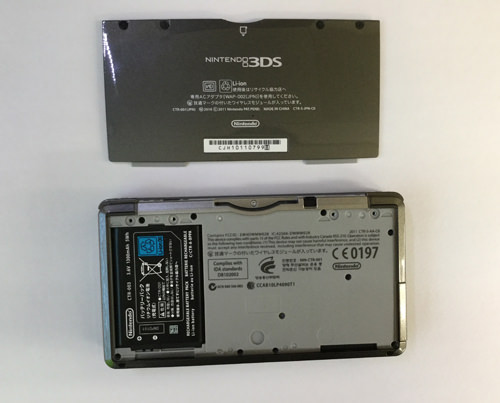
 After removing the screw, you can easily remove it by sliding the cover.
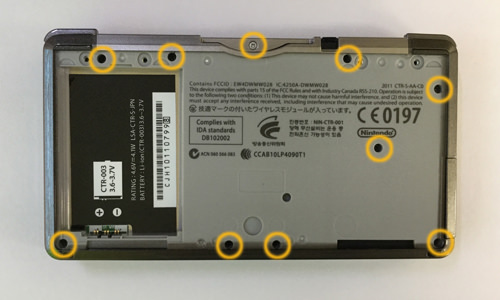


コメントを残す