The iPhoneXR was launched on October 26, 2018, but we will release the decomposition method because we disassembled immediately.
On this page, I think that it is possible to refer to if the purpose is to repair it by oneself when the liquid crystal crack, glass cracking, etc. have occurred, so if you have confidence in your arm, please challenge and see.
Decomposition is all self-responsibility, but if you can back up in case of emergency, please disassemble after taking a backup.
The iPhone XR is mainly a Y-shaped driver, although the philophilae of the iPhone has become the main.
It is a product that can not be easily purchased in the home center, but please be sure to use a special tool because there is a thing that the screw thread collapses if you try to open it with a Phillips screwdriver forcibly!
Will the data disappear if I change the LCD?
The data will not disappear just by changing the liquid crystal.
Since the data of the iPhone is recorded in the part called NAND on the logic board, the data is not lost just by replacing the liquid crystal.
However, the data is not lost only if you repair it yourself or repair it at a non-regular store.
If you want to change the liquid crystal with the data left, you want to avoid manufacturer repair because it is almost 100% data initialization when you ask Apple or an authorized service provider.
In addition, if you can take a backup in iTunes, etc., there is no problem with the manufacturer repair, but you can not take the backup, if you feel troublesome please consult a non-regular store.
The advantage of non-regular stores is that most of the repairs that are not related to the data will proceed with the data as it is.
If you can replace the liquid crystal by yourself with reference to the decomposition method below, you can use the iPhone as it is with the data up to now.
However, it is safe to back up and remember how to back up in case of a failure that you do not know when it will happen.
When replacing the lcd of the iPhone XR at Apple, it was 22400 yen.
[iPhone XR decomposition LIQUID crystal replacement and repair method STEP 1]
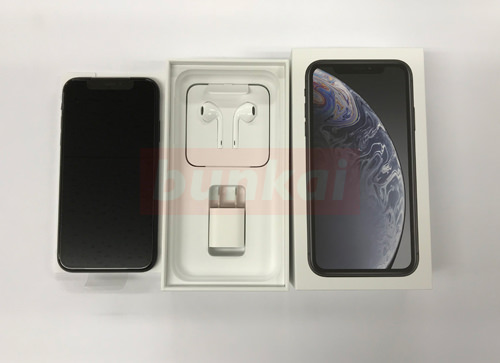
I opened the box of the iPhone XR, but the contents are almost the same as the iPhone until now?
Although it is a sense of size to be worried about, it is larger than the iPhone X that became a full-screen display, iPhone 7, width compared to the iPhone 8, etc. width, the vertical width both have become considerably larger.
iPhone 7 Plus, I think that there is no problem at all if you are using such as iPhone8 Plus, but if you are accustomed to the small size of the iPhone I felt that it takes some time to get used to.
However, it is quite convenient because there is a Way ID or there is an operation method that was not until now when I actually use it for a few days.
Then, I want to actually expose the decomposition method.
[iPhone XR decomposition LIQUID crystal replacement and repair method STEP 2]
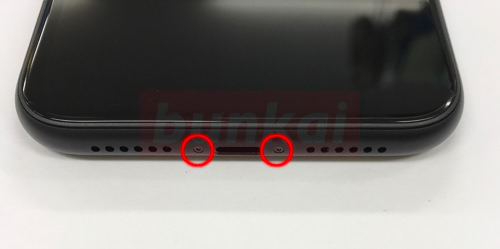
First of all, the power of the main unit is turned off, and the decomposition is started.
Since there are two screws in the lower part of the body as well as disassembly of the iPhone up to now, let's remove the screw using a dedicated screwdriver.
[iPhone XR decomposition LIQUID crystal replacement and repair method STEP 3]
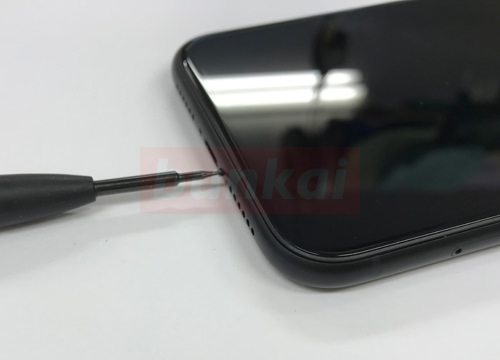
If it is not a dedicated screwdriver, the screw thread will collapse, so let's not use a Phillips screwdriver even if it is wrong!
[iPhone XR decomposition LIQUID crystal replacement and repair method STEP 4]
That's where it matters.
The relatively new iPhone has a waterproof tape on the lcd and the installation part of the main body because it is waterproof.
No waterproof tape is seen from the outside, but it is possible to see it when removing the liquid crystal.
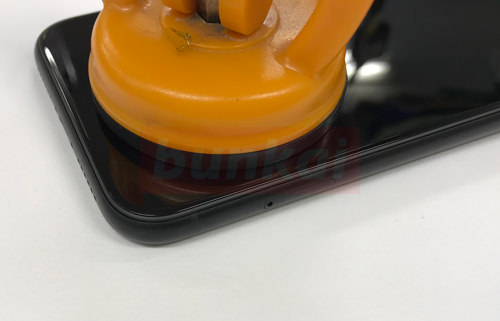
The basic way to remove the liquid crystal is the same as the iPhone until now, but in this decomposition we use an orange suction cup because the liquid crystal is not cracked.
It is how to remove the liquid crystal, but it warms the area around the liquid crystal lightly with heat such as a dryer, and then uses the suction cup to lift it.
(The reason for using the dryer is to wipe the waterproof tape inside.))
[iPhone XR decomposition LIQUID crystal replacement and repair method STEP 5]
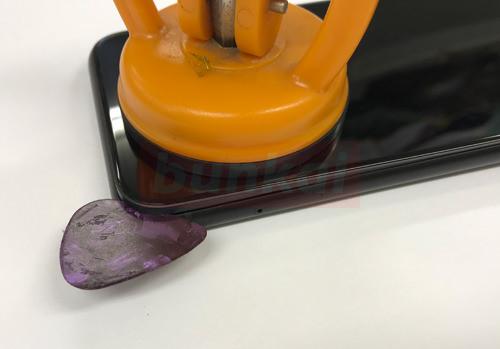
If you can lift the liquid crystal as in the image, the work efficiency is good if you insert a pick etc. in the gap,
When the waterproof tape is heated, it is easy to remove the liquid crystal.
If the suction cup cannot be used due to liquid crystal cracking, the only way is to insert a tool such as a pick directly into the gap between the liquid crystal and the main body and peel it off a little forcefully.
[iPhone XR decomposition LIQUID crystal replacement and repair method STEP 6]
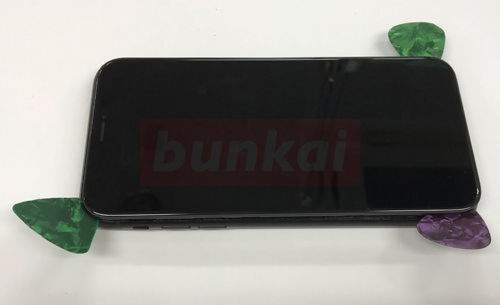
It is more efficient to insert a pick etc. into the part where the liquid crystal floats even a little, but it is a feeling like an image if it is easy to understand.
There is a waterproof tape between the pick and the pick, but it is an image that tears the waterproof tape by sliding the pick a little at a time from one floating part.
If you insert the pick too far, it may damage the internal cable, so let's slide the pick while checking the inside.
It is good to insert a pick is about several mm, but it is better to understand the internal structure first by looking at the decomposition process below.
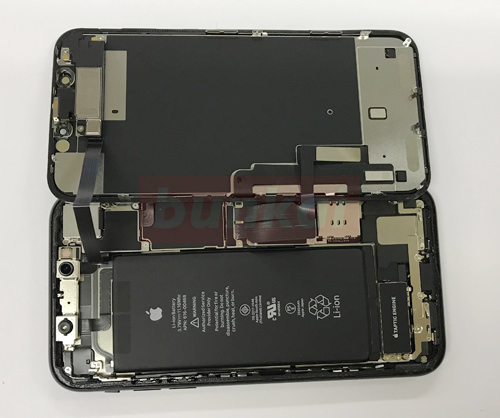
[iPhone XR decomposition LIQUID crystal replacement and repair method STEP 7]
It is possible to lift the liquid crystal to such a feeling if it is possible to insert a pick and a spatula around the liquid crystal.
In terms of the image, the left side is the front camera side and the right side is the loudspeaker side.
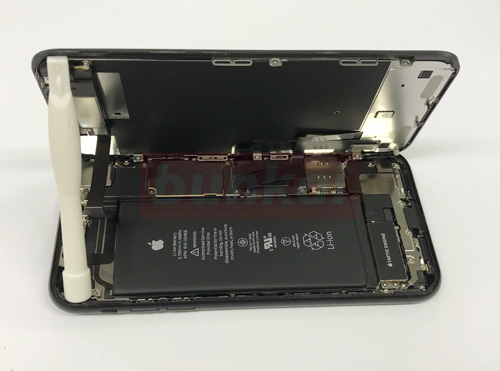
[iPhone XR decomposition LIQUID crystal replacement and repair method STEP 8]
Even if the liquid crystal can be removed, the cable is connected to the logic board on the liquid crystal and the main body side.
So let's lay it down like the image while being careful not to damage the cable.
[iPhone XR decomposition LIQUID crystal replacement and repair method STEP 9]
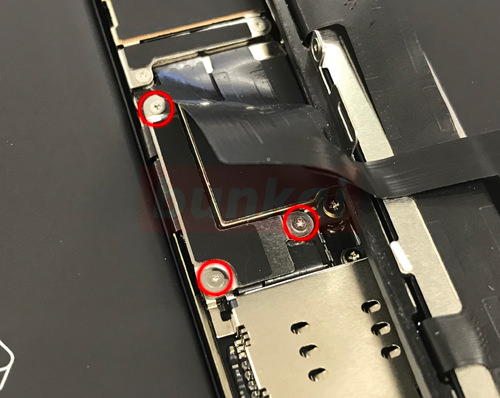
From here, the battery connector is removed from the logic board, but the battery connector is removed as a top priority to cut off electricity.
There is a screw in the red circle part, but let's remove the Y-shaped screwdriver.
If you can remove the screw, it is possible to remove even the iron plate.
[iPhone XR decomposition LIQUID crystal replacement and repair method STEP 10]
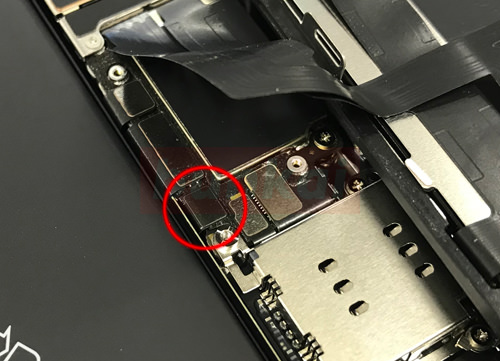
I think that it became the state of the image when the iron plate can be removed, but a small connector surrounded by a red circle is the place where the battery and the logic board are connected.
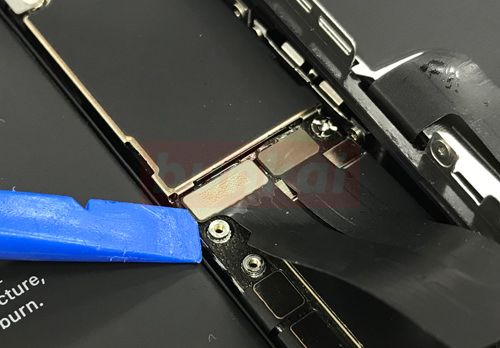
[iPhone XR decomposition LIQUID crystal replacement and repair method STEP 11]
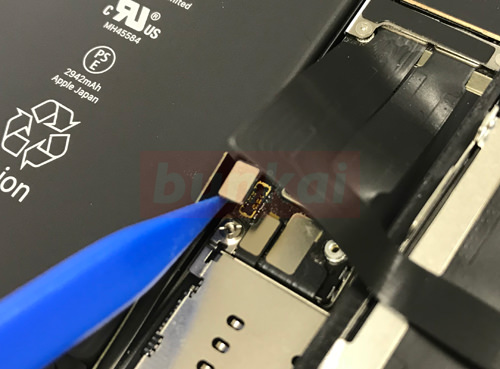
As shown in the image, if you use a plastic tool or something like that and lift it upward from below, you will be able to remove the battery connector.
[iPhone XR decomposition LIQUID crystal replacement and repair method STEP 12]
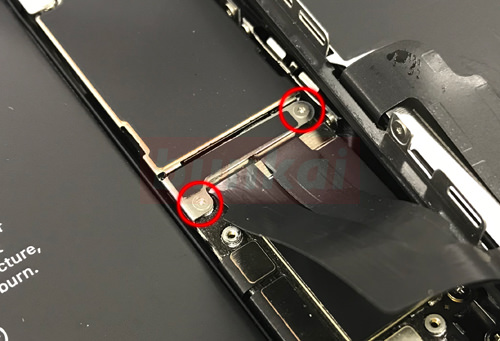
This part is connected to the liquid crystal and the logic board, but how to remove it is the same as the connector of the previous battery.
First of all, let's remove the screw and the iron plate.
[iPhone XR decomposition LIQUID crystal replacement and repair method STEP 13]
The connector is removed by causing it from the bottom to the top, but let's remove each connector because there are two places.
[iPhone XR decomposition LIQUID crystal replacement and repair method STEP 14]
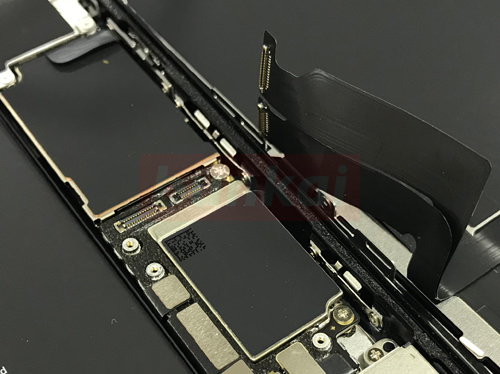
The LCD cable could be removed from the logic board.
[iPhone XR decomposition LIQUID crystal replacement and repair method STEP 15]
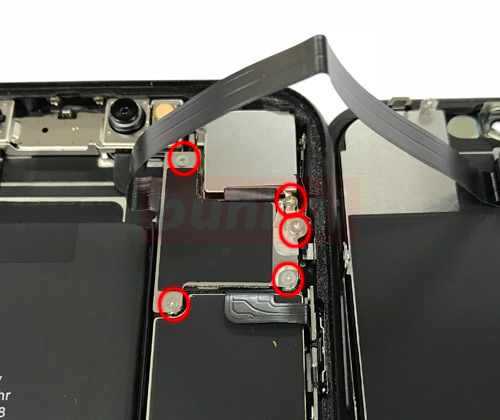
The cable of the speaker is connected from the liquid crystal side under this plate.
Remove all screws in the red circle and remove the plate.
[iPhone XR decomposition LIQUID crystal replacement and repair method STEP 16]
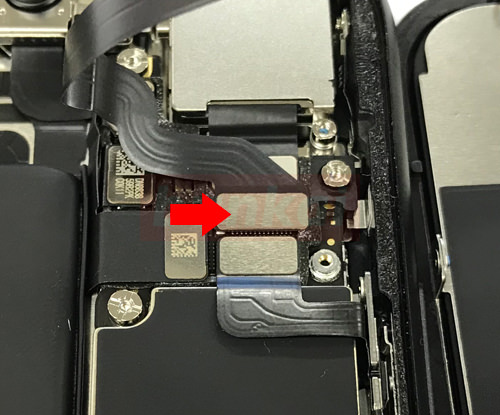
The connector of the arrow part is a speaker cable extending from the liquid crystal side.
Let's remove the tool.
The structure around here is similar to the iPhone X.
[iPhone XR decomposition LIQUID crystal replacement and repair method STEP 17]
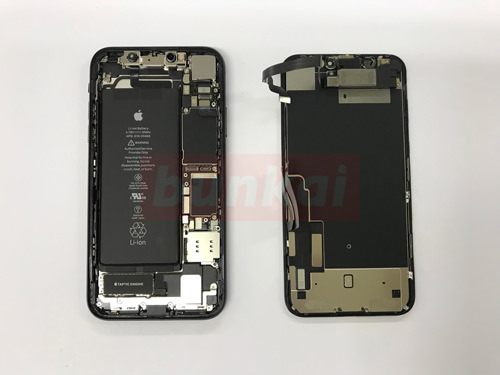
It was possible to separate the liquid crystal and the main body.
Until now, the iPhone (7, 8, etc.) had a camera attached to the liquid crystal side, but the front camera has become the main body side as well as the iPhone X.
[iPhone XR decomposition LIQUID crystal replacement and repair method STEP 18]
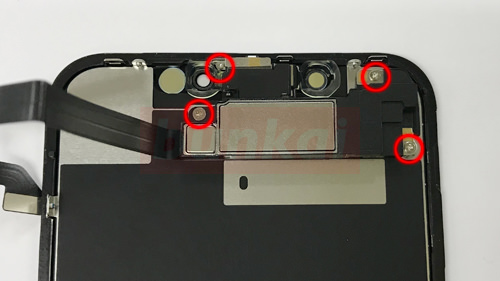
Remove the speakers on the LCD side, but remove all the screws on the red circle.
[iPhone XR decomposition LIQUID crystal replacement and repair method STEP 19]
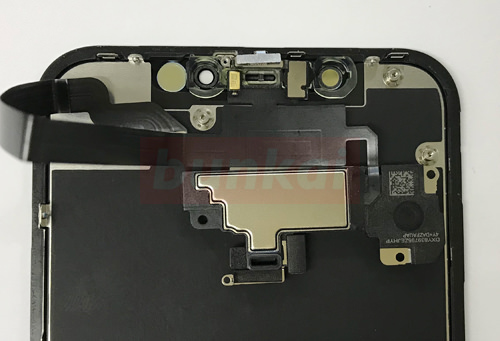
When the screw can be removed, the speaker part can be rotated 180 degrees.
Since the cable part is fixed to the liquid crystal itself with light double-sided tape, it is possible to remove the speaker if you use a tool such as a spatula and twist the lower side.
[iPhone XR decomposition LIQUID crystal replacement and repair method STEP 20]
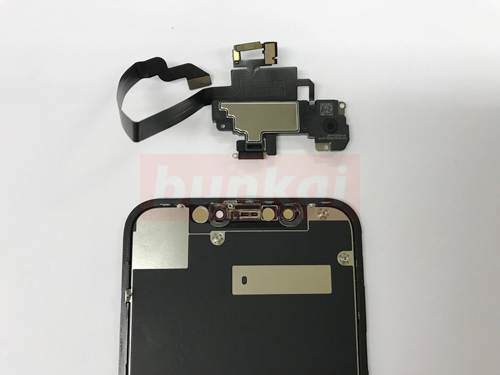
The speaker was able to be removed from the LCD.
Summary
At the time of this writing (2018/11/12), there was no distribution of lcd components for the iPhone XR.
It is likely to be distributed in the next few months, but I think that the price of parts is probably a little expensive.
It's been a year since the iPhone X was released, but parts are still expensive.
The iPhone X has an OLED (organic EL) LCD, but the specs are better than the liquid Retina of the iPhone XR.
So it seems to be the same amount as the liquid crystal parts of the iPhone X, or a little cheaper, so even if you start accepting iPhone XR at the iPhone repair shop, it seems to be at least 30,000 yen or more.
Recent iPhones are close to 100,000 yen even with the minimum spec, and when it comes to high specs, it is close to 200,000 yen.
I thought that there was no problem at all even if I did not subscribe to Apple Care before, but when I purchase a new iPhone XR, XS, XS Max, etc., it is better to subscribe to Apple Care until the distribution of parts begins.