The iPad Pro 11 inches just after it was released, but we disassembled it immediately!
There is no guarantee because it decomposes after two hours after I purchased it with a new article.
The purchased model is the iPad Pro 11-inch Wifi model A1980 64GB.
It looks like a big screen even 11 inches by the fact that the black edge around the liquid crystal has narrowed!
According to Apple's official website, the lcd crack repair fee for the iPad Pro (11 inches) was 57,400 yen (excluding tax) if it is not covered by the warranty.
Because it is 61992 yen when it includes tax, it seems to be an amount that can not be easily reached.
The main difference from the iPad up to now is the elimination of the face authentication function and the home button, but if you have an iPhone X or later iPhone, I think the iPad Pro 11 inch will soon become familiar.
However, since the iPad Pro 11 inch parts are not in circulation yet (as of 2019/1), those who plan to purchase in the future should put on a cover and take measures at the time of fall.
So let's start disassembling!
[iPad Pro 11 disassembly LCD replacement, repair method STEP1]
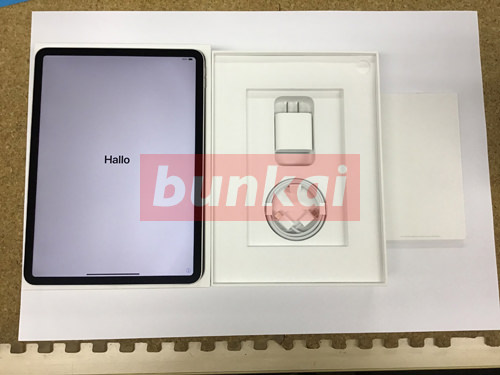
First of all, we did it from the check of the bundle!
[iPad Pro 11 disassembly LCD replacement, repair method STEP2]

It is the first USB-C as an iPad.
As with Mac laptops, I think all future iPads will probably switch to USB-C.
[iPad Pro 11 disassembly LCD replacement, repair method STEP3]
From now on, I'd like to disassemble the iPad Pro 11 inches, but I'd like to proceed with the disassembly quite carefully because the body's construction has changed a lot from the previous iPad.
Up to now, the iPad has had a home button, but this time the Pad Pro 11 inch is not.
Structurally, I would like to verify whether the content is similar to the iPhone X.
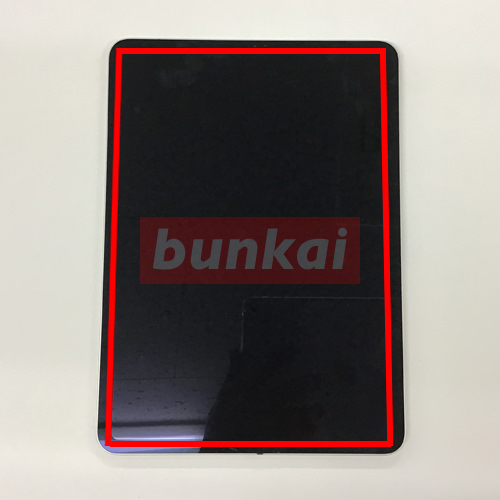
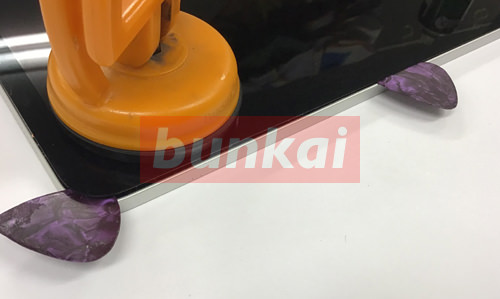
First of all, i will work to peel off the liquid crystal, but unlike the iPhone, there are no screws around the dock connector.
I think that the structure around here is the same as the past iPad, but it is probably fixed with a powerful double-sided tape in the red line part.
Let's peel off the heat of the heat gun by applying the red line part!
[iPad Pro 11 disassembly LCD replacement, repair method STEP4]
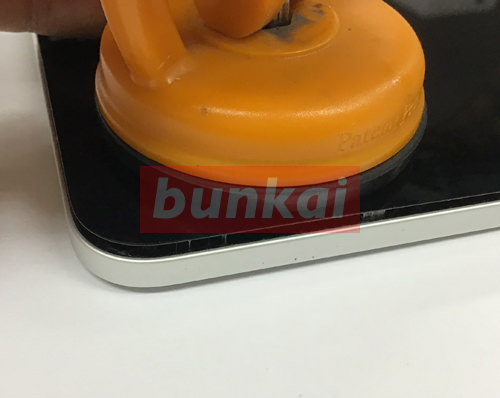
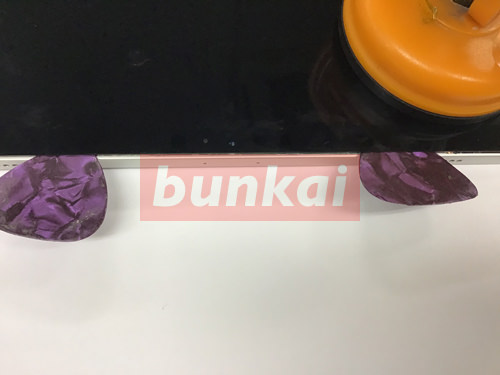
I was able to confirm that the double-sided tape peeled off when I lifted the place where I applied heat with a suction cup.
If the heat is weak, it is difficult to peel off the liquid crystal, so it is necessary to adjust the temperature around here.
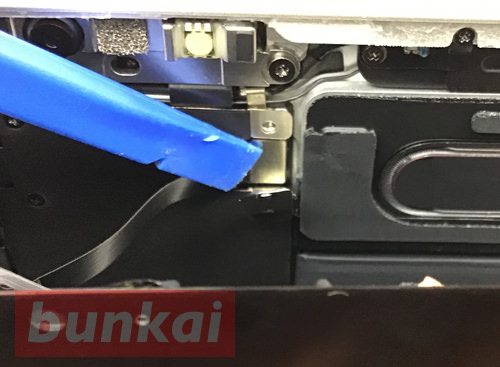
[iPad Pro 11 disassembly LCD replacement, repair method STEP5]
In order to prevent re-adhesion in the part where the glass is peeled off, we insert a pick that is also in the disassembly tool of the iPhone.
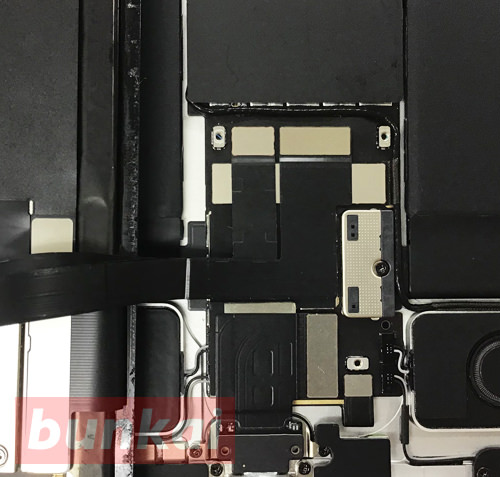
[iPad Pro 11 disassembly LCD replacement, repair method STEP6]
This part becomes the front camera, but the camera has come until quite a while.
I think that it is a point that it is necessary to pay considerable attention because there is a possibility that the wiring of the inside is cut if the tool is forcibly inserted.
This work is carried out around the liquid crystal per lap.
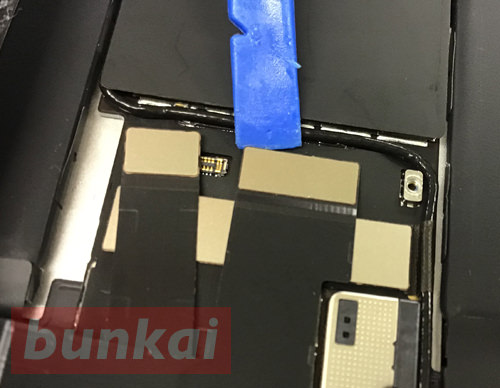
[iPad Pro 11 disassembly LCD replacement, repair method STEP7]
Originally, if it was possible to peel off the glass to some extent, it was possible to lift the liquid crystal, but When I looked inside, I noticed that there were two wires from the liquid crystal.
The image part is around the front camera.
[iPad Pro 11 disassembly LCD replacement, repair method STEP8]

This is another wiring that is different from the previous one, but the lower side (originally the home button side) is also connected to the logic board in the same way.
[iPad Pro 11 disassembly LCD replacement, repair method STEP9]
It is the original decomposition method to remove the wiring after removing the connector of the battery, but it is not possible to do it no matter how you think about it as long as you look at the internal structure.
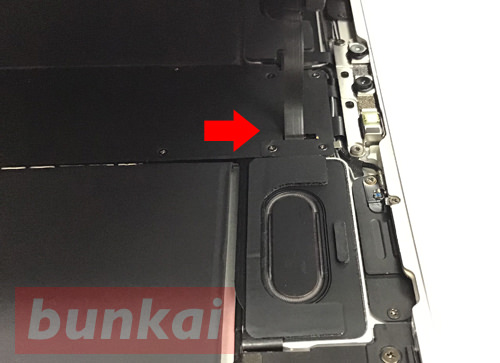
So this time I decided to remove the cable on the front camera side first.
There is a black plate in the place surrounded by a red frame, but it is stopped by two screws.
Because the screw is a Phillips screw, use the screwdriver.
[iPad Pro 11 disassembly LCD replacement, repair method STEP10]
If you can remove the screw above, the plate will come off easily.
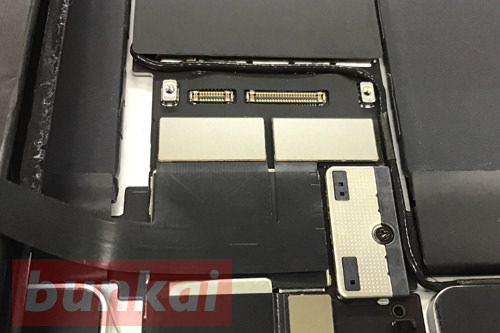
[iPad Pro 11 disassembly LCD replacement, repair method STEP11]

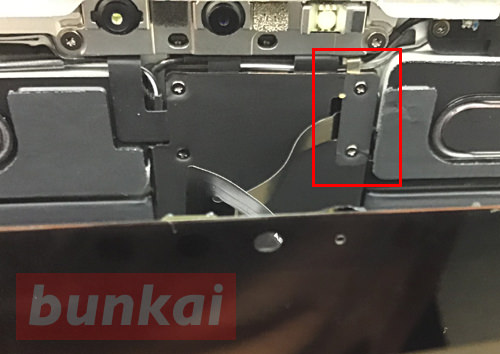
The connector is connected to the logic board under the plate.
It is possible to remove the connector easily by lifting it from the bottom to the top using a plastic tool etc.
[iPad Pro 11 disassembly LCD replacement, repair method STEP12]
It is possible to cause the liquid crystal to this state if it is possible to remove the connector of the previous.
[iPad Pro 11 disassembly LCD replacement, repair method STEP13]
This is the part where the lcd cable on the lower side is connected, but there are three screws on the black plate.
I use a Phillips screwdriver and remove everything.
[iPad Pro 11 disassembly LCD replacement, repair method STEP14]
When the screw can be removed, it is possible to remove the black plate easily as in the image.
[iPad Pro 11 disassembly LCD replacement, repair method STEP15]
There were a lot of connectors connected under the plate.
[iPad Pro 11 disassembly LCD replacement, repair method STEP16]

You can remove all connectors in the same way, but use a plastic tool as shown in the image, so lift it upward.
[iPad Pro 11 disassembly LCD replacement, repair method STEP17]
I will remove the connector in the same manner as before.
[iPad Pro 11 disassembly LCD replacement, repair method STEP18]
Let's remove these two in the same way as before!
[iPad Pro 11 disassembly LCD replacement, repair method STEP19]
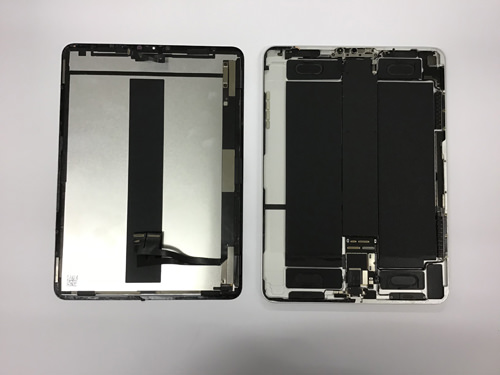
It was possible to completely separate the liquid crystal and the main body side.
I don't think anyone has broken the liquid crystal yet, but I think that it is possible to change the liquid crystal by this decomposition procedure.
It is likely that liquid crystal parts will start to be distributed in the next six months to several months, but if you break the screen before the parts are in circulation, I think that you can only repair them in the Apple Store.
The iPad is much more expensive than before, so it's better to subscribe to Apple Care if you're buying a new model.
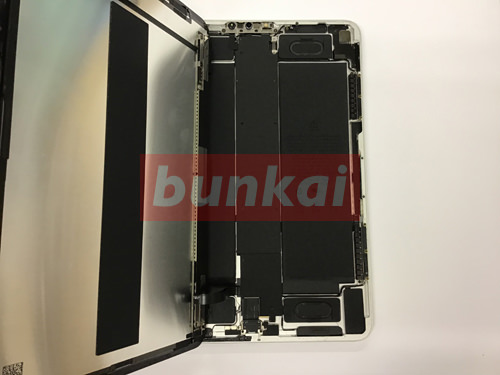
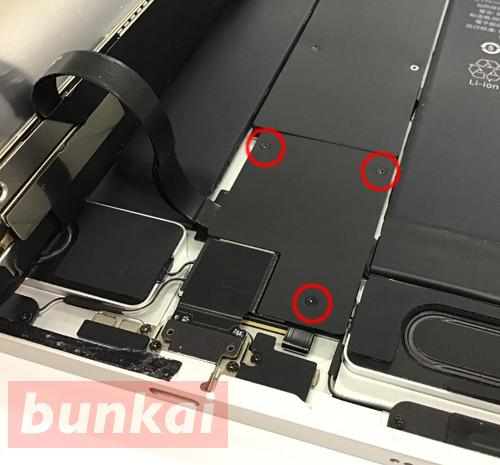
[iPad Pro 11 disassembly LCD replacement, repair method STEP20]

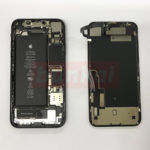
Now let's take a check out the internal structure of the iPad Pro 11-inch A1980.
The battery is divided from side to side, just like the previous iPad Pro.
There is a logic board to be caught in the battery, but it is also covered with a black plate (heat shield) similar to the previous Pad Pro.
Because there is a philanthroby in the red circle part, it removes everything.
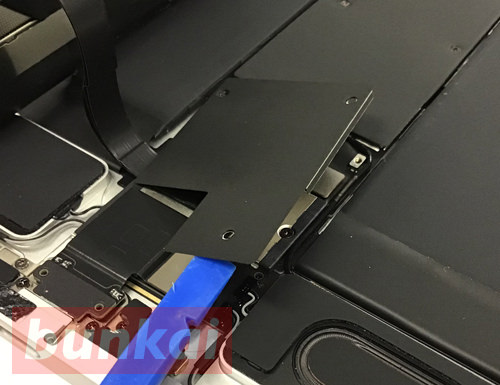
[iPad Pro 11 disassembly LCD replacement, repair method STEP21]

The logic board of the iPad Pro is now in sight!
[iPad Pro 11 disassembly LCD replacement, repair method STEP22]
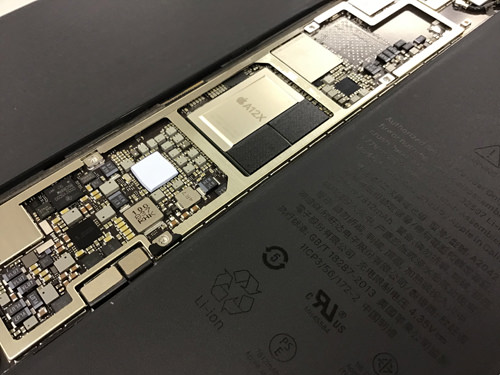
You can see the A12X that the GPU has been enhanced.
[iPad Pro 11 disassembly LCD replacement, repair method STEP23]
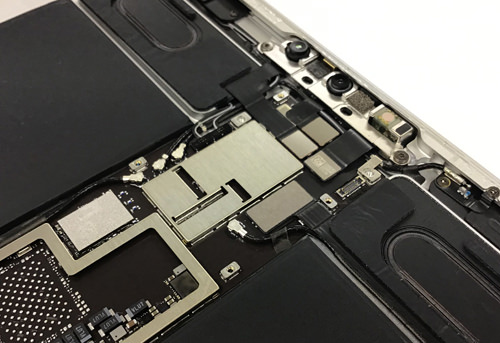
The structure of the camera side.
[iPad Pro 11 disassembly LCD replacement, repair method STEP24]

It is the structure of the bottom side.
[iPad Pro 11 disassembly LCD replacement, repair method STEP25]
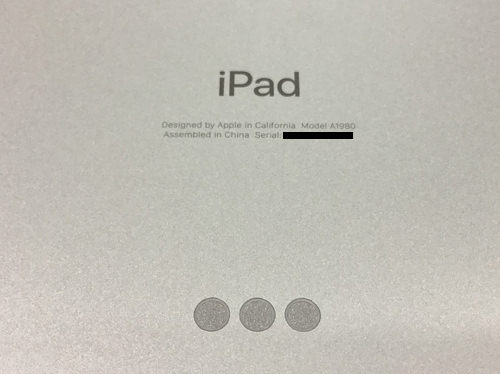
There was a description of the model number on the back of the main body, but the Wifi model seems to be A1980.
I purchased this iPad Pro 11 inch without any knowledge, but what is the place to install the round part in the image above?
Keyboard?Pencil?
[An assicity]
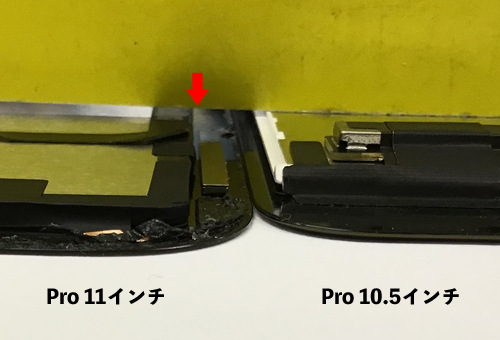
The iPad Pro 11 inch lcd is quite lightweight, and I compared the thickness of the previous model iPad Pro 10.5 inch to the thickness of the LCD itself.
It is very difficult to understand, but if you look at the liquid crystal side by side, you can see that there is a gap in the 11-inch side.
It is a place where you want to be careful about liquid crystal cracking because it is thinner from 2mm to about 3mm about 11 inches!
In the future, I think that there will be stores that can be dealt with by private repair shops other than Apple, but you can predict that the repair price will probably start from 40,000 yen or more.