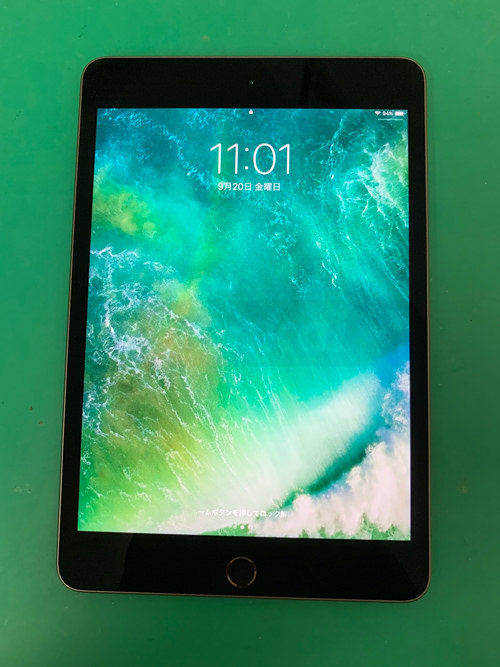
We’re going to show you how to disassemble the new iPad Mini5, which was launched in 2019, but Apple Pencil is finally compatible with the fifth-generation model of the iPad Mini.
However, Apple Pencil is the first generation and the second generation, and it is the first generation that can be used for the iPad Mini 5.
I think that it is helpful because it becomes an effective decomposition method in the case of the case where the screen cracking, the line enters the screen, etc.
[iPad Mini 5 LCD replacement and disassembly repair method 1]
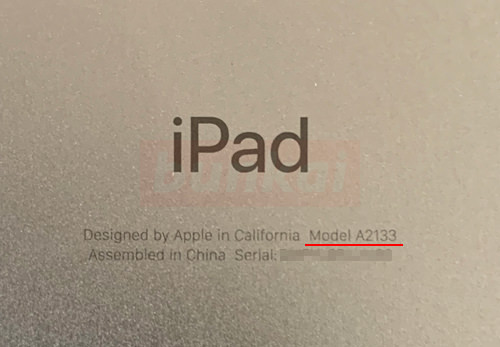
The iPad Mini 5 is an A2133 Wifi model.
[iPad Mini 5 LCD replacement and disassembly repair method 2]
The iPad Mini 5 combines a touch panel and an LCD panel.
The lcd of the iPad Mini 4 was also integrated, but the basic removal method is the same.
If only glass (touch panel) is broken, the glass is not broken but there is a bad display, any liquid crystal needs to be replaced.
This decomposition method is the method when replacing each liquid crystal, but most people will be this decomposition method.
To disassemble, turn off the power of the iPad before starting work.
In the image, a strong double-sided tape is attached to the black part around the liquid crystal, and the liquid crystal is attached to the main body.
It is not possible to peel off easily because it is a fairly powerful tape though the work of peeling it as it is because there is no screwing etc.
We apply heat to the black areas around the liquid crystal and peel off the liquid crystal.
[iPad Mini 5 LCD replacement and disassembly repair method 3]

The tool used is called a heat gun, but if it is easy to understand, it becomes a powerful thing of the dryer.
Because it becomes considerably hotter than the dryer, please be careful about handling it carefully.
[iPad Mini 5 LCD replacement and disassembly repair method 4]
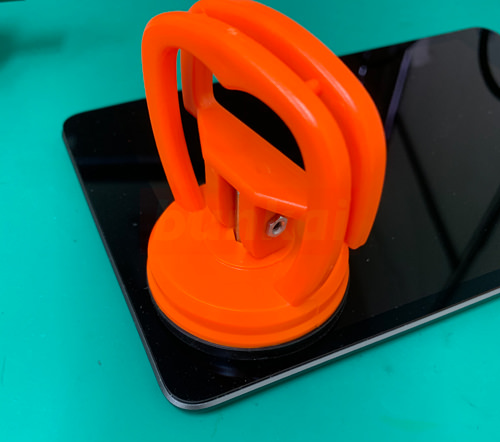
I set the suction cup to the part where the heat of the heat screen was applied and pull it out lightly.(Camera side)
If the heat is applied weakly, it will not peel off at all, but if you pull it forcibly, the screen will easily break.
Since the suction cup cannot be used when the liquid crystal is peeled off by the touch panel cracking of the surface, there is no other way but to peel off the liquid crystal steadily.
[iPad Mini 5 LCD replacement and disassembly repair method 5]
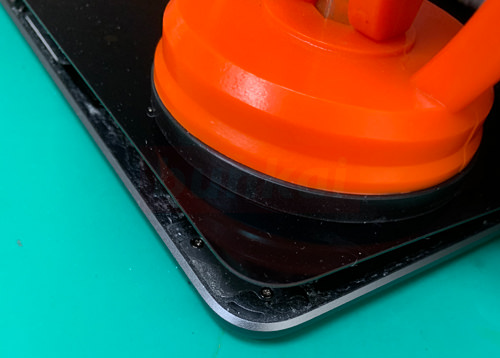
There was a slight gap between the liquid crystal and the main body, but let’s float around the liquid crystal like this.
[iPad Mini 5 LCD replacement and disassembly repair method 6]
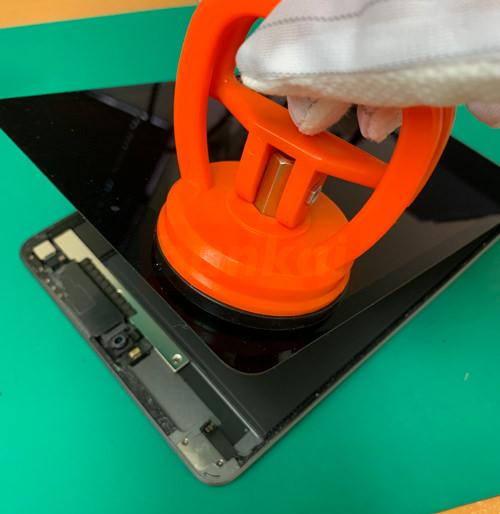
Lift ingintoue from the camera side and it will look like this.
[iPad Mini 5 LCD replacement and disassembly repair method 7]
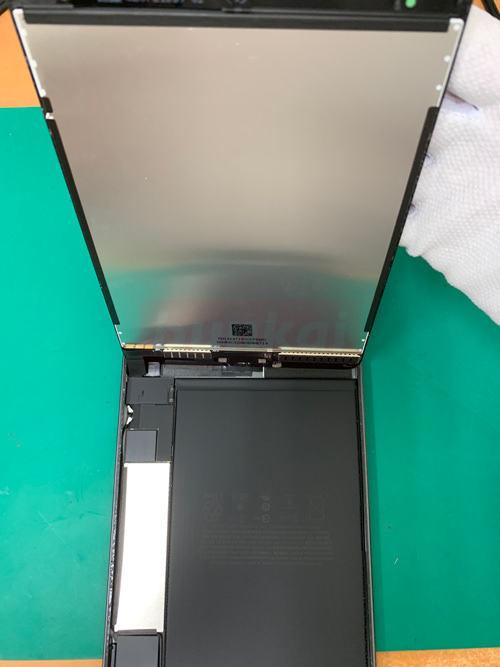
It is a state in which the liquid crystal was raised vertically.
[iPad Mini 5 LCD replacement and disassembly repair method 8]
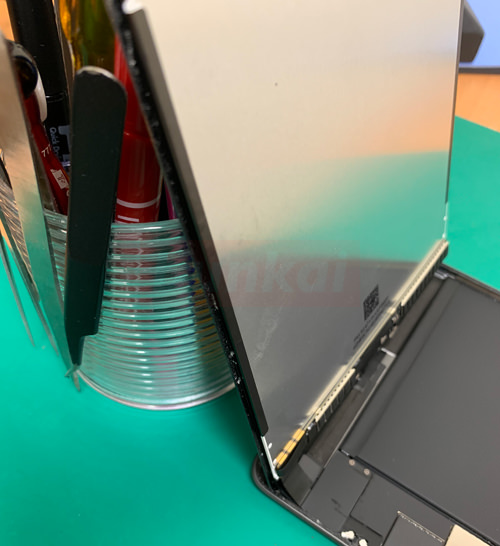
As it is, it will fall under the weight of the liquid crystal, so it will be easier to work next if you place a heavy stone behind the liquid crystal.
[iPad Mini 5 LCD replacement and disassembly repair method 9]
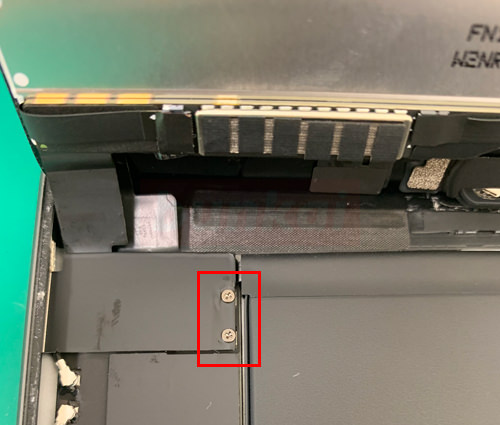
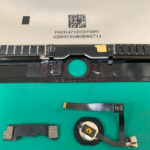
The wiring connected to the logic board from the liquid crystal side is hidden in this iron plate, but let’s remove the screw of the part surrounded by a red circle with a Phillips screwdriver.
[iPad Mini 5 LCD replacement and disassembly repair method 10]
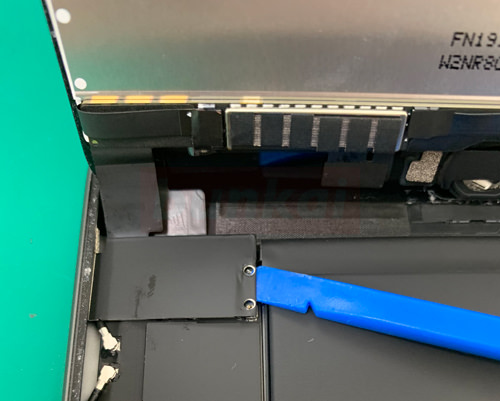
After removing the screw, insert the plastic tool into the position of the image, so that it is lightly twisted on top.
The battery connector is connected to the logic board in this iron plate, so please disassemble carefully.
If you do not know, please check in the next step before disassembling.
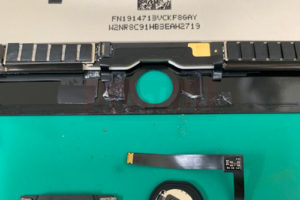
[iPad Mini 5 LCD replacement and disassembly repair method 11]
The iron plate has lifted up, but I think you can see that the wiring of the battery is also off together.
[iPad Mini 5 LCD replacement and disassembly repair method 12]
There is battery wiring on the arrow, but be careful not to break it.
[iPad Mini 5 LCD replacement and disassembly repair method 13]
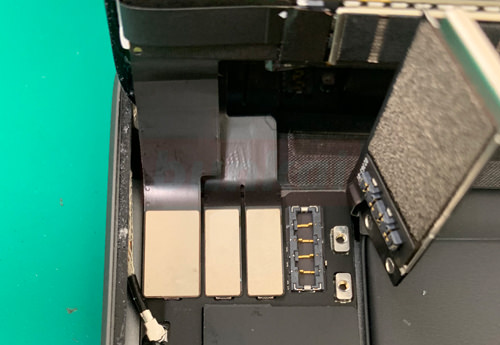
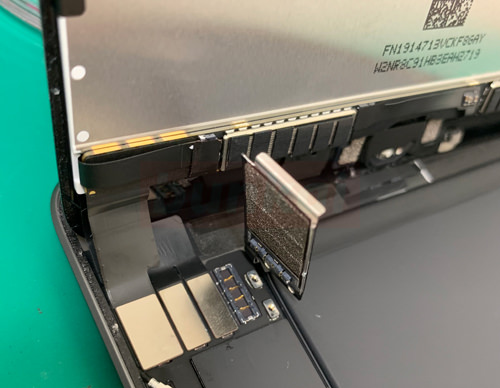
There are three connectors, but they are all removed in the same way.
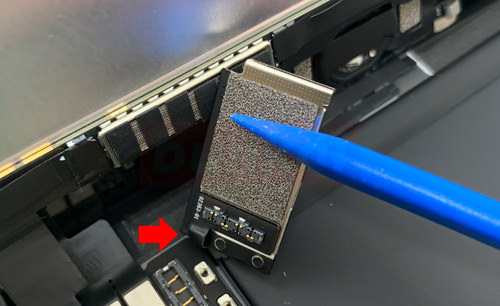
[iPad Mini 5 LCD replacement and disassembly repair method 14]

You can easily remove the connector by lifting it from the bottom to the top as shown in the image.
[iPad Mini 5 LCD replacement and disassembly repair method 15]
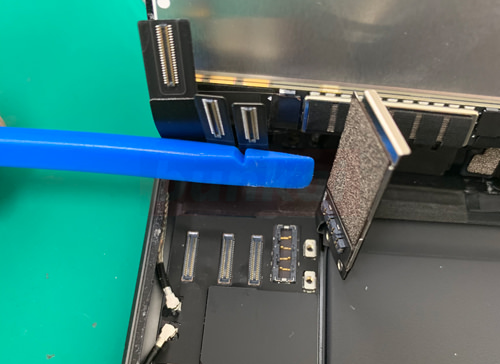
I was able to remove three connectors.
[iPad Mini 5 LCD replacement and disassembly repair method 16]
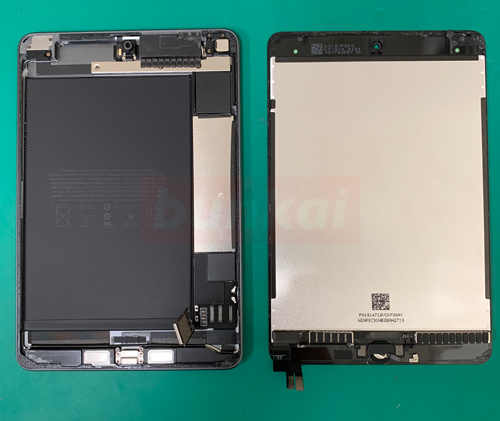
It was possible to separate the liquid crystal and the main body side.
After that, it is completed if a new liquid crystal is installed and assembled to the original state, but it is necessary to remove the home button from the original liquid crystal and transplant it.