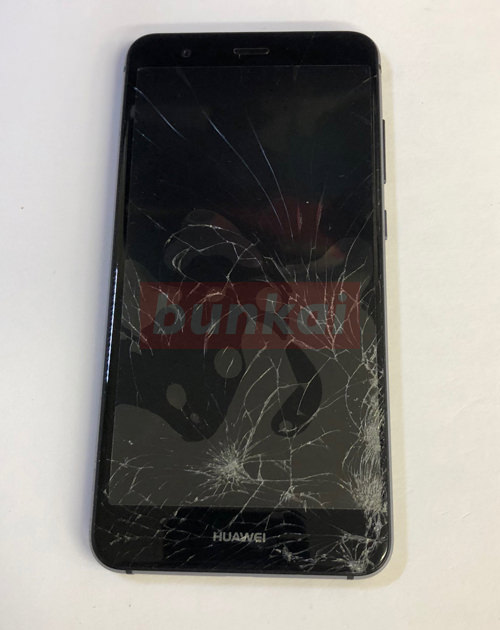
The Huawei P10 lite is a 5.2-inch model released in 2017, but will show you how to repair the liquid crystal cracking, which is considered to be the most common failure.
The difficulty is likely to be high because both the touch panel side and the rear panel side are required to be disassembled.
In addition, the contents that are most common in the failure of the smartphone is liquid crystal cracking, but it will not return unless the liquid crystal is replaced when the liquid crystal cracks.
Of course, you can put it to the repair shop, but you can fix the liquid crystal cheaply if you can repair it yourself.
Tools used for disassembly, tool list that is useful to have
[Huawei P10 lite LCD cracking repair and disassembly method 1]
The LCD replacement of the Huawei P10 lite requires disassembly of the touch panel side and the rear panel side, but I would like to disassemble the rear side first.
[Huawei P10 lite LCD crackrepair and disassembly method 2]
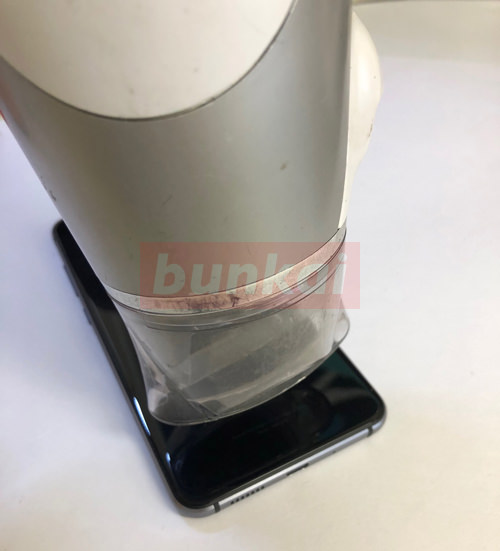
The rear panel is fixed to the main unit with light tape, but it is easy to peel off when heat is applied with a dryer or heat gun.
The place where heat is applied is the whole, but be careful because it may deform if heat is applied too much.
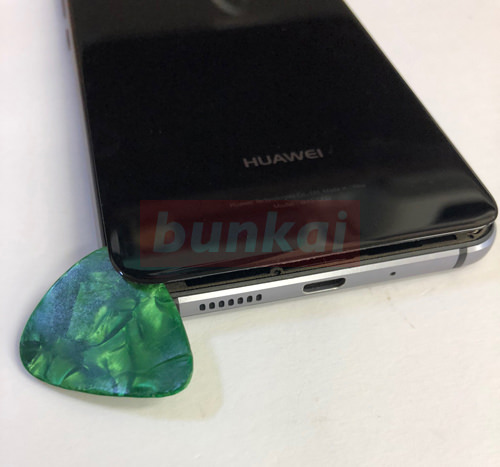
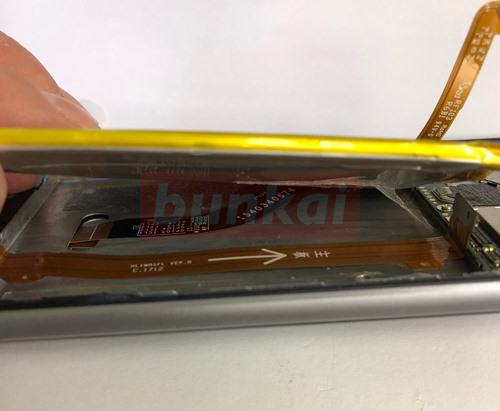
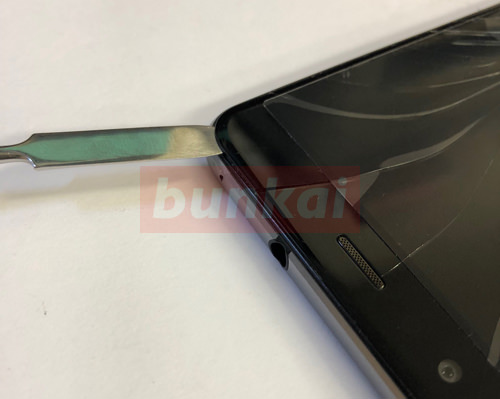
[Huawei P10 lite LCD cracking repair and disassembly method 3]
After applying heat to the rear panel, insert the tool into the gap between the rear panel and the body, as shown in the image, and slide it sideways.
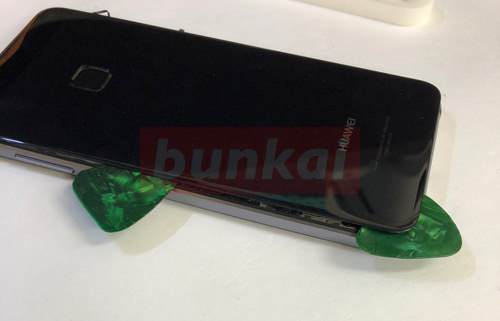
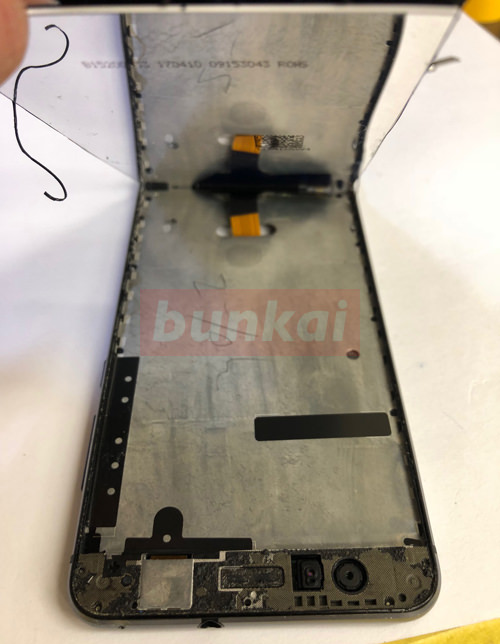
[Huawei P10 lite LCD cracking repair and disassembly method 4]
I peel off the back panel like this.
[Huawei P10 lite LCD cracking repair and disassembly method 5]
If you can peel off the rear panel to some extent, you can put it in such a state, but please be careful not to disconnect it because the cable is still connected to the inside.
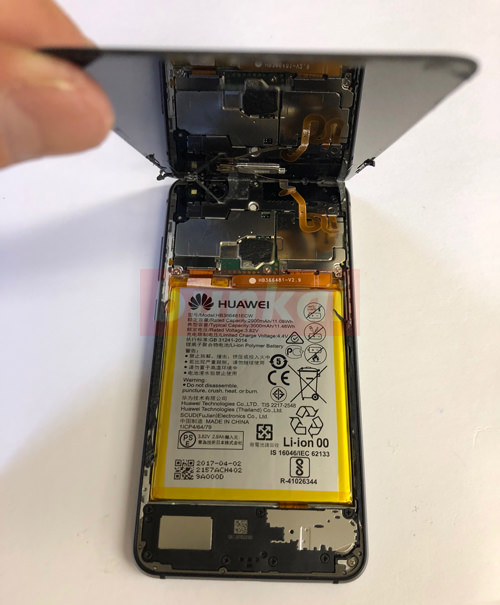
[Huawei P10 lite LCD cracking repair and disassembly method 6]
It is a state that the orange cable is connected though it is a state arranged on the side side from the previous state.

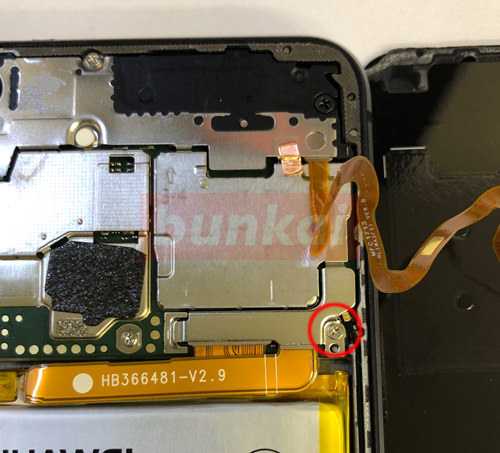
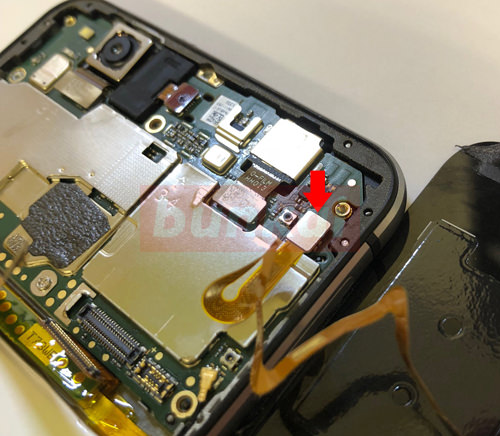
[Huawei P10 lite LCD cracking repair and disassembly method 7]
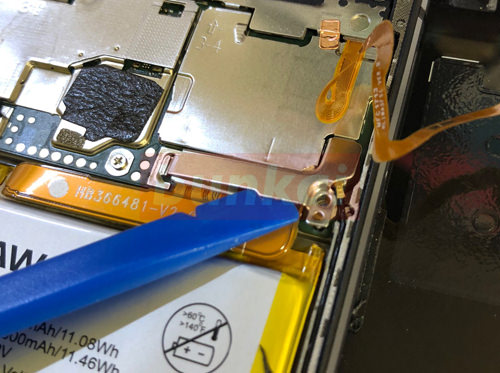
There is a Phillips screw in the red circle part, but let's remove the screwdriver!
[Huawei P10 lite LCD cracking repair and disassembly method 8]
When the screw can be removed, the metal plate can be removed, so the tool is inserted under the plate and it is lifted up.
The tool used in this case should be made of plastic instead of metal.
Because the main body is still energized, please note that there is a possibility that it will shortify if you use a metal tool.
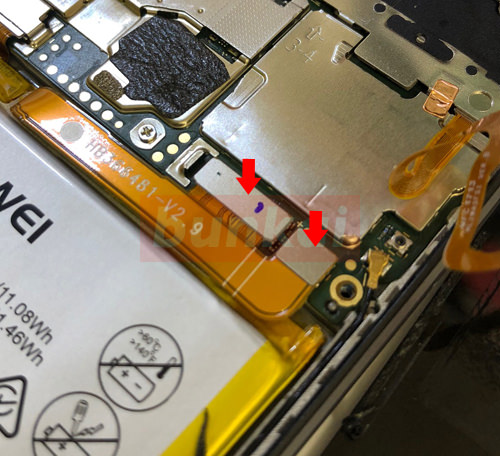
[Huawei P10 lite LCD cracking repair and disassembly method 9]
There are two connectors under the metal plate, but the smaller one on the right is the battery connector.
It is possible to remove the connector if you try to cause a plastic tool from below to upward,
The order to remove is to remove the right side and then to the left side.
[Huawei P10 lite LCD cracking repair and disassembly method 10]
The connector could be removed.
[Huawei P10 lite LCD cracking repair and disassembly method 11]
Next, remove the plate that covers the camera.
I forgot to take a picture, but the plate is fixed with a screw, so let's remove all the screws that hold the plate!
There are five or six screws to remove.
If you can remove all the screws, you can float the plate as in the image, so let's remove it.
[Huawei P10 lite LCD cracking repair and disassembly method 12]
It is like this when it is possible to remove the plate.
The connector of the arrow part is connected to the rear panel, but let's remove it.
It is possible to separate the main body and the back panel when it is possible to remove.
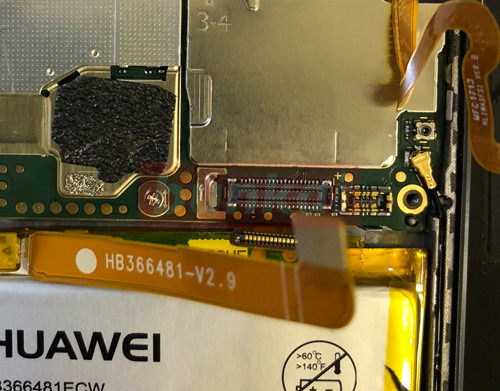
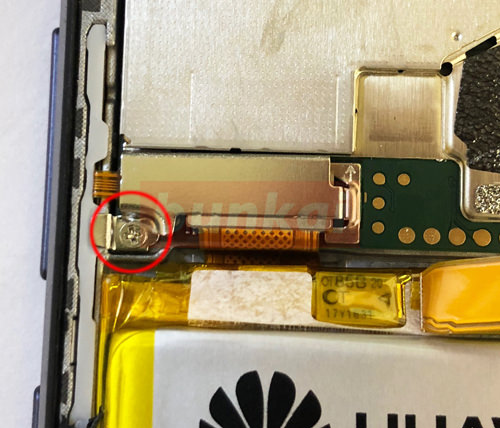
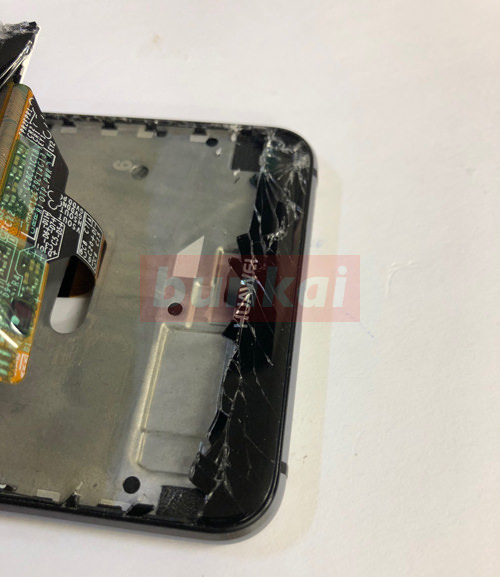
[Huawei P10 lite LCD cracking repair and disassembly method 13]
This part is where the cable of the touch panel is contained, but because there is a screw in the arrow part, the screwdriver is removed.
If you can remove the screw, let's remove the metal plate as it is.
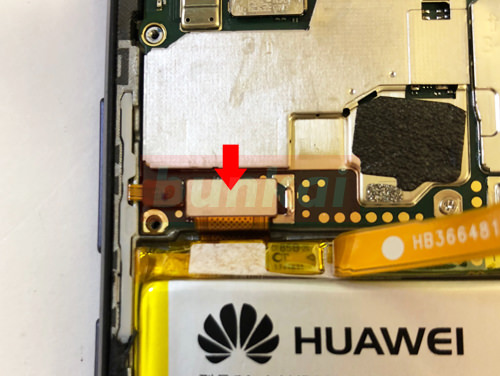
[Huawei P10 lite LCD cracking repair and disassembly method 14]
Because there is a connector under the plate, remove it.
[Huawei P10 lite LCD cracking repair and disassembly method 15]
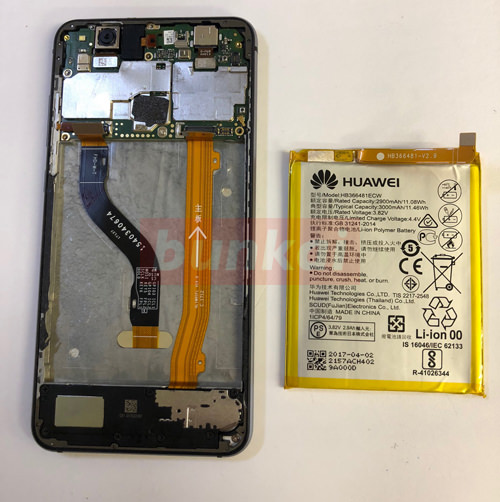
From here, we will remove the battery, but since the previous LCD cable is on the underside of the battery, the LCD cable cannot be removed unless the battery is removed.
Since the battery itself is fixed with double-sided tape to the main body, it is easy to peel off by lightly adding heat.

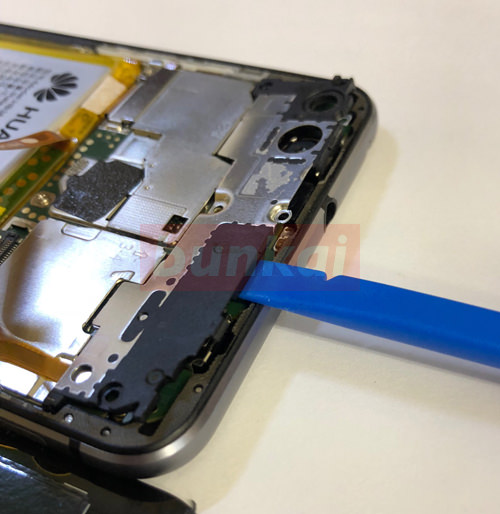
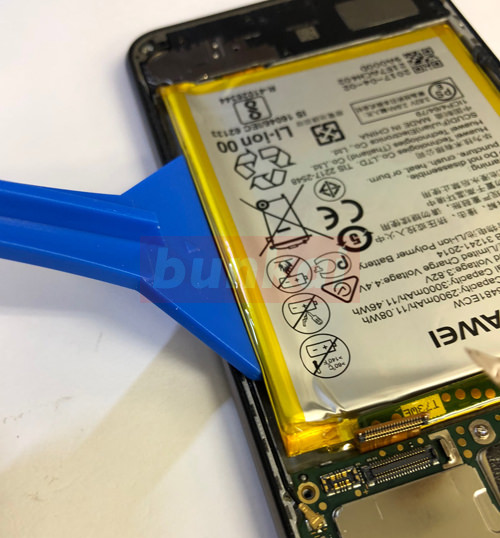
[Huawei P10 lite LCD cracking repair and disassembly method 16]
Insert the tool into the side of the battery and peel it off.
[Huawei P10 lite LCD cracking repair and disassembly method 17]
There is a cable under the battery, so be careful not to break or scratch.
[Huawei P10 lite LCD cracking repair and disassembly method 18]
The battery could be removed.
This page is a decomposition method for liquid crystal replacement, but those who want to replace the battery of P10 Lite can cope with the decomposition method so far.
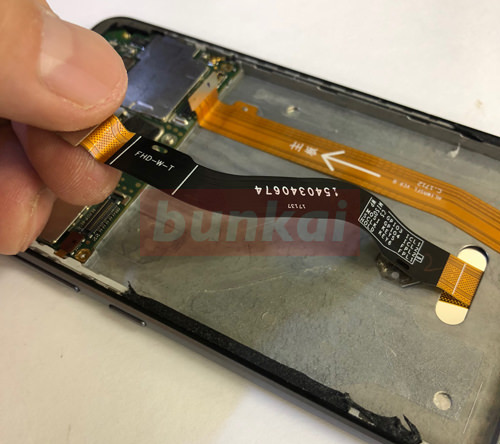
[Huawei P10 lite LCD cracking repair and disassembly method 19]
The cable part of the liquid crystal is attached with light double-sided tape, but it can be easily removed by hand.
[Huawei P10 lite LCD crackrepair and disassembly method 20]
From here, we will peel off the liquid crystal part that has broken, but it is attached to the main body with double-sided tape as well as the rear panel.
Because it becomes a fairly strong tape, it is made to peel off after applying heat, but the part that heats is the heel of the liquid crystal.
[Huawei P10 lite LCD crackrepair and disassembly method 21]
After applying heat, the tool is inserted into the gap between the glass and the frame as shown in the image and peels it off.
If the liquid crystal is not cracked, the work efficiency is good when there is a suction cup, but if the liquid crystal crackiser, there is no choice but to peel off the glass steadily because the suction cup cannot be used.
[Huawei P10 lite LCD crackrepair and disassembly method 22]
Because the glass breaks on the way, it is better to use gloves etc. when working.
Since the side side is about 1mm peeling portion, it can be peeled off relatively easily, but the upper side, the lower side must peel off about 1cm, so be careful not to get hurt.

[Huawei P10 lite LCD crackrepair and disassembly method 23]
The liquid crystal glass is peeled off to some extent, but you can see the cable extending to the rear panel side in the back.
[Huawei P10 lite LCD crackrepair and disassembly method 24]
Let's peel off the remaining part of the glass neatly using a tool etc.
[Huawei P10 lite LCD crackrepair and disassembly method 25]
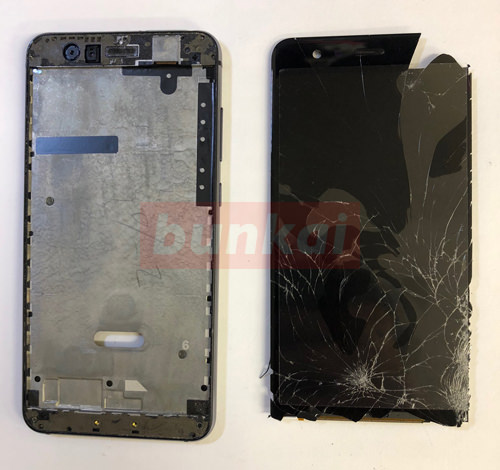
The liquid crystal part of p10 Lite was able to be removed.
I think it takes more than two hours to disassemble for the first time, but if you are used to it, it is about one hour.
If it is possible to put it in this state, it is completed if it is replaced with a newly prepared liquid crystal and assembled by the original procedure.