The other day, I disassembled the DW-6900FS (Fragment Design) model, and i would like to disassemble the G-Shock of the Fragment Design model again.
The DW-6900FS was a digital display, but this G-100 is a model that displays both analog and digital.
The tools used can be substituted for the things in the home, but the drivers used are as follows.
[Battery replacement step 1 of G-Shock G100]
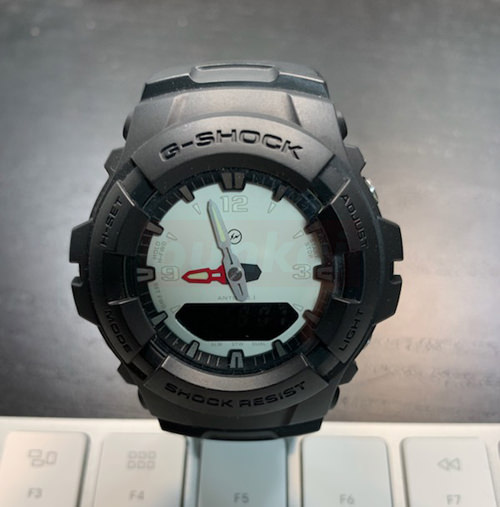
As was the case with the previous DW-6900FS (Fragment Design), the color is matte black and the dial is white.
[Battery replacement step 2 of G-Shock G-100]
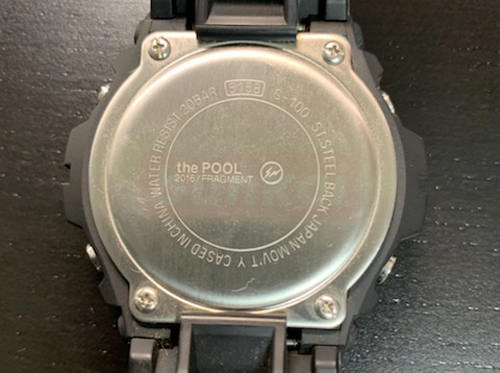
The battery replacement is disassembled from the back, but the flow of the battery replacement of G-Shock is basically the same.
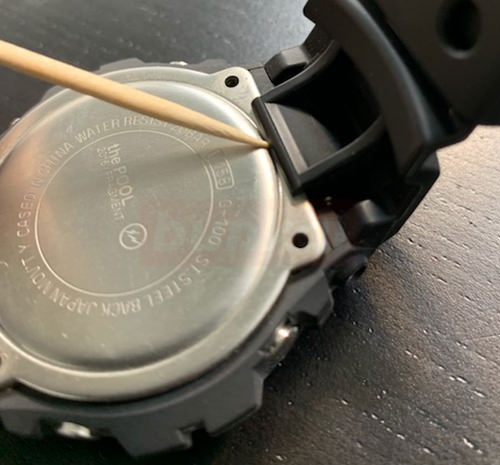
[Battery replacement step 3 of G-Shock G-100]
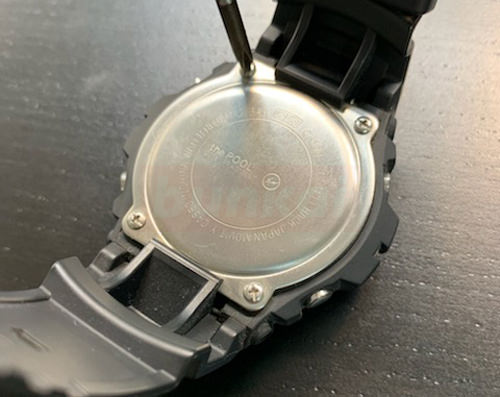
There are four screws on the back cover, so let's remove them all.
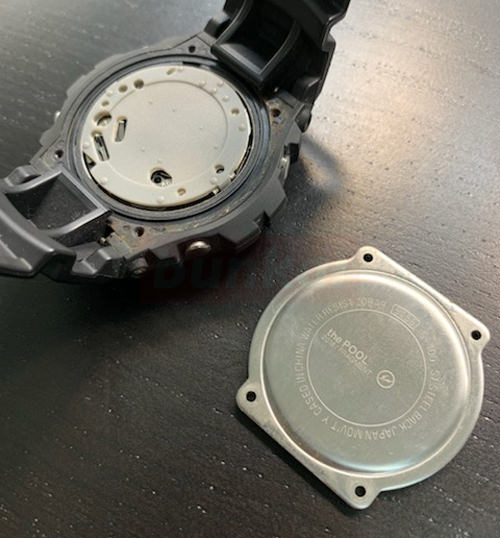
[Battery replacement step 4 of G-Shock G-100]
When the screw can be removed, the back cover can be removed by hand.
The rubber of the belt is covered on the back of the silver, but it is possible to remove it by pushing the belt outward.
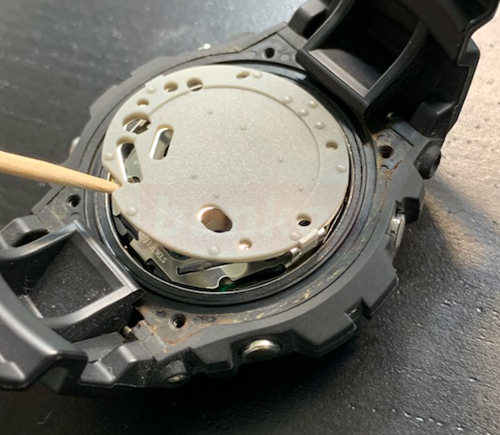
[Battery replacement step 5 of G-Shock G-100]
When the back cover was removed, there was a gray rubber made of silicon, but there was a nail in the right side one place.
It was possible to remove the rubber easily if it caused it to the right side from the direction of the toothpick (left side) though it was a way to remove it.
[Battery replacement step 6 of G-Shock G-100]
It is easy to come off.
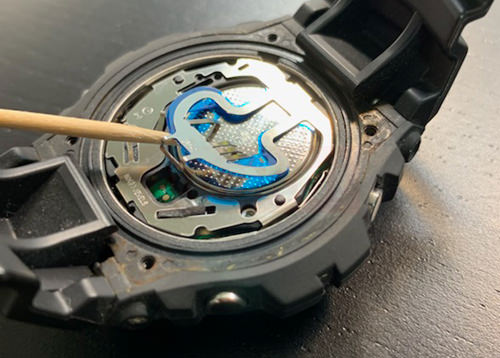
[Battery replacement step 7 of G-Shock G-100]

The battery is now in sight.
You can see that it is fixed with iron fittings, but if you look closely, the front and back of the battery is opposite the DW-6900FS.
[Battery replacement step 8 of G-Shock G-100]
The metal fittings are hook-shaped, but you can easily remove them if you check the structure.
This makes it possible to remove only the batteries.
[Battery replacement step 9 of G-Shock G-100]
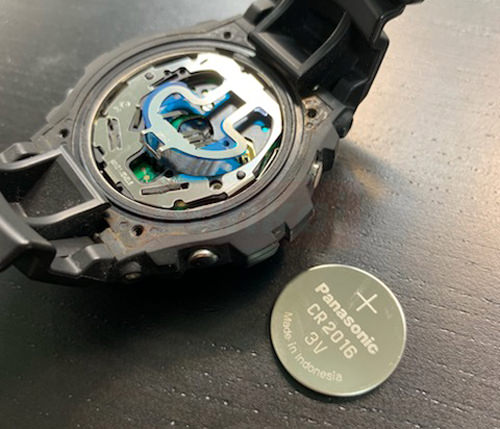
The battery was able to be removed.
It is possible to put it in this state in about 5 minutes if decomposition proceeds without any problems.
After that, i will replace it with the battery that I have prepared and incorporate it into the original state, but please pay attention to the front and back of the battery.
Also, don't forget to make the battery short after fixing it with the nails of the metal fittings.
It is a method to short, but if you look closely at the metal fittings, you will see the notation "AC" and "-", but it is OK if you touch each with tweezers and pass for about 2 seconds.