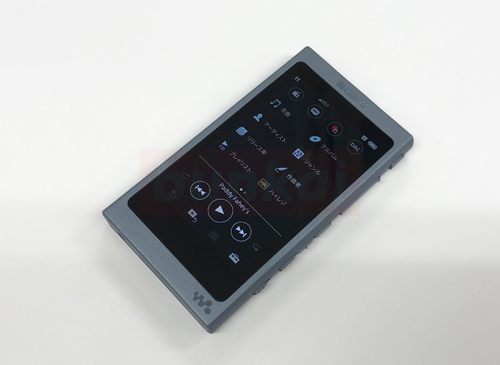
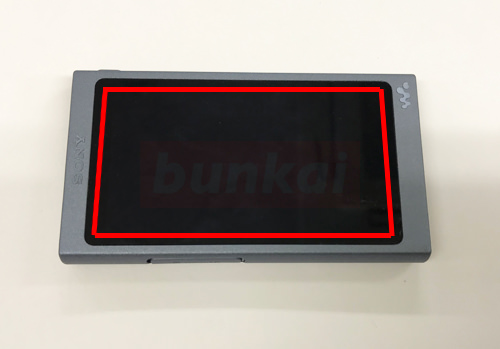
If you are using SONY's Walkman NW-A45, you may be able to improve it by replacing the LCD if the screen is not attached, the screen has entered the line, the touch does not work, or does not respond.
If the screen is not attached, it is important to first turn on the Walkman, but the part that can be considered due to a failure is a liquid crystal or a base.
If the screen of the Walkman is not attached due to a base failure, it may become a high repair fee, but if it is a screen failure, it may be able to be fixed by the amount of money reached.
I will publish the repair method of SONY Walkman NW-A45, so I think that you can refer to it when replacing the LCD screen.
When we checked the manufacturer's (SONY) Walkman repair price (LCD replacement), the NW-A45 was 13,000 yen (excluding tax).
[Walkman NW-A45 screen not attached liquid crystal replacement, disassembly repair method 1]
To remove the Walkman NW-A45 LCD, it must be almost entirely in a state of balashi.
We will also remove the method of battery replacement and the foundation in the middle of the decomposition, but please disassemble while careful because it will become a rather expensive repair fee if you break down those parts by any chance.
Then, I want to start decomposition.
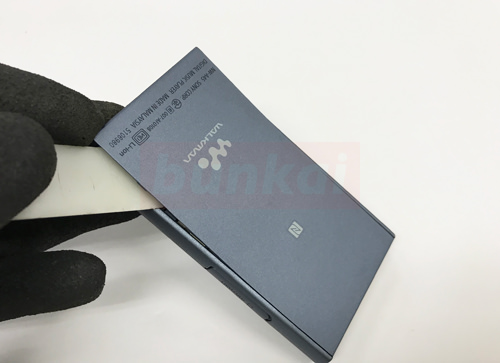
[Walkman NW-A45 screen not attached liquid crystal replacement, disassembly repair method 2]
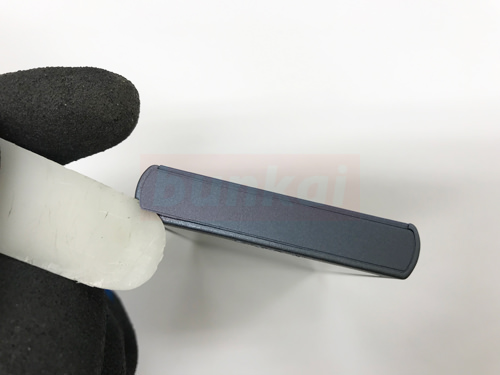
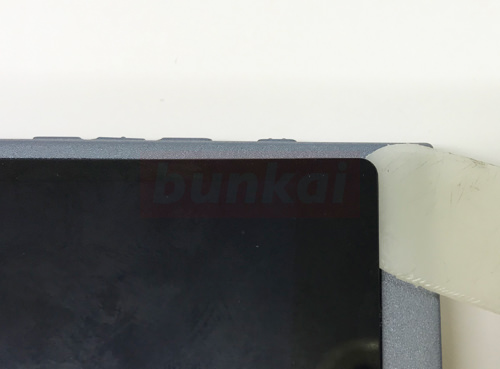
This is the upper side (SONY logo), but there is a seal and cover of the same color body, so I will open it from there.
Let's peel off a little by using the tool as shown in the image.
If it is a little hard, it is easy to peel off if you lightly apply heat with a dryer or heat gun and then disassemble it.
In the disassembly of the Walkman, it is not noticeable to use plastic tools as much as possible without using metal tools.
[Walkman NW-A45 screen not attached liquid crystal replacement, disassembly repair method 3]
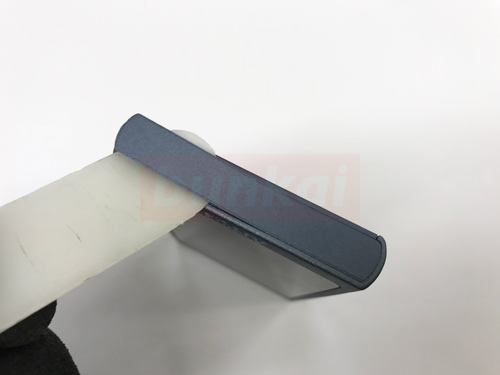
If you can float even in one place, let's try to peel off by sliding carefully.
Please note that if you proceed with the decomposition forcefully, it may break because of the material of the plastic.
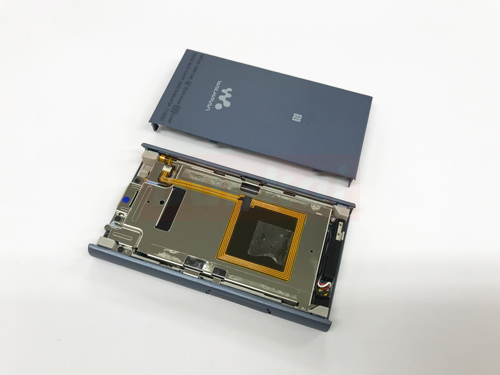
[Walkman NW-A45 screen not attached liquid crystal replacement, disassembly repair method 4]
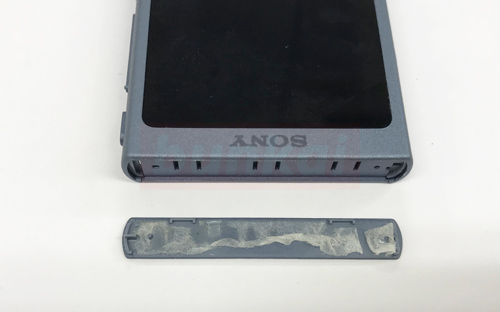
I was able to remove the upper lid, but you can see that it was fixed only with double-sided tape.
[Walkman NW-A45 screen not attached liquid crystal replacement, disassembly repair method 5]
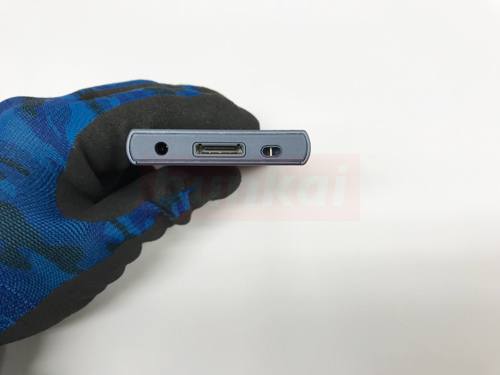
It becomes the lower side (dock connector side) opposite to the previous, but it is also fixed with tape, so i will peel it off by the same procedure as before.
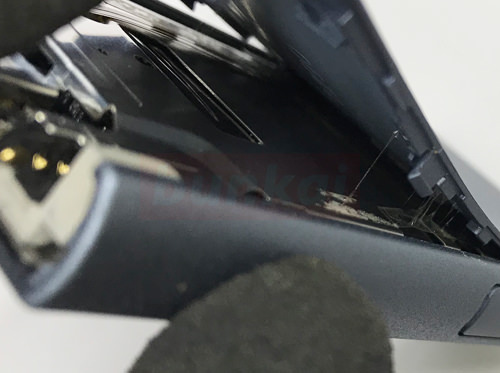
[Walkman NW-A45 screen not attached liquid crystal replacement, disassembly repair method 6]

Let's insert and peel off the tool as shown in the image.
[Walkman NW-A45 screen not attached liquid crystal replacement, disassembly repair method 7]

The upper and lower sides are only affixed with double-sided tape, so you can easily peel them off.
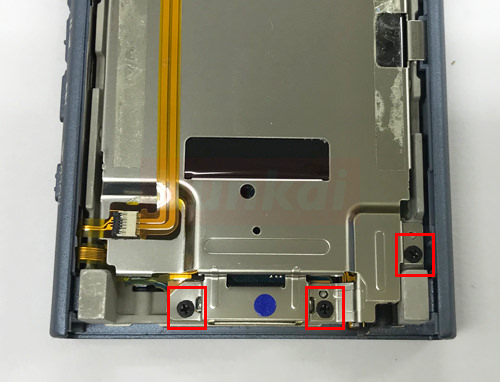
[Walkman NW-A45 screen not attached liquid crystal replacement, disassembly repair method 8]
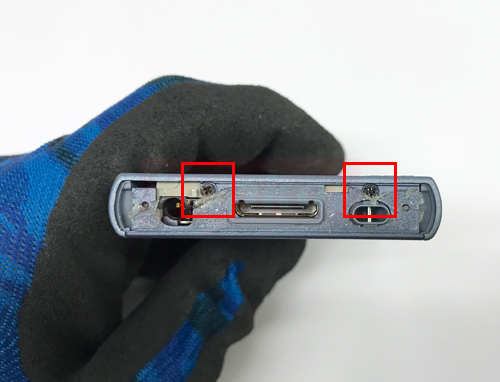
It is not on the upper side, but there are two screws on the lower side.
Let's use out the thin Phillips screwdriver at the tip.
[Walkman NW-A45 lcd replacement with no screen, disassembly repair method 9]
I'm opening the cover a little bit, do you understand?
[Walkman NW-A45 screen not attached liquid crystal replacement, disassembly repair method 10]
I took a picture from a different angle, but I put a spatula into this gap and disassembled it.
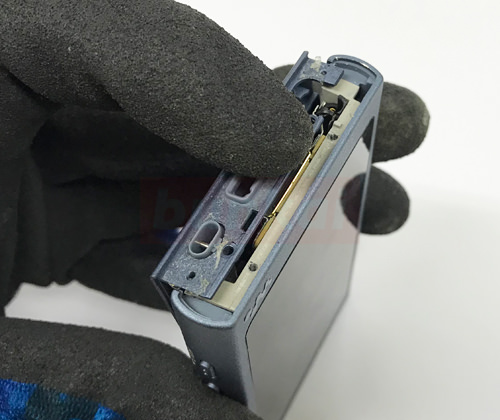
[Walkman NW-A45 lcd replacement with no screen, disassembly repair method 11]
The back cover is fixed with double-sided tape and plastic claws, but it slides a little bit.
[Walkman NW-A45 lcd replacement with no screen, disassembly repair method 12]
Since there is a double-sided tape from around the middle, let's insert the spatula while checking the inside.
[Walkman NW-A45 lcd replacement with no screen, disassembly repair method 13]
Only the back of the Walkman could be removed.
[Walkman NW-A45 lcd replacement with no screen, disassembly repair method 14]
There is a screw in the part surrounded by a red frame, so let's remove it.
[Walkman NW-A45 screen not attached liquid crystal replacement, disassembly repair method 15]
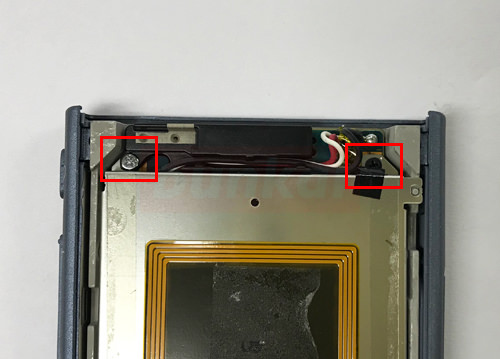
It is opposite to the previous, but let's remove the screw of two places.
[Walkman NW-A45 lcd replacement with no screen, disassembly repair method 16]
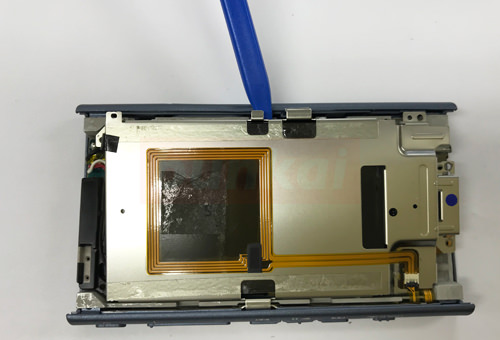
Remove the plate by inserting the tool into the gap and lifting it.
[Walkman NW-A45 lcd replacement with no screen, disassembly repair method 17]
Let's float because the cable of the battery enters the gap of the part.
[Walkman NW-A45 lcd replacement with no screen, disassembly repair method 18]
Place the cable on top.
[Walkman NW-A45 lcd replacement with no screen, disassembly repair method 19]

Remove the orange wiring, but pull the connector claws to 90 degrees before sliding the cable.
[Walkman NW-A45 screen not attached liquid crystal replacement, disassembly repair method 20]
You can remove the cable in this way.
[Walkman NW-A45 lcd replacement with no screen, disassembly repair method 21]
The part where the connector was stuck earlier is attached to the silver plate with double-sided tape, so let's insert the tool down and peel it off.
[Walkman NW-A45 lcd replacement with no screen, disassembly repair method 22]
If the tape is hard, it is easy to peel off by using a dryer or heat gun and warming it.
[Walkman NNW-A45 screen not attached liquid crystal replacement, disassembly repair method 23]
Remove the silver plate, but gently lift it from the bottom.
[Walkman NW-A45 screen not attached liquid crystal replacement, disassembly repair method 24]
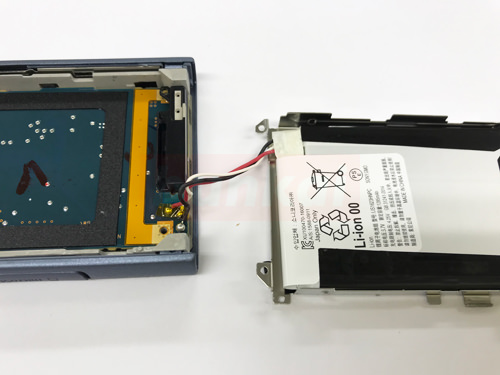
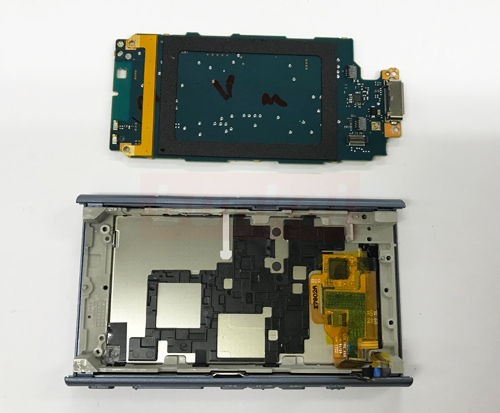
I was able to remove the plate, but the battery does not come off completely because it is soldered to the base.
Therefore, decomposition proceeds as it is.
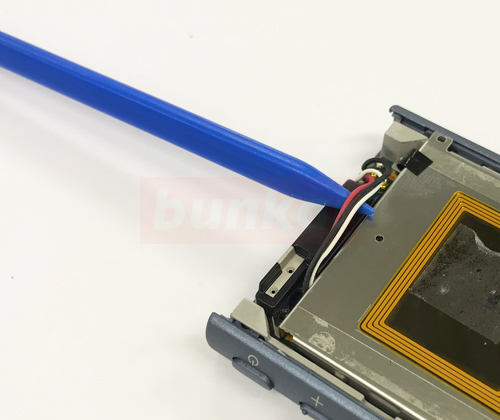
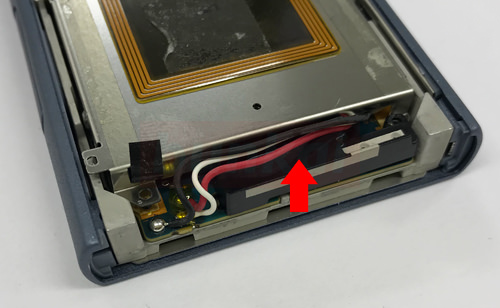
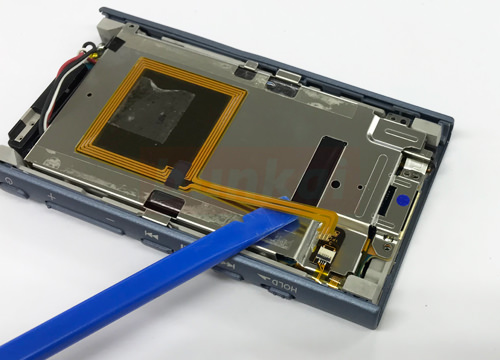
[Walkman NW-A45 screen not attached liquid crystal replacement, disassembly repair method 25]
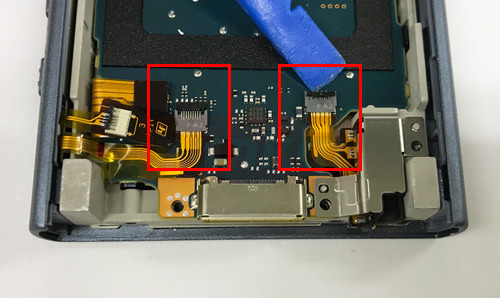
Remove the wiring of the red frame, but let's pull out the cable after causing the claws of the connector to 90 degrees.
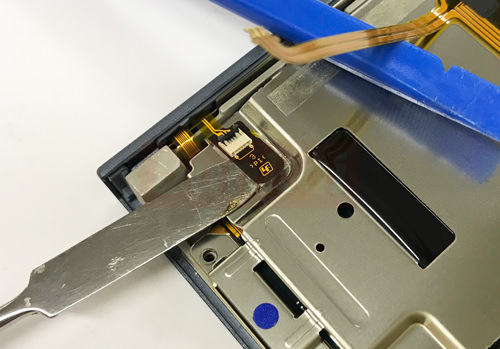
[Walkman NNW-A45 screen not attached liquid crystal replacement, disassembly repair method 26]

The cable of the liquid crystal is inserted from the top to the bottom, so when you remove it, you can easily remove it by lifting it from the bottom to the top.
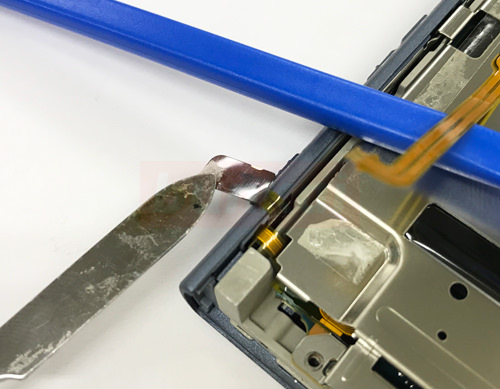
[Walkman NNW-A45 screen not attached liquid crystal replacement, disassembly repair method 27]
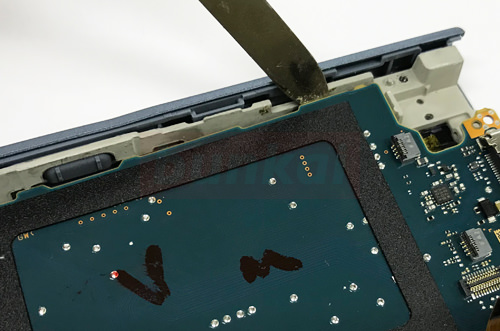
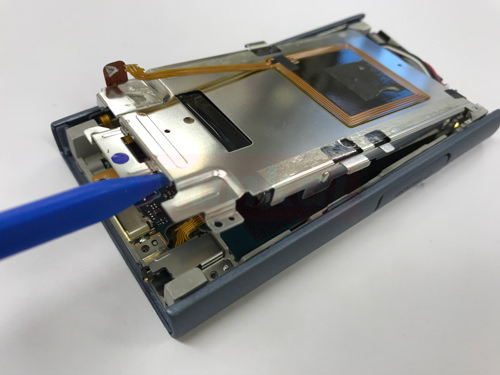
Next, remove the base, but check again to see if you have forgotten to remove the screws and wiring.
The tool is inserted into the gap between the base and the main body and it is removed, but it does not lift easily.
Because the base is stuck to the nail of the main body, it comes off if you try to lift the base while pushing the nail.
[Walkman NNW-A45 screen not attached liquid crystal replacement, disassembly repair method 28]
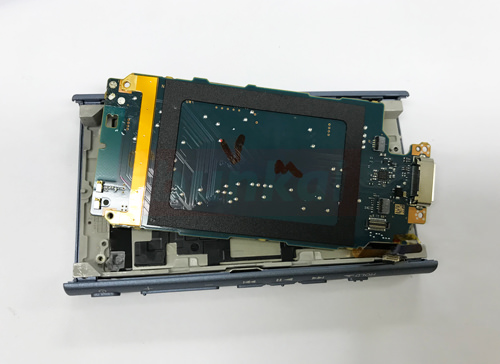
This is what happens when the foundation is removed.
[Walkman NNW-A45 screen not attached liquid crystal replacement, disassembly repair method 29]
It is completely off.
There is no battery in the image, but because the image is borrowed (this homepage).
[Walkman NNW-A45 screen not attached liquid crystal replacement, disassembly repair method 30]
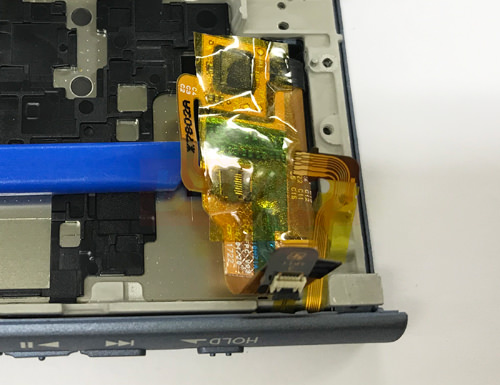
I think that it is possible to confirm that there is an orange wiring inside when the base can be removed, but the wiring is attached with double-sided tape to the main body, so let's plug the tool down and peel it off.
[Walkman NNW-A45 screen not attached liquid crystal replacement, disassembly repair method 31]

When you peel off the tape, it looks like this.
[Walkman NNW-A45 screen not attached liquid crystal replacement, disassembly repair method 32]
This time, the liquid crystal side is removed.
The liquid crystal is attached to the main body with double-sided tape, but it is difficult to remove it as it is.
Double-sided tape is attached to the red line part, but the heat of the heat gun and the dryer is applied, and the tape is removed while softening.
[Walkman NNW-A45 screen not attached liquid crystal replacement, disassembly repair method 33]
If you feel that the tape has softened by applying heat to the glass, try pressing it lightly out of the back side of the liquid crystal by hand.
If the glass floats even a little, insert the tool as shown in the image.
If it does not float at all, please try the same procedure again after applying a little more heat because the heat is weak.
[Walkman NNW-A45 screen not attached liquid crystal replacement, disassembly repair method 34]

When the glass floats, it can be removed to such a feeling.
[Walkman NNW-A45 screen not attached liquid crystal replacement, disassembly repair method 35]
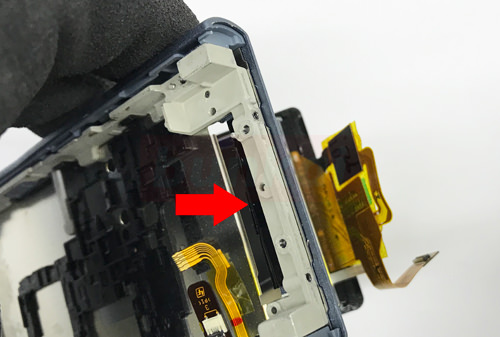
When the screen comes off to some extent, push the cable out to the other side through the arrow hole.
[Walkman NNW-A45 screen not attached liquid crystal replacement, disassembly repair method 36]
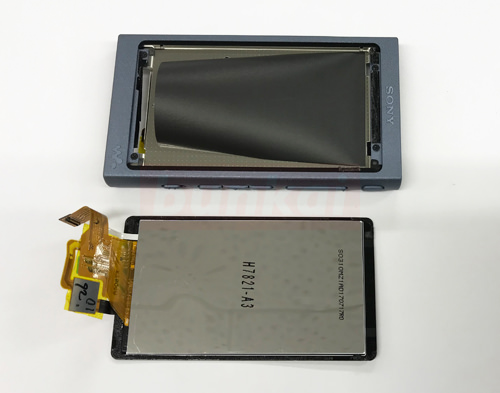
The LCD could be removed.
If the part is ready, return to the original procedure and re-incorporate it to complete.