If the battery of the Nintendo Switch has become bad or expanded, you will need to replace the battery, but we will publish the disassembly repair method when you change the battery yourself.
The expansion of the battery is difficult to understand on the outside, but it is a signal of battery expansion if the gap of the liquid crystal seems to be widening compared with the past.
By the way, on the official website of Nintendo (manufacturer), when doing battery replacement, it seems to be 4212 yen, so it is even cheaper than before.
The following is the tool used for disassembly, but this tool alone can handle battery replacement.
[Switch battery replacement and repair method 1]
Let's remove the Joycon attached to both sides first because we will continue to disassemble the Switch!
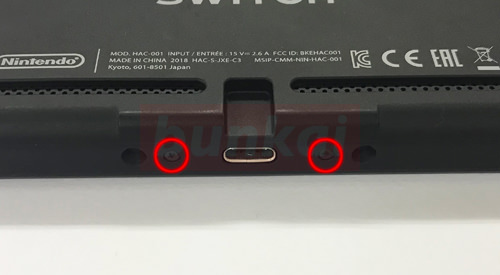
[Switch battery replacement and repair method 2]
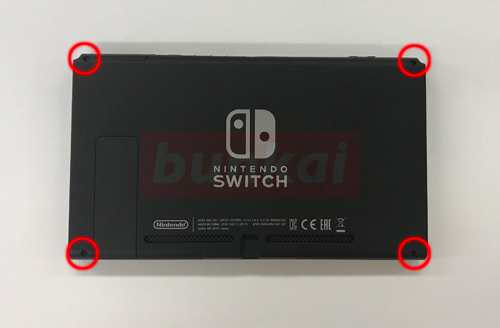
All disassemblies are done from the back, but the screw in the red circle part is removed with the screwdriver first.
[Switch battery replacement and repair method 3]
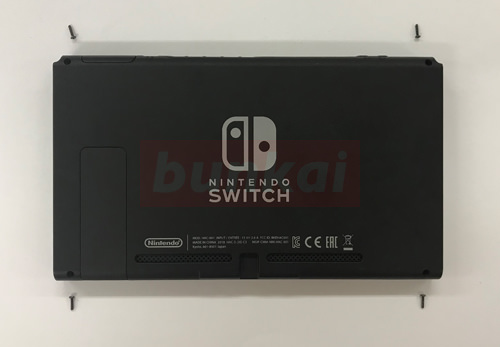
I was able to remove the screw, but please keep it so as not to lose it so as not to remove the screw further in the future.
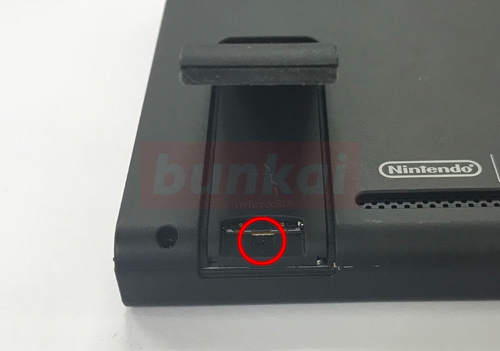
[Switch battery replacement and repair method 4]
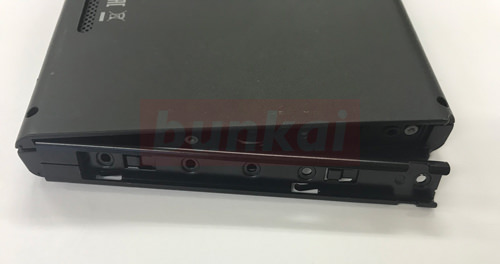
This is the dock connector side, but there are two screws, so I will remove it.
[Switch battery replacement and repair method 5]
This is the upper side, but the screw is removed.
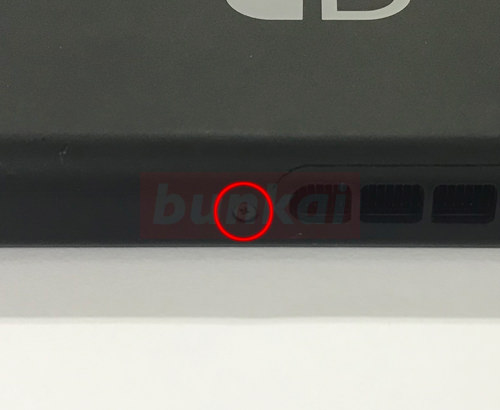
[Switch Battery Replacement and Repair Method 6]
There is a screw in the part where micro SD is inserted, but it is a place that tends to forget unexpectedly.
Let's open the lid by hand and remove the screw with the screwdriver.
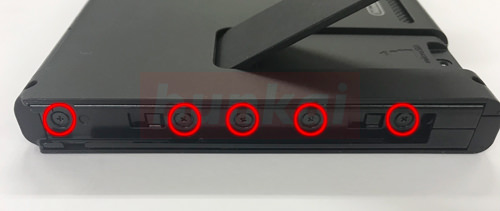
[Switch battery replacement and repair method 7]
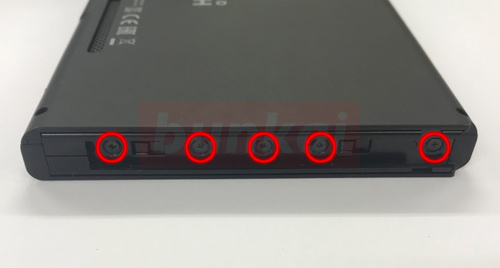
Here is the part to insert the Joycon, but there are five screws.
Remove all screws with a screwdriver.
[Switch battery replacement and repair method 8]
If you can remove all the screws, the parts will come off slightly for the image, but it will not come off completely, so it will be okay for the time being.
[Switch Battery Replacement and Repair Method 9]
It is the Joycon part on the other side.
Because it becomes the same method as decomposition, let's remove the screw in the same manner as before.
[Switch battery replacement and repair method 10]
The parts come off slightly in the same way, but for the time being, this is also okay as it is.
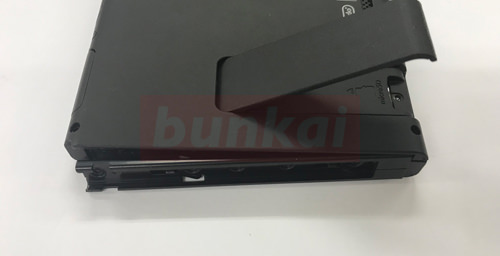
[Switch battery replacement and repair method 11]
It is possible to lift the back cover as shown in the image when all screws up to the above process can be removed.
I try to cause it gradually from the dock connector side (charge part), but if there is a hard part on the way, please check again because there is a possibility of forgetting to remove the screw.
[Switch battery replacement and repair method 12]
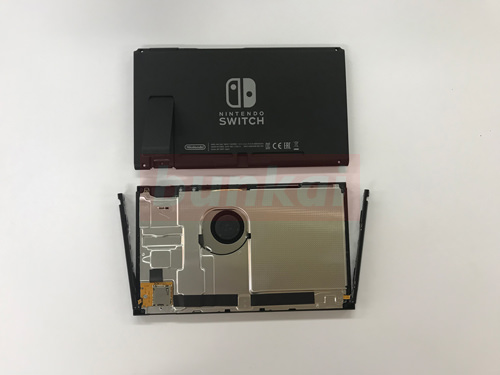
It was possible to remove the back cover from the main body.
Decomposition gradually becomes complicated from here, so let's perform the decomposition while checking the structure.
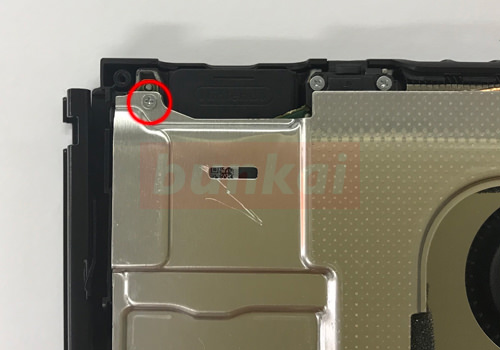
[Switch battery replacement and repair method 13]
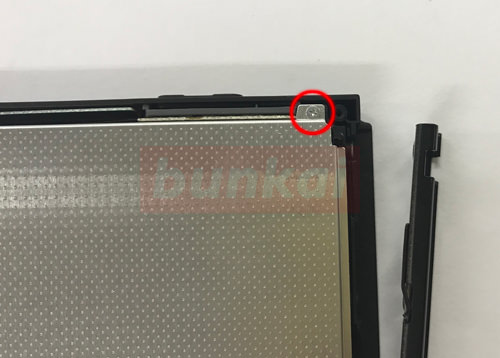
The inner motherboard is protected by the iron shield.
First of all, it becomes from the process of removing this shield, but it is fixed to the main body with several screws.
Let's remove the screw of the red circle part.
[Switch battery replacement and repair method 14]
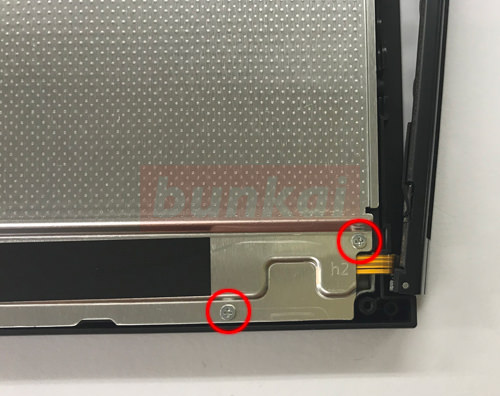
This is the bottom right.
Let's remove the screw as before.
[Switch battery replacement and repair method 15]
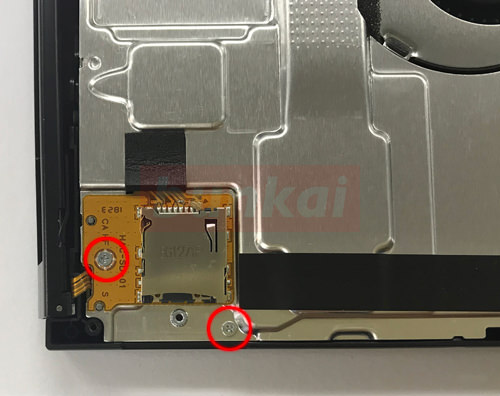
This part is a micro SD outlet, but be careful not to damage the base when removing the screw.
[Switch battery replacement and repair method 16]
This is the upper left.
Let's remove the screw in the same way.
[Switch battery replacement and repair method 17]
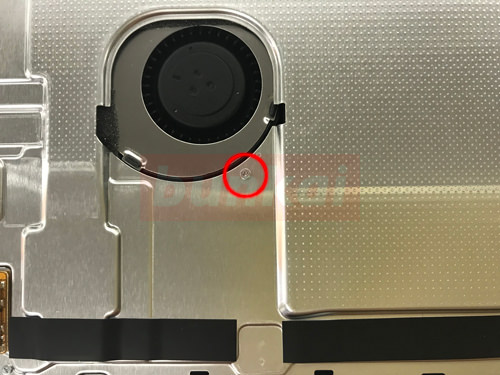
There is a screw in the FAN in the middle, so don't forget to remove it.
[Switch battery replacement and repair method 18]
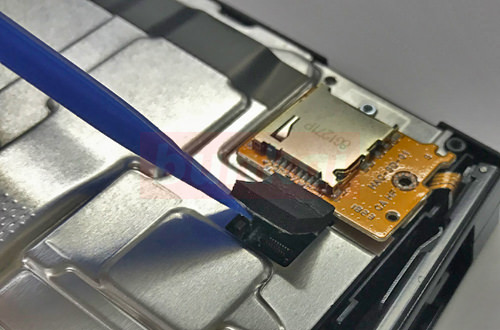
The base of the previous micro SD is connected to the motherboard by a connector.
It is possible to remove the connector by inserting the tool from the bottom as shown in the image and lifting it upward.
[Switch battery replacement and repair method 19]
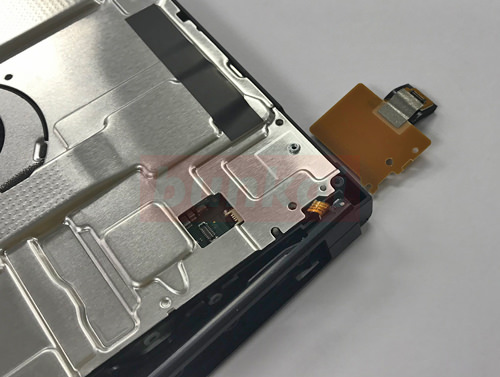
It is possible to remove it easily if you wake up the base of micro SD as it is.
[Switch battery replacement and repair method 20]
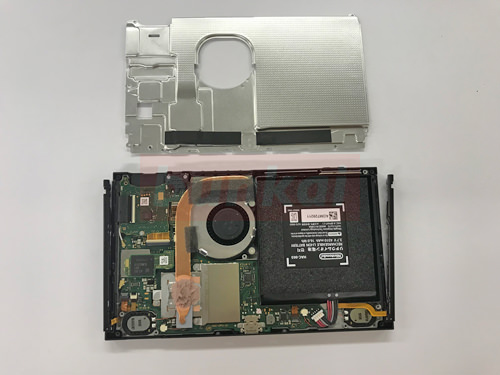
If you can remove all the base and screws of the micro SD, you can remove the silver plate.
[Switch battery replacement and repair method 21]
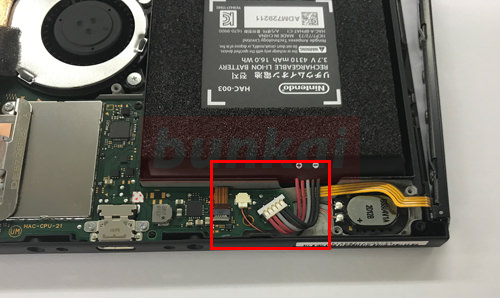
I think that you can check the battery as soon as you can remove the silver plate, but the part surrounded by a red frame is connected to the motherboard.
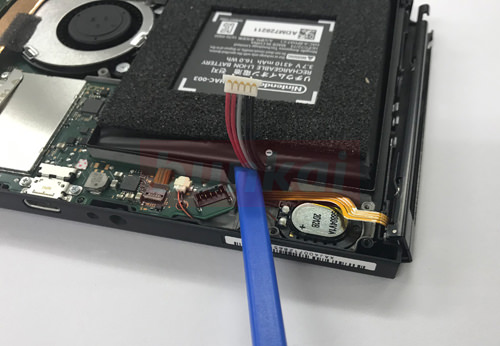
[Switch battery replacement and repair method 22]
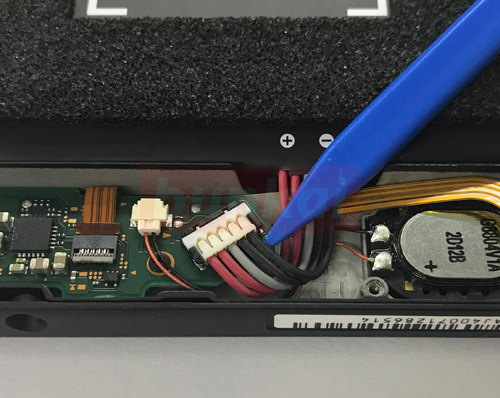
Remove the connector before the battery itself, but it is possible to remove the connector if you try to lift the tool down as shown in the image.
[Switch battery replacement and repair method 23]

Now i was able to cut off the electricity from the Switch body.
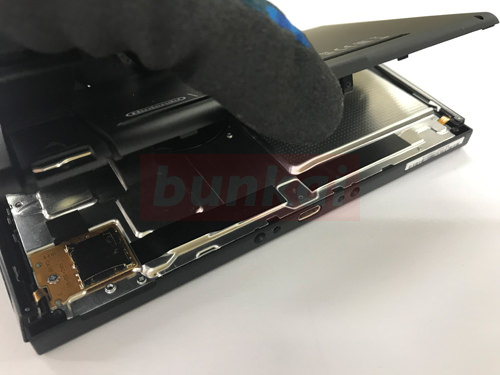
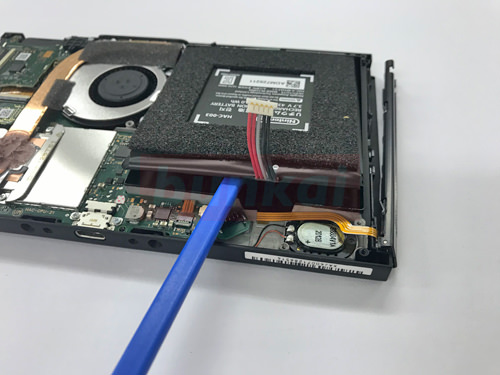
[Switch battery replacement and repair method 24]
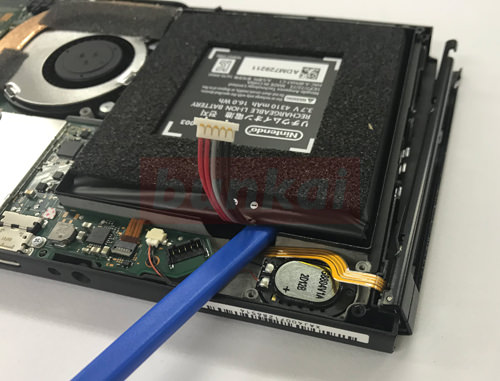
Since the battery is attached to the main body with double-sided tape, it will be peeled off using a tool as shown in the image, but I think that the position where the tool is inserted is good in the image.
It's like inserting a tool and tearing up the double-sided tape.
[Switch battery replacement and repair method 25]
I plug the tool in a different direction than before.
[Switch battery replacement and repair method 26]
If you plug the tool to a certain extent, you can lift it a little like the image, so let's peel off the tape while checking the state inside the battery.
[Switch battery replacement and repair method 27]
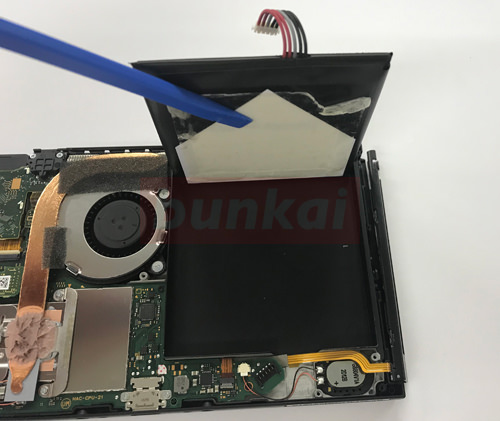
I was able to peel off the battery.
If you want to replace a new battery, please assemble it with the original procedure.
Since this battery replacement method does not affect the save game, please refer to it if you do not want to lose data.