Sharp's air purifier KC-Z40 is disassembled.
It is an air purifier equipped with a humidification function released in 2010, but it has been about 10 years since it was released, so if it is still in use, why not try maintenance?
The tool used for disassembly is only a Phillips screwdriver (large) and a monkey, so I think that it is possible to disassemble almost with the tool in the home.
[Sharp Air Purifier KC-Z40 Decomposition Method 1]

The model that disassembled this time is here, but Sharp's air purifier feels unified in appearance.
[Sharp Air Purifier KC-Z40 Decomposition Method 2]
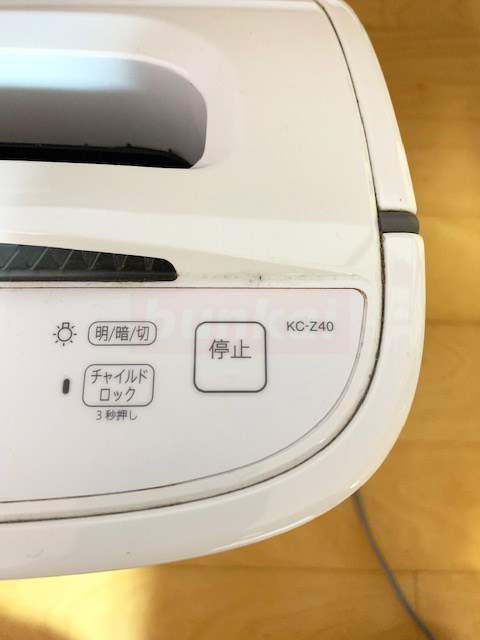
Model: KC-Z40
[Sharp Air Purifier KC-Z40 Decomposition Method 3]
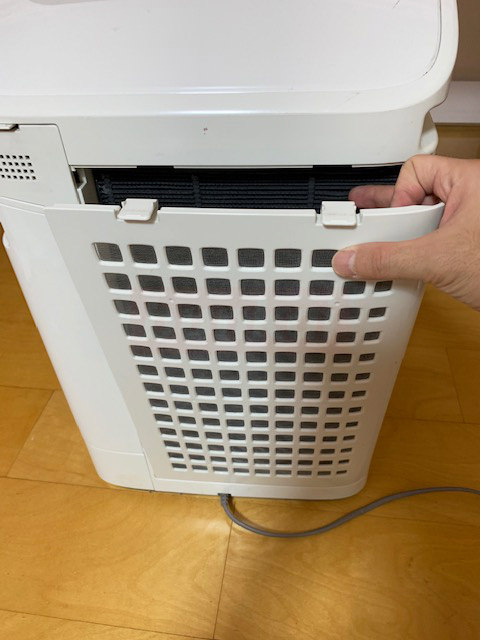
The replacement of the dust collection filter and deodorization filter is made to be able to be easily removed by opening the back cover.
I think that the main mechanism of dust and dirt is purified by this filter, but there are a lot of dust that could not be caught by the filter inside the air purifier.
The main task of this decomposition is other than the filter, I think that it is better to change the filter depending on the situation if it decomposes because there is no meaning at all if the filter seems to be dirty even if the part other than the filter is cleaned and cleaned.
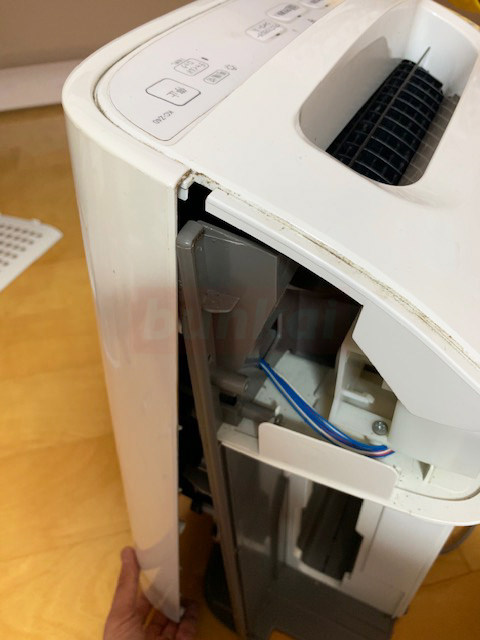
[Sharp Air Purifier KC-Z40 Decomposition Method 4]
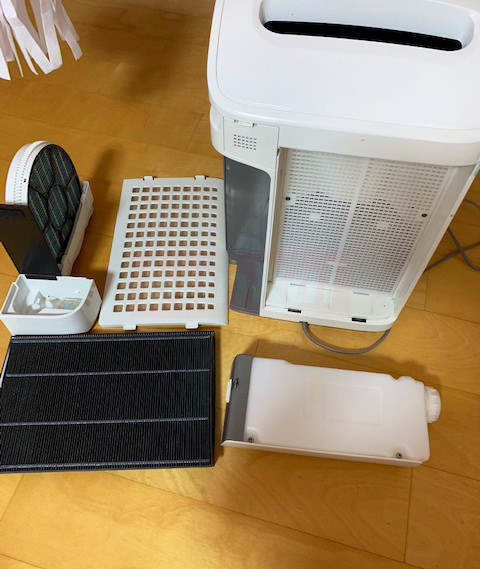
I have omitted some of the decomposition, but if you have cleaned even once, I have not been in this state?
The part of the blue circle in the upper left, the tank in the lower right is the thing to be used for humidification.
THE KC-Z40 has a humidification function, but please note that mold will occur in the parts of the tank and blue circle if the state is not humidified.
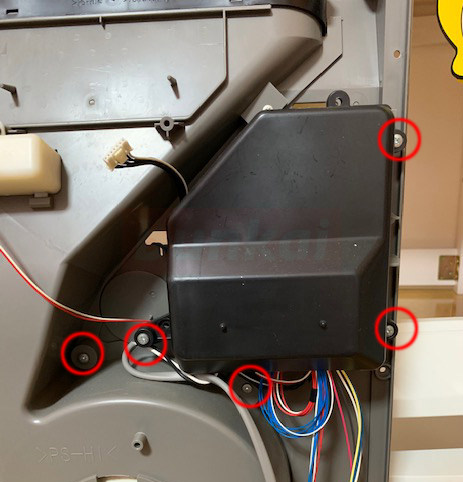
[Sharp Air Purifier KC-Z40 Decomposition Method 5]
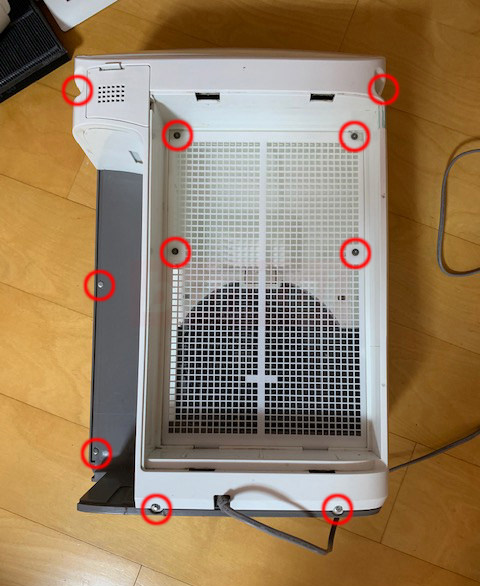
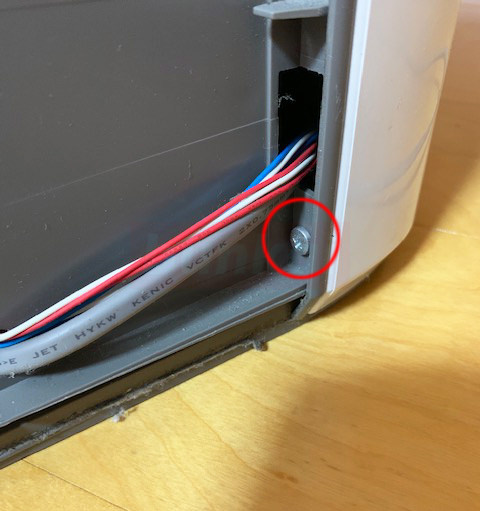
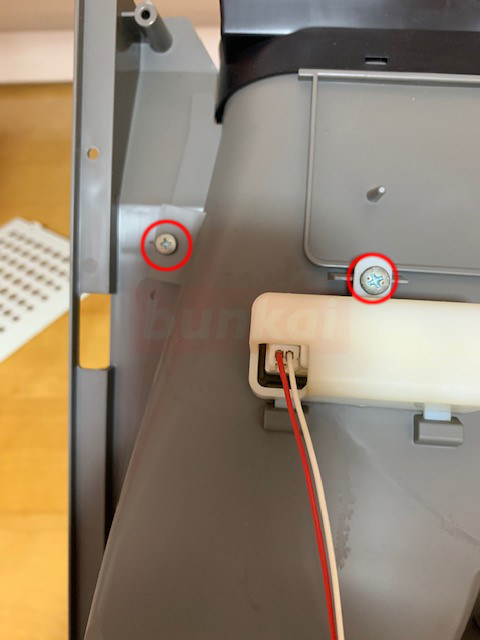
From here, it becomes the main decomposition, but let's remove all because there is a screw in the red circle part.
[Sharp Air Purifier KC-Z40 Decomposition Method 6]

It is the net part of the back of the dust collection filter and the deodorizing filter, but it is possible to remove it easily if the screw is off.
[Sharp Air Purifier KC-Z40 Decomposition Method 7]
Dirt is not noticeable in this area, but you can still see that there is dust when tracing the body with your finger.
[Sharp Air Purifier KC-Z40 Decomposition Method 8]
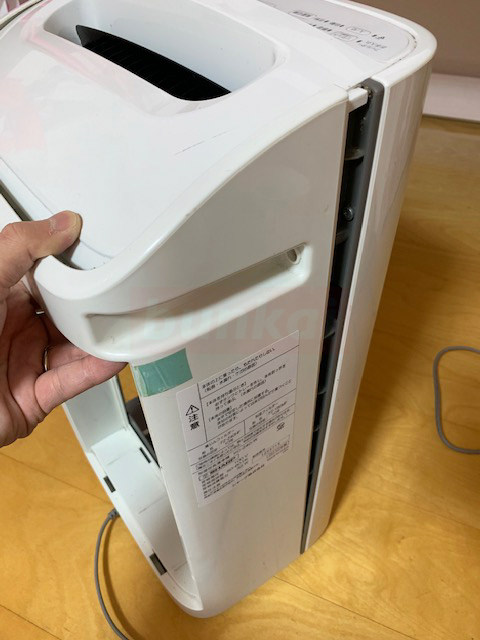
If all the screws mentioned above can be removed, it is possible to remove the body of the back half.
It is possible to remove it if you pull it back while suppressing the front side.
[Sharp Air Purifier KC-Z40 Decomposition Method 9]
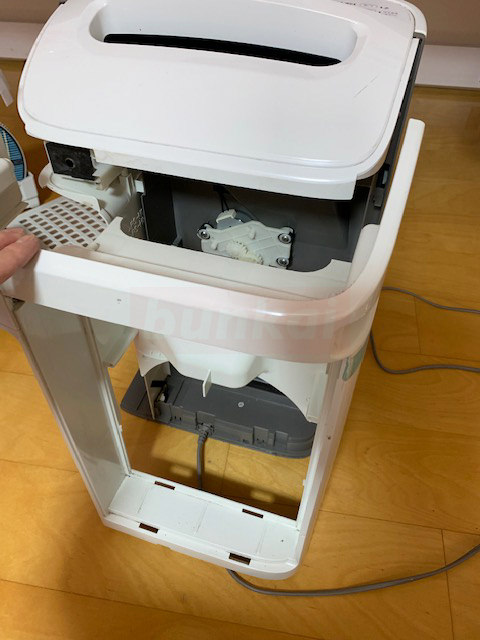
You can remove it like this.
[Sharp Air Purifier KC-Z40 Decomposition Method 10]
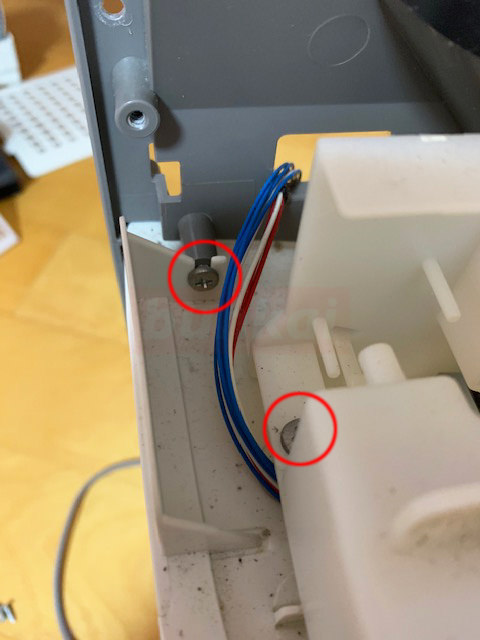
There are more screws inside the parts removed in STEP 9.
Let's remove the screw of the red circle part.
[Sharp Air Purifier KC-Z40 Decomposition Method 11]
Remove this screw, too.
[Sharp Air Purifier KC-Z40 Decomposition Method 12]
This is the left side towards.
[Sharp Air Purifier KC-Z40 Decomposition Method 13]
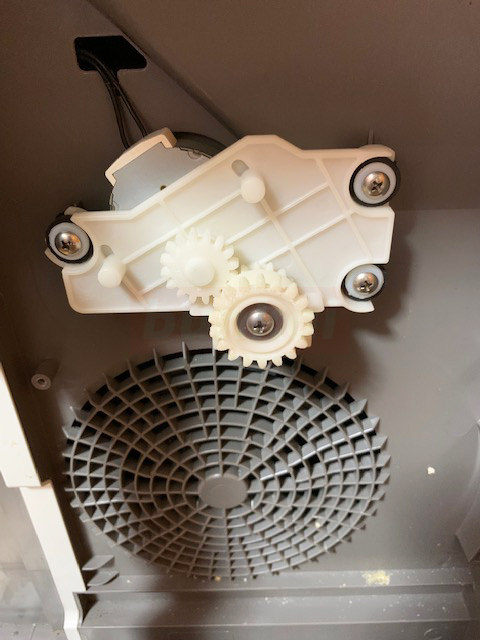
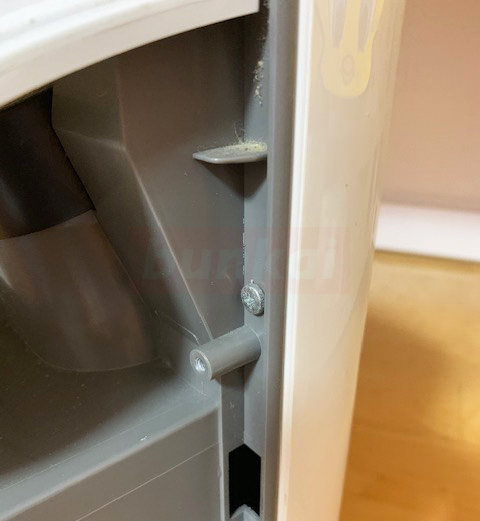
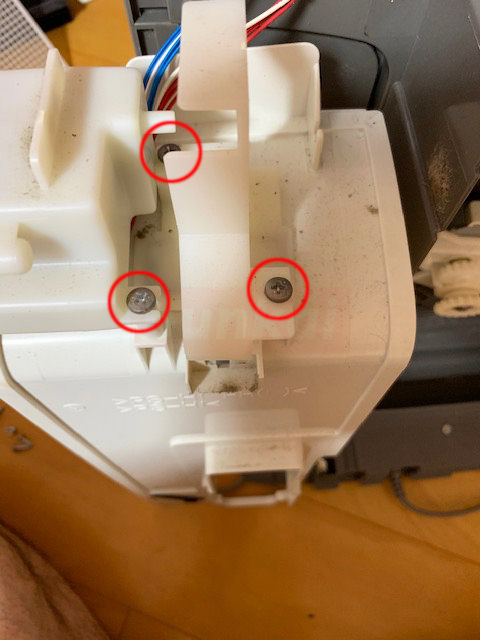
There is a part of the gear in the middle, but remove the screw of the other screw (one left, two on the right).
[Sharp Air Purifier KC-Z40 Decomposition Method 14]
I will remove the cover of the front side and the upper side at once, but I think that i can understand the feeling that comes off when I lift the cover of the front side from the bottom to the top.
[Sharp Air Purifier KC-Z40 Decomposition Method 15]

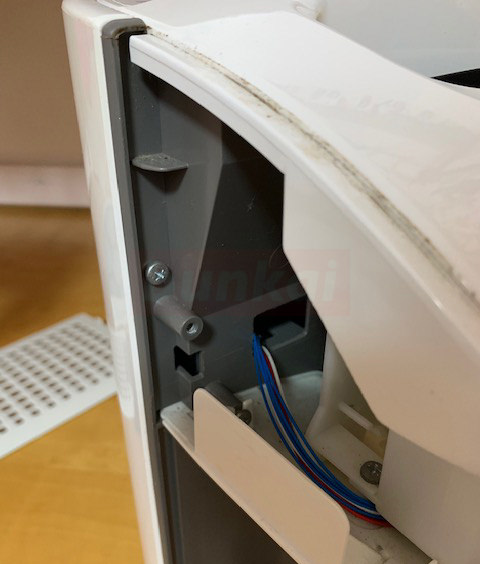
This part is the underside of the switch, but the previous cover does not come off unless the connector of the red circle part is removed.
You can remove the connector by grasping the base of the cable with your finger and pulling it downward.
[Sharp Air Purifier KC-Z40 Decomposition Method 16]
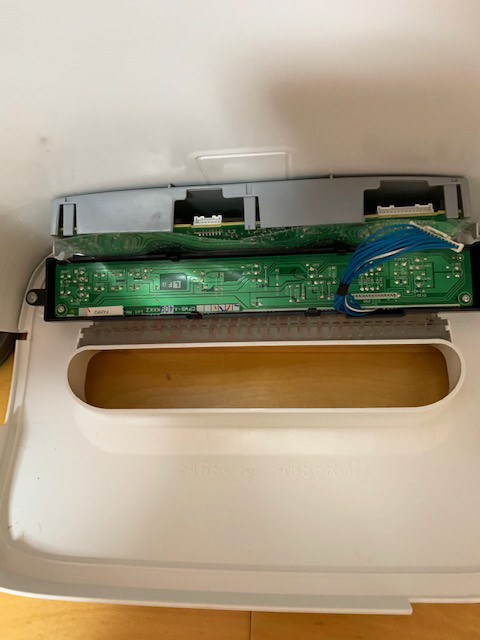
The cover could be removed.
[Sharp Air Purifier KC-Z40 Decomposition Method 17]
I think that there is a part of the t-ko target to remove the cover of the previous, but let's remove all the screws of the red circle part.
[Sharp Air Purifier KC-Z40 Decomposition Method 18]

The screw is hidden in the lid around the fan, so please do not forget to remove it.
[Sharp Air Purifier KC-Z40 Decomposition Method 19]
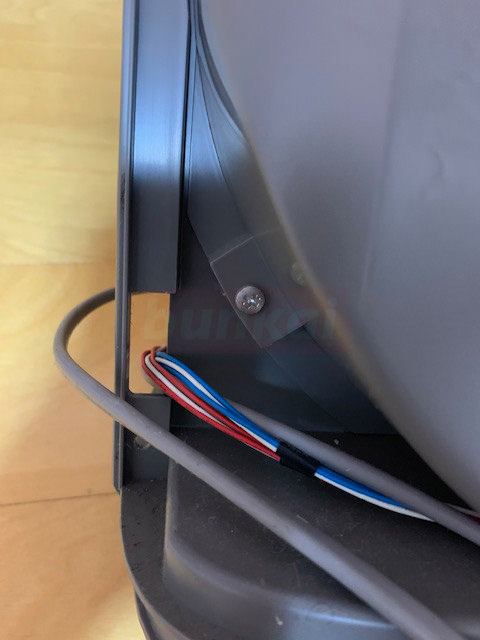
Remove the screw on the lower left.
[Sharp Air Purifier KC-Z40 Decomposition Method 20]
Remove the screw on the top left.
[Sharp Air Purifier KC-Z40 Decomposition Method 21]
Remove the red circle screw.
[Sharp Air Purifier KC-Z40 Decomposition Method 22]
Here, also remove the screw of the red circle part.
[Sharp Air Purifier KC-Z40 Decomposition Method 23]
Originally, there is a black part in the cylindrical part, but I lifted it upward and removed it first.
You can see that dust is thick inside the black parts.
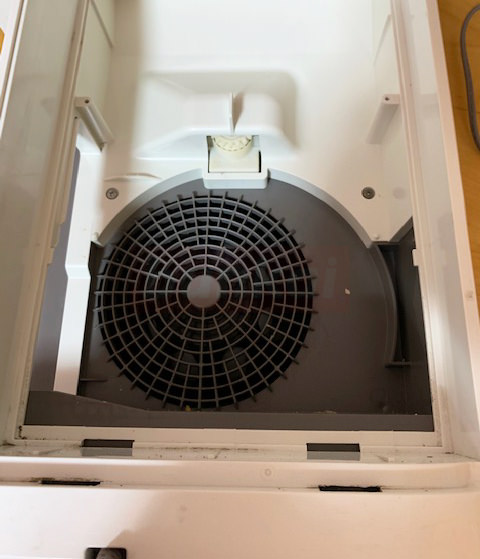
[Sharp Air Purifier KC-Z40 Decomposition Method 24]
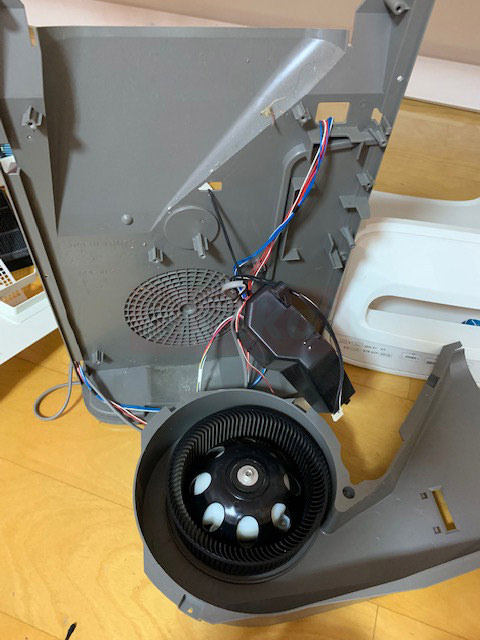
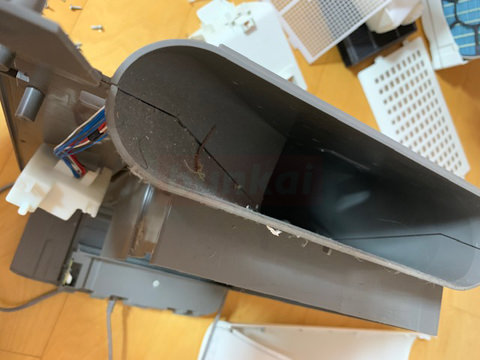
I think that it becomes like an image if I cut the tubular part of the previous in two, but I was able to confirm that there is a big black fan.
[Sharp Air Purifier KC-Z40 Decomposition Method 25]
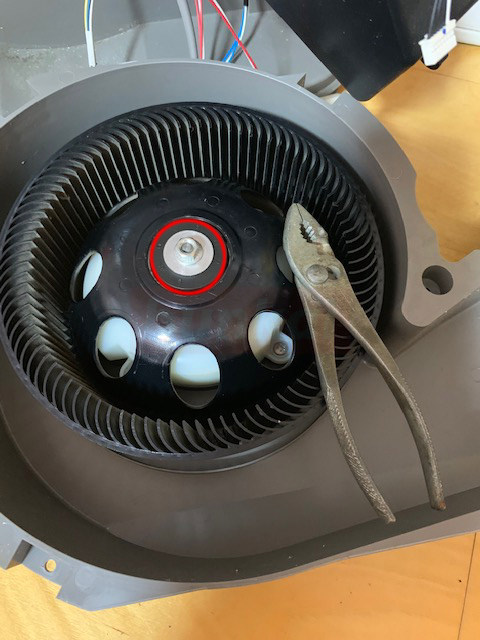
Because there is a lot of dust in the fan position, I want to remove it and clean it.
Because there is a hexagonal nut in the red circle part, let's use the monkey etc.
After removing the screw, only the fan can be removed if it is lifted upward as it is.
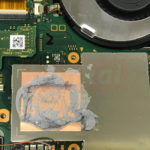
[Sharp Air Purifier KC-Z40 Decomposition Method 26]
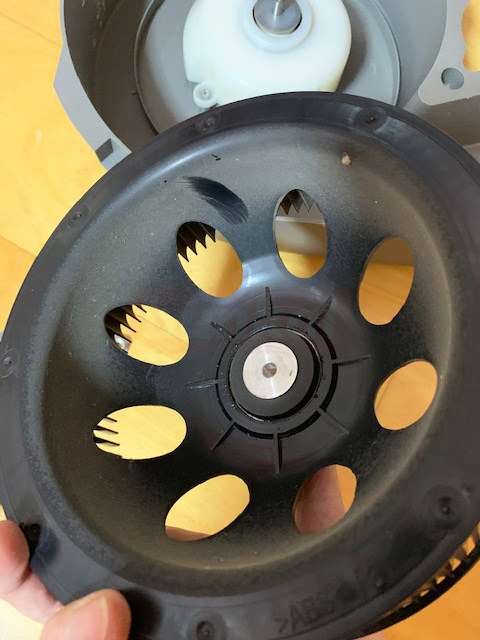
There is a lot of sand and dust.
I was able to remove dirt easily by wiping with water without using a cleaner.
Summary
I was aiming to clean the part that can not be removed by dust collection filter and deodorization filter, but I felt that the inside is quite dirty.
I think that it takes at least one to two hours to incorporate it into the original state when cleaning after disassembling up to this point.
I think that it is ant to renew it to a new air purifier thinking about the year, but it is quite recommended because it is less than 5000 yen even if the filter change is included if it can disassemble it by oneself and clean it.