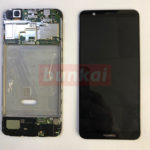
iPod touch I would like to disassemble the 4th generation A1367,
Let's try to disassemble after confirming the advantages and disadvantages!
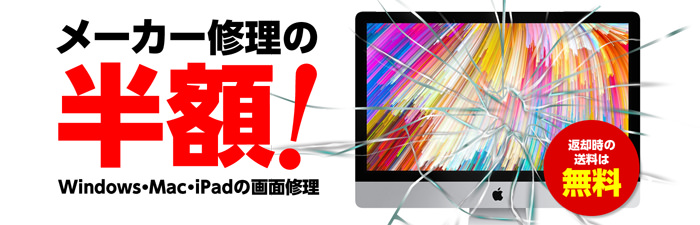
All disassemblies of the iPod touch 4th generation begin with the LIQUID Crystal removed, but a strong double-sided tape is attached to the part surrounded by a red circle.
If you add heat from a heat gun or dryer and wipe the tape, then peel off the liquid crystal, the work efficiency will increase.
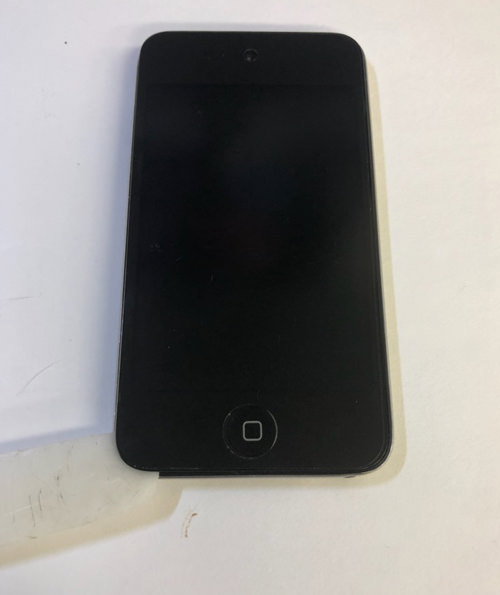
After warming to some extent with a heat gun or dryer, the tool is inserted into the slight gap between the liquid crystal glass and the main body.
In the image, plastic spatula is used, but it does not matter if it is thinner.
The ideal is a thin one such as a point card (made of paper) as a substitute.
The tape is also affixed to the side of the main body, but it is safe to float the lower side (home button) and the upper side (camera side) because the adhesive is weak.
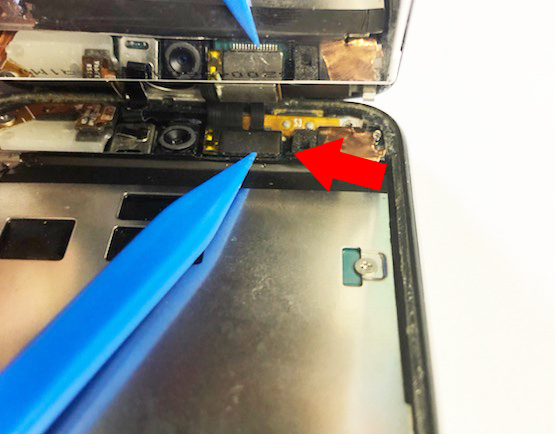
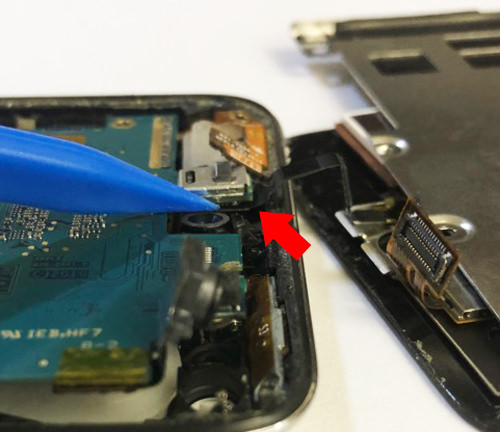
This part connects the LCD to the logic board, but the cable is so short that it comes off quickly.
It is possible to remove the connector if it wakes up from the bottom to the upper side how to remove it.
There is a heat shield between the LCD and the logic board.
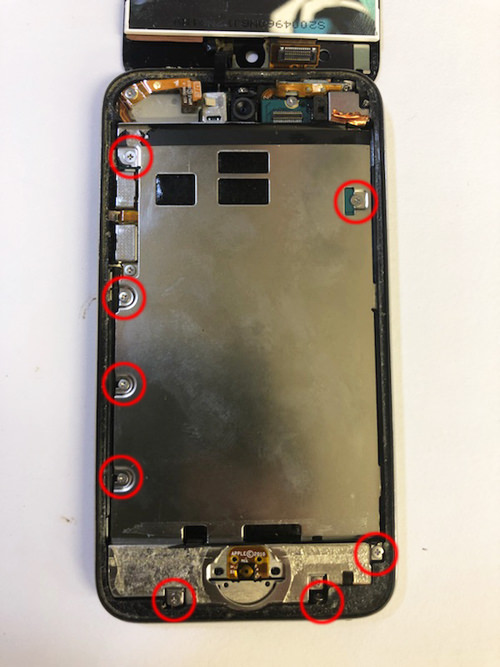
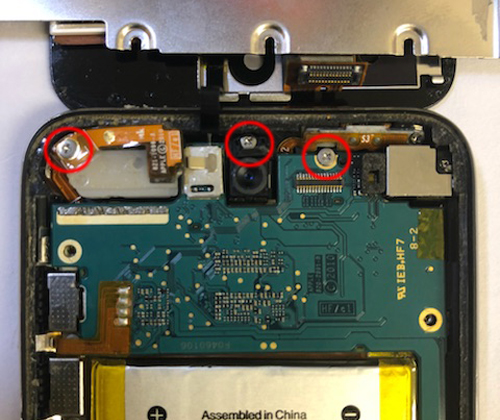
All screws in the red circle part will be removed, but please store it so that it does not become lost because the length and shape of the screw are slightly different.
Once the screw is removed, remove the heat shield.
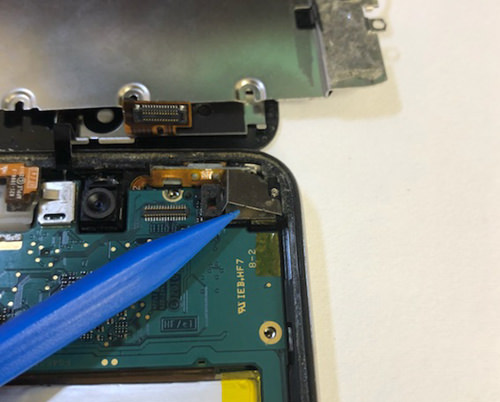
It is possible to remove it if the tool is inserted into the position of the image and it is made to lift it to the upper side.
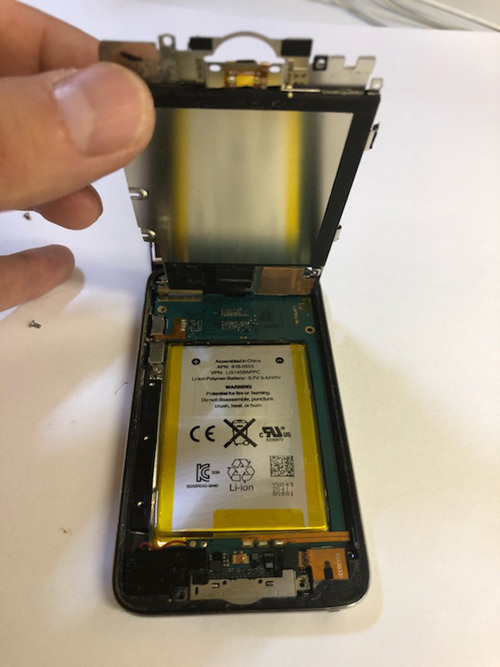
The heat shield is lifted up, but there is a battery underneath.
iPod touch A1367 is a type that the battery is soldered to the base, so it is quite difficult when replacing the battery.
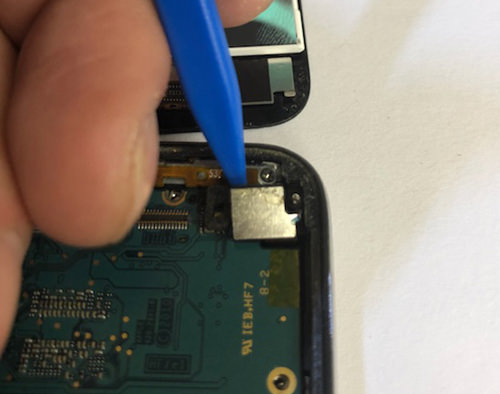
After removing the previous plate, remove the camera itself from the recesses that the camera is in.
You can remove it from the depression if you wake it from the back to the front.
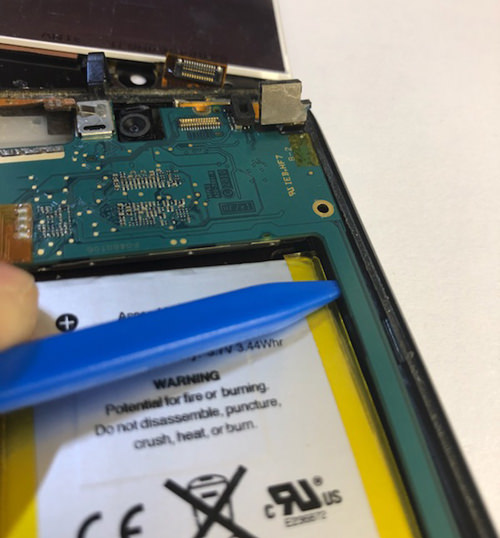
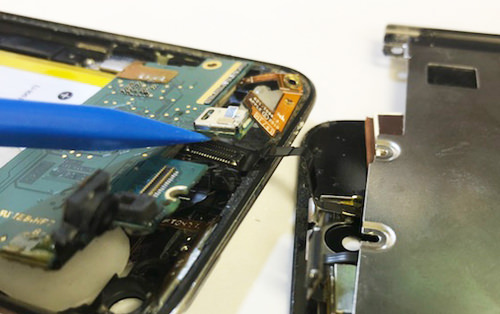
It is quite difficult to understand, but the cable is connected by a connector to the back of the base.
It is a feeling to lift the base and push only the connector part down and remove it.
It is difficult to understand, but the connector is off the base.
I think that it is good to understand the structure because this work is quite troublesome when i return the liquid crystal exchange later.
The connector is completely off, but this part is lurking under the base.
Now that we can separate the liquid crystal side and the main body side, we will install the liquid crystal that we have prepared.
It depends on the parts you have prepared, but if you do not have a home button, please port it from the original LCD.
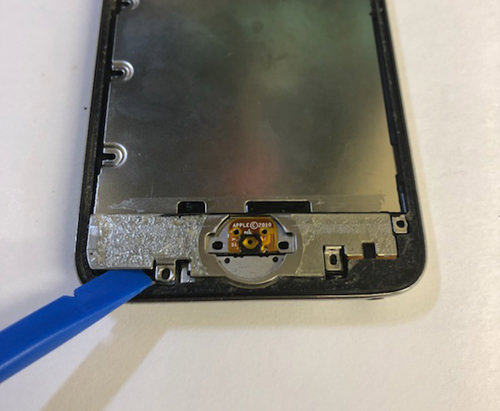
The home button is only taped, so it can be easily removed.
I think that the removal was not a problem, but the installation is quite troublesome.
The cable is extremely short and it is quite difficult to install, but be careful to install it.
If you try to install it forcibly, the connector may break, and there is a possibility that the work up to now becomes a bubble of water.
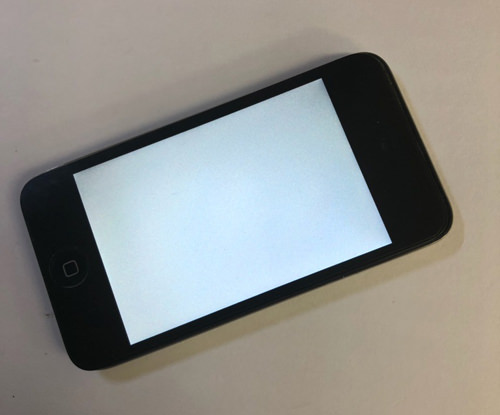
If the connector i just did not fit, the screen will white out like this.
Therefore, it is better to turn on the iPod once and display it normally before paying the LCD completely, or to check whether the touch reacts normally.
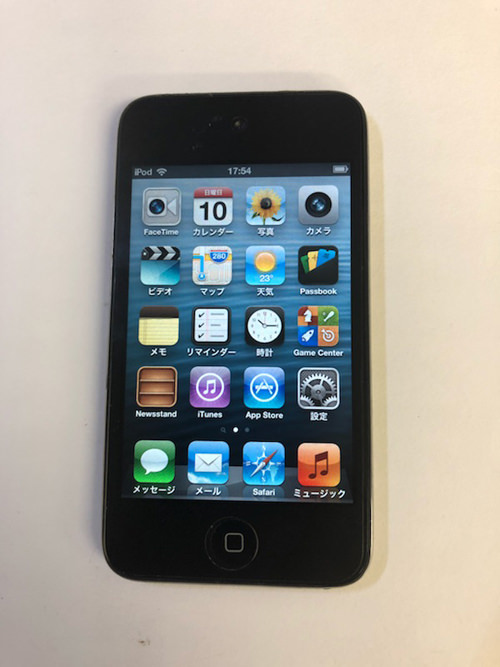
The LCD was displayed safely.
The iPod touch 4th generation is not difficult to disassemble so much once you get used to it, but there are several points that need a knack, so please disassemble carefully!