iPad 6th Generation (2018) A1893 LCD Cracking, Cracks, Cracks, How to Repair When You Can't See The Screen, Decomposition Method
[iPad 6th Generation (2018) A1893 LCD Replacement and Decomposition Method STEP 1]
- It has only been about a week since it was released, but we have broken down the iPad 6th generation, so we will release it.
It is a big feature of the iPad 6th generation, but Apple pencil can only be used in the 6th generation on an iPad that cuts 50,000 yen, but unlike the iPad Pro, there are four to two speakers, so is this area cost?rifu?
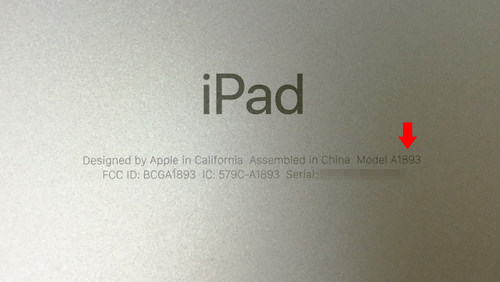
Since you can choose 32GB and 128GB of capacity, I think that you buy it from the cost. - The model that disassembled this time becomes A1893 and has become a Wifi model, but from the experience up to now, we have guessed that the decomposition method is the same even in the cellular model!
Now that iPadA1893 is separate from the touch panel and lcd panel (inner LCD), it is possible to replace the touch panel and the LCD panel.
Recent lyseeapad shaved a touch panel and an LCD panel are often integrated, and if it is integrated, the parts price is expensive impression, but even if parts are distributed in the future, the repair price is likely to be relatively cheap.
[iPad 6th Generation (2018) A1893 LCD Replacement and Decomposition Method STEP 2]
- The main tools used are Phillips screwdrivers, spatulas, picks, heat guns and dryers.
I think that there is no explanation for those who have used a heat gun, but if you explain it clearly to the person who sees it for the first time, is the heat gun a powerful version of the dryer?
The reason why the heat gun is used is to make it easy to peel off by warming the double-sided tape.
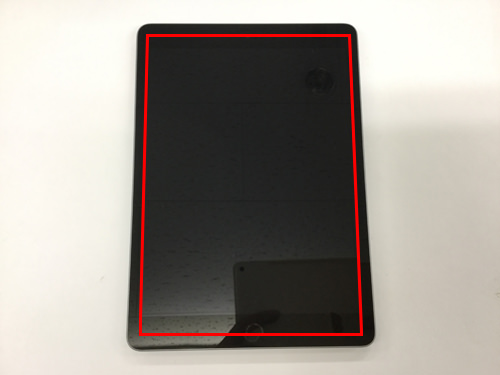
All of the iPad models are fixed to the frame with double-sided tape, and the LCD needs to be removed no matter which parts are replaced.
The 6th generation of the iPad is also fixed to the frame as well, so I will peel off using this heat gun,
Because double-sided tape is attached to the red line part, heat is added to this part.
[iPad 6th Generation (2018) A1893 LCD Replacement and Decomposition Method STEP 3]
- If you apply too much heat, the liquid crystal may burn inside, so keep a moderate temperature.
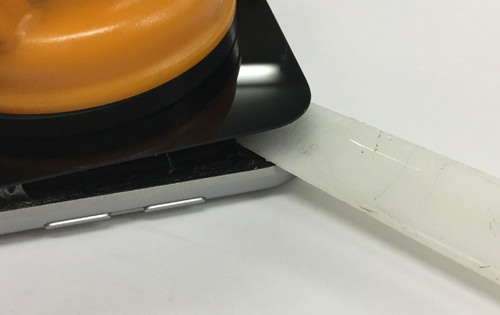
Because it becomes an image to pull out with a suction cup (orange) while warming with heat, please do not apply too much to the same part though it is the temperature which floats by pulling the suction cup here.
In the image, we use a spatula, but if you can float the glass in a little, it is efficient if you put a pick or a card in the floating part.
[iPad 6th Generation (2018) A1893 LCD Replacement and Decomposition Method STEP 4]
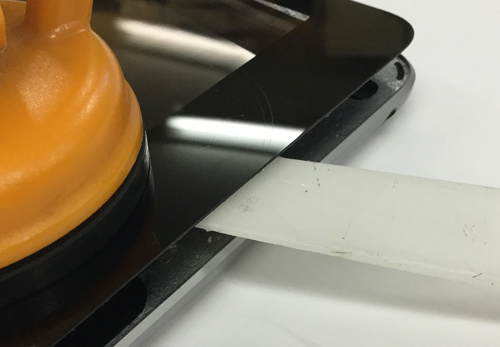
- This work is done around the LCD for one week, but care must be taken not to insert the spatula too much so as not to break around the home button and the LCD cable.
In particular, the part to be careful in the insertion of the spatula is the right side and the lower side of STEP5 (home button side).
The home button of the iPad A1893 is equipped with a fingerprint authentication function, but if you break it or scratch it by any chance, you will not be able to use the fingerprint authentication function, so be careful.
[iPad 6th Generation (2018) A1893 LCD Replacement and Decomposition Method STEP 5]
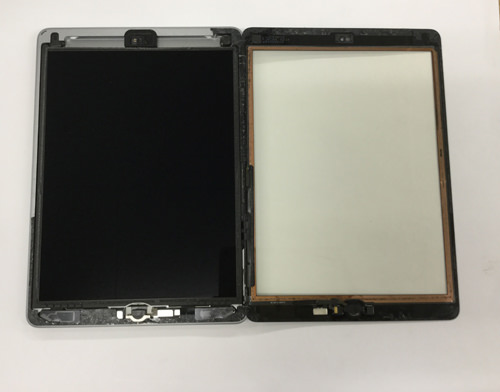
- If it can be peeled off to some extent, it can be opened like an image, but the cable of the touch panel and the home button is still connected to the logic board.
In this state, remove the internal LCD panel and remove the connector.
[iPad 6th Generation (2018) A1893 LCD Replacement and Decomposition Method STEP 6]
- The inner LCD panel is secured with four screws in total, but it is in an easy-to-understand position because it becomes four corners.
There are times when you are hiding with black tape when you remove the touch panel, but you will be able to find it immediately!
In addition, it is possible to remove the screw easily by using a Phillips screwdriver.
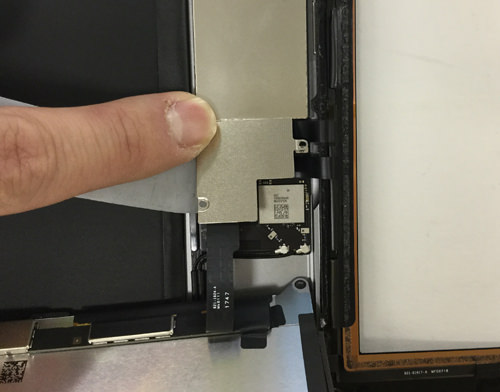
[iPad 6th Generation (2018) A1893 LCD Replacement and Decomposition Method STEP 7]
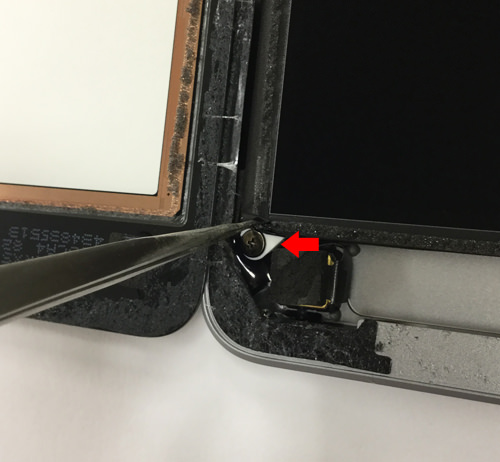
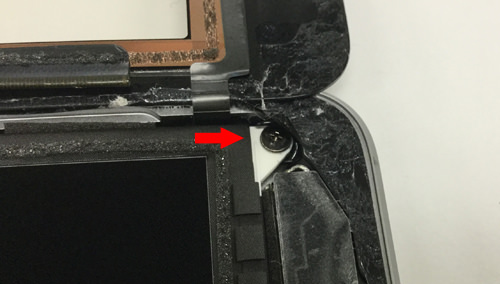
There is a screw that secures the liquid crystal panel on the side of the camera.
[iPad 6th Generation (2018) A1893 LCD Replacement and Decomposition Method STEP 8]
- This is next to the earphone jack.
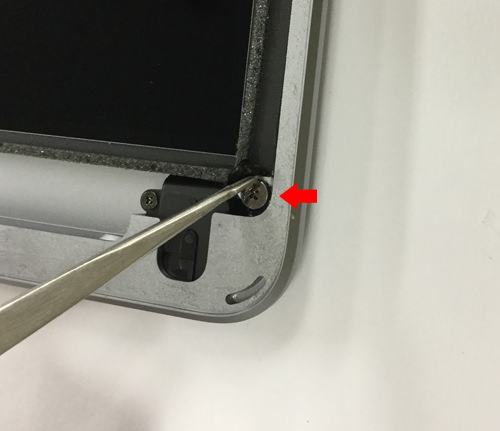
[iPad 6th Generation (2018) A1893 LCD Replacement and Decomposition Method STEP 9]
- This is the screw on the left side of the home button.
[iPad 6th generation (2018) Lcd replacement and decomposition method of A1893 STEP 10]
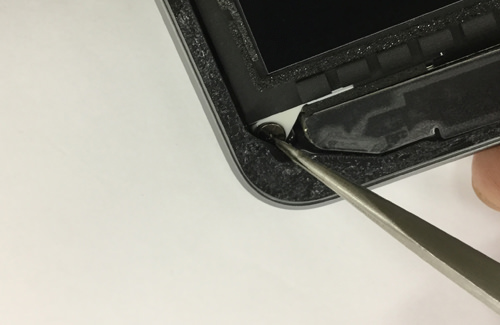
- It is possible to wake up like an image because the liquid crystal panel becomes free when the Koo T which removes four screws is possible, but the direction to lift the liquid crystal is the home button side from the camera side.
When lifted from the home button side, the cable of the liquid crystal panel interferes, so be sure to raise the liquid crystal from the camera side (upper side).
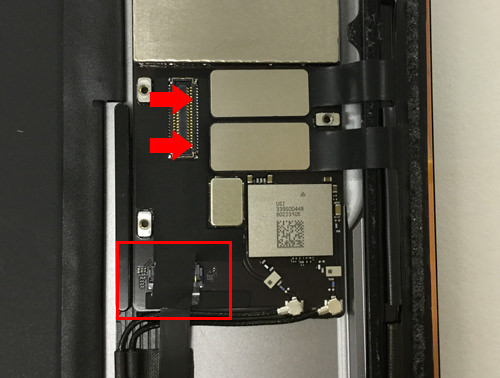
[iPad 6th Generation (2018) A1893 LCD Replacement and Decomposition Method STEP 11]

- I think that it was possible to confirm the image part when the liquid crystal is raised to some extent, but the red frame above is the connection part of the battery and the logic board, the red circle below is the place where the touch panel, the liquid crystal cable, and the home button cable are stored.
First, remove the battery screw with a Phillips screwdriver, plug a pick into the gap that floated, etc. and cut off the electricity.
Next, remove the three red-circled screws with a Phillips screwdriver.
[iPad 6th Generation (2018) A1893 LCD Replacement and Decomposition Method STEP 12]
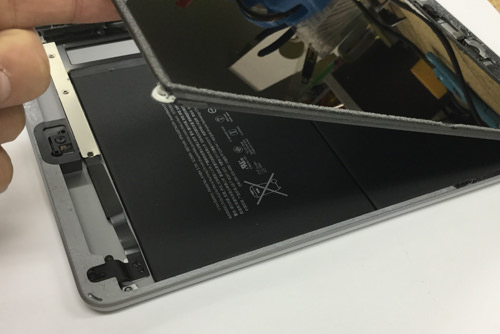
- When the screw can be removed, the iron plate comes off, but be sure to lift it from the bottom to the top.
I think that i was able to remove the liquid crystal panel together if the iron plate came off.
The touch panel is normal, but if a line enters the LCD or a display defect occurs, the repair is completed by reassembling it with the original procedure from here.
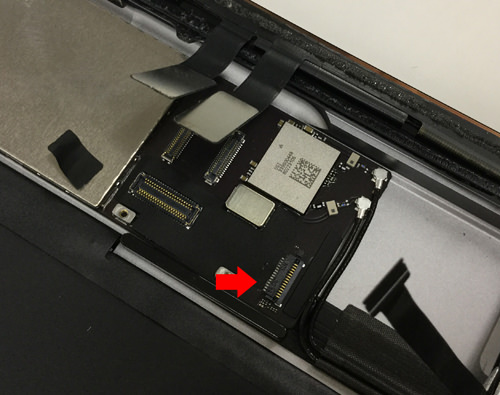
[iPad 6th Generation (2018) A1893 LCD Replacement and Decomposition Method STEP 13]
- The red arrow part becomes the connector of the touch panel, but the same procedure as when the connector of the previous LCD panel is removed, so that it occurs with a spatula from the bottom to the top.
The part that is enclosed in red waku becomes the place where the cable of the home button is connected, but it is hidden by black tape, so I leave it.
[iPad 6th generation (2018) Lcd replacement and decomposition method of A1893 STEP 14]
- The red arrow part can be easily removed by sliding the cable after causing the nail of the connector to the connector part where the home button was connected.
The cable is also quite delicate, so be careful not to bend or damage it.
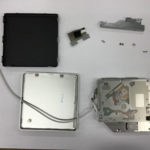
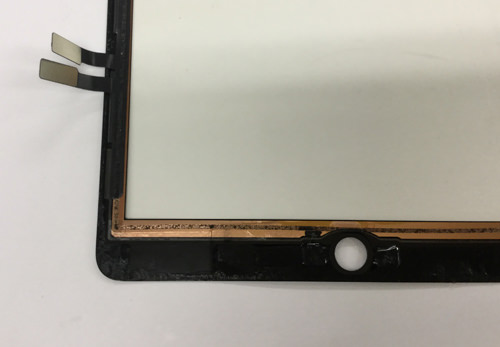
[iPad 6th generation (2018) Lcd replacement and decomposition method of A1893 STEP 15]
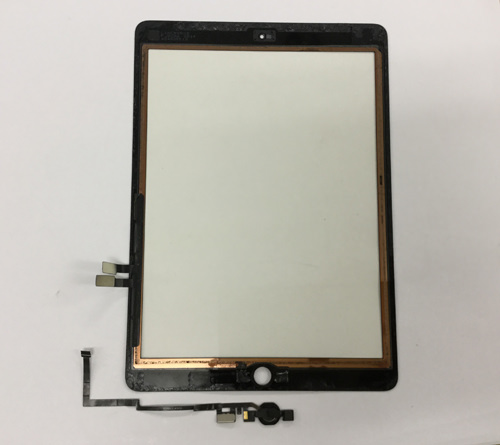
- Only the touch panel was able to be removed.
In addition, the home button was also removed, but the home button is also necessary to port when replacing the touch panel.
In addition, the home button is fixed with light double-sided tape and resin, but it is easy to peel off when light heat is applied from the front side.
If the touch panel has cracks or cracks, it is necessary to disassemble up to this point, but if you are used to disassembling the iPad, it may not be that difficult, but I think that the method of LCD replacement is very similar to the iPadAir.
[iPad 6th generation (2018) Lcd replacement and decomposition method of A1893 STEP 16]
- The display can be disassembled into a touch panel and an LCD panel, and the iPad Air parts may be used because it is similar to the disassembly method of the iPad Air!I thought, but it was slightly different when I looked closely.
The structure of the cable is very similar, but it was a little different because it corresponded to Apple Pencil.
It disassembled in less than one repair after it was released, but there seems to be no distribution of parts yet.
I think that the parts will be distributed as time goes by in the future, but because the liquid crystal can be separated, it will not be a high repair price like the iPad Pro?I think.
Please feel free to contact us when the parts become in circulation and we will start repairing them!