iPod nano 7th generation LCD cracking, cracks, cracks, how to repair when the screen is not visible, decomposition method
[iPod nano 7th generation liquid crystal exchange and decomposition method STEP 1]
- I'm going to break down the iPod nano 7th generation, but please check the following steps first.
If you feel that disassembly is impossible for you, I recommend that you consult a repair shop without hesitation.
There is a complicated part of disassembly, but if you apologize by any chance and break the cable or damage the base, other repairs will also be needed, and there may be high repair fees.
On the other hand, if you can repair it yourself, you can fix your iPod at the lowest price.
Let's try to disassemble after confirming the advantages and disadvantages!
[iPod nano 7th generation liquid crystal exchange and decomposition method STEP 2]

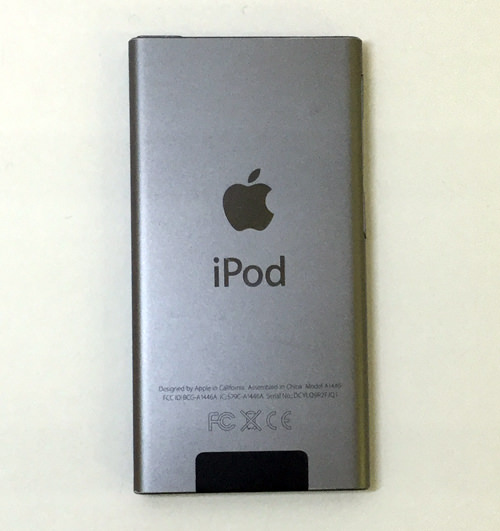
- On the outside, i can't find any screws, but disassemble is done from the vicinity of the dock connector.
The black part is acting like a protective cover, but the tool is inserted and removed.
The tools used for the ipod nano 7th generation disassembly are:
[iPod nano 7th generation liquid crystal exchange and decomposition method STEP 3]
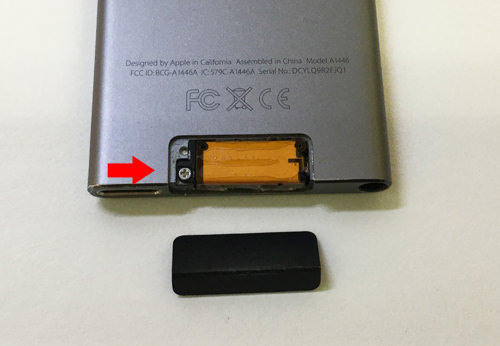
- I think that i was able to remove it easily because the black cover is only fixed with a light double-sided tape.
If you can find the screw in the arrow part, let's remove the screwdriver.
[iPod nano 7th generation liquid crystal exchange and decomposition method STEP 4]
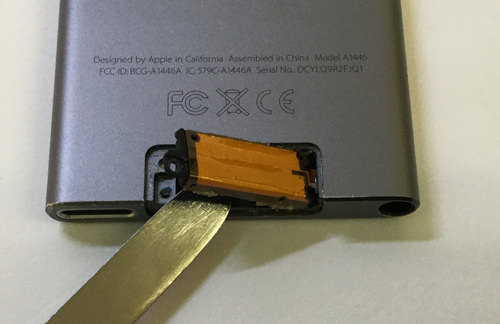
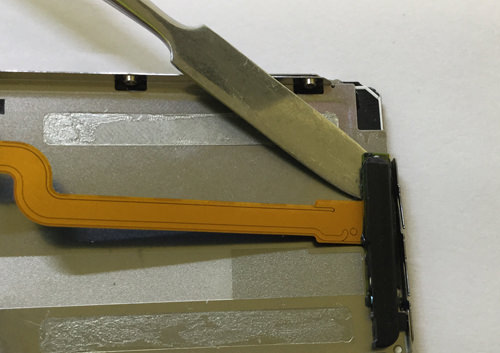
- This orange part is Bluetooth, but it should be raised from the left side to the right side as shown in the image.
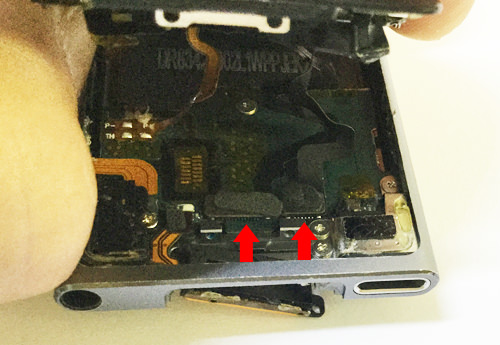
[iPod nano 7th generation liquid crystal exchange and decomposition method STEP 5]
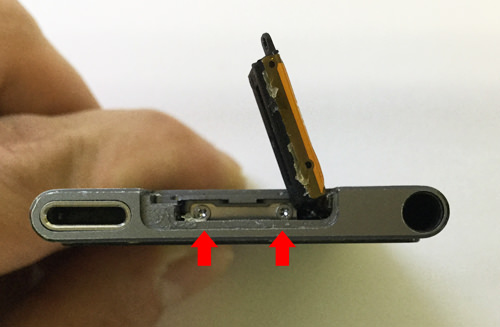
- When you turn up the Bluetoothw, you can see that there are two screws inside.
Let's get out of the driver.
[iPod nano 7th generation liquid crystal exchange and decomposition method STEP 6]
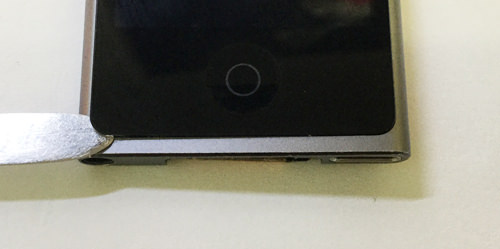
- The most important part of the iPod nano 7th generation decomposition is to remove this LCD panel.
As shown in the image, the tool slides into a slight gap, but please refer to the following procedure for a series of flow.
Be careful because the thickness of the liquid crystal is thin, and if you forcibly disassemble it, it may break the liquid crystal.
[iPod nano 7th generation liquid crystal exchange and decomposition method STEP 7]
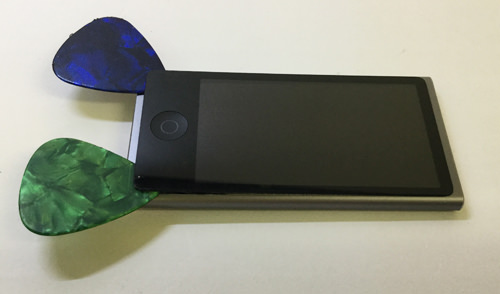
You can substitute with a card even if you do not have a pick.(credit cards, point cards, cards, etc.)
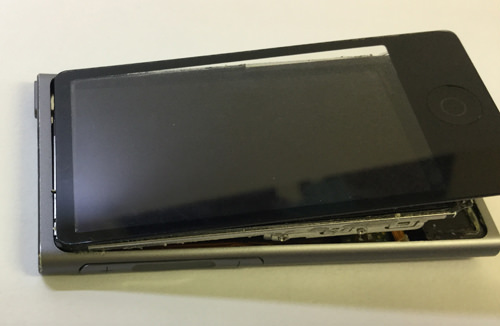
[iPod nano 7th generation liquid crystal exchange and decomposition method STEP 8]

- It is in a state in which the liquid crystal is raised to about half, but please do not cause it forcibly because the cable is still connected internally.
[iPad Pro 10.5-inch LCD replacement and decomposition method STEP 9]
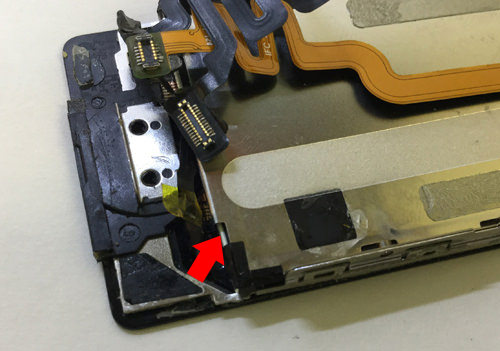
- There is a cable connected to the base in the arrow part, but it is removed in this state.
This part will be energized, so please use a plastic spatula instead of a yazus with an iron spatula.
Please note that if you use an iron spatula to disassemble, your iPod will be shorted if you touch the metal part, and you may not be able to turn on the power.
The connector can be easily removed if it is raised from the bottom to the top.
[iPod nano 7th generation liquid crystal exchange and decomposition method STEP 10]
- After removing the connector, the LCD on the opposite side is raised from the home button.
[iPod nano 7th generation liquid crystal exchange and decomposition method STEP 11]
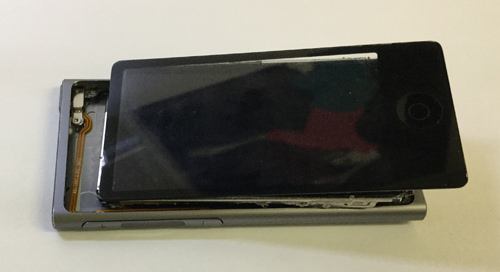
- For the time being, the liquid crystal works so far, but other cables are connected internally, so it cannot be completely separated yet.
[iPod nano 7th generation liquid crystal exchange and decomposition method STEP 12]
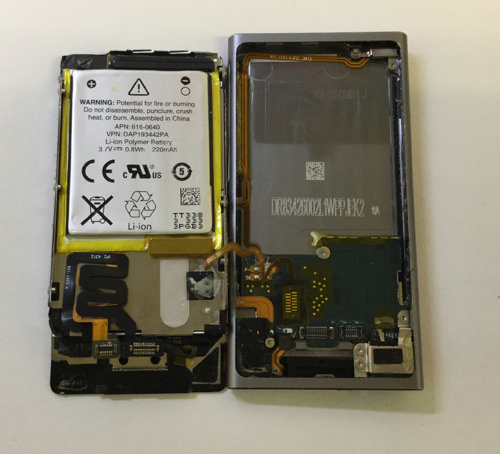
- Because the battery is soldered to the base as shown in the image, it is not possible to completely separate it.
[iPod nano 7th generation liquid crystal exchange and decomposition method STEP 13]
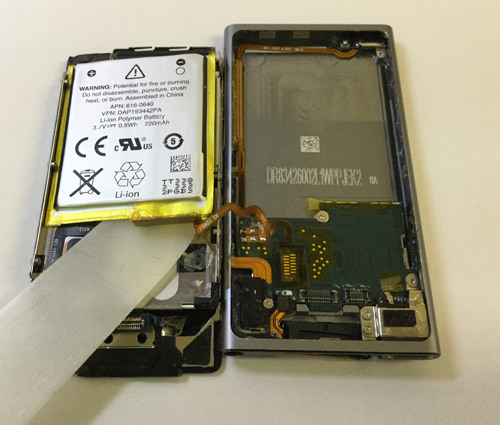
As a large part remaining on the liquid crystal side, it becomes a battery, but the tool is inserted and removed under the battery as shown in the image.
[iPod nano 7th generation liquid crystal exchange and decomposition method STEP 14]
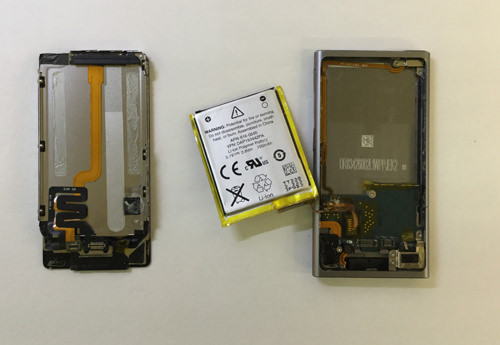
- Because the battery could be removed from the liquid crystal side, it was possible to completely separate it.
[iPod nano 7th generation liquid crystal exchange and decomposition method STEP 15]
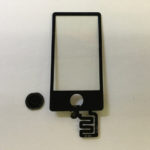
- From here on, we will break down the liquid crystal side, but the iPod nano 7th generation liquid crystal is two-layer ed.
In this decomposition method, we will break down to the inside panel side, so the work continues from here.
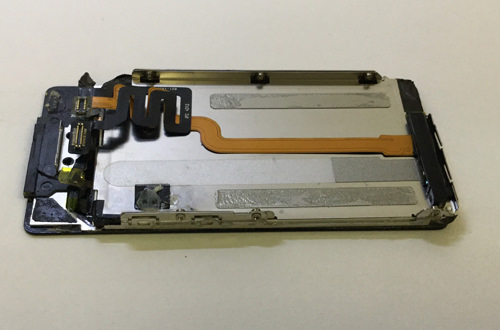
[iPod nano 7th generation liquid crystal exchange and decomposition method STEP 16]
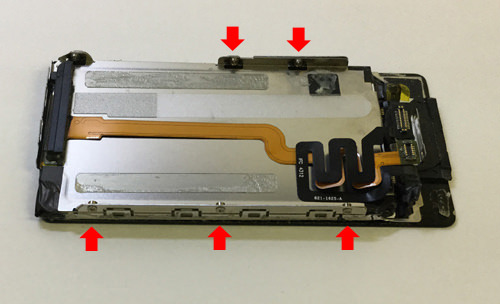
- There is a silver iron plate (heat shield) between the liquid crystal and the main body, but since it is fixed with a screw on the arrow part, let's remove all screws.
[iPod nano 7th generation liquid crystal exchange and decomposition method STEP 17]
- It is opposite to the home button, but the tool is inserted under the black part and floated.
[iPod nano 7th generation liquid crystal exchange and decomposition method STEP 18]
- The iron plate is raised from around the arrow, but be careful not to break the cable.
[iPod nano 7th generation liquid crystal exchange and decomposition method STEP 19]
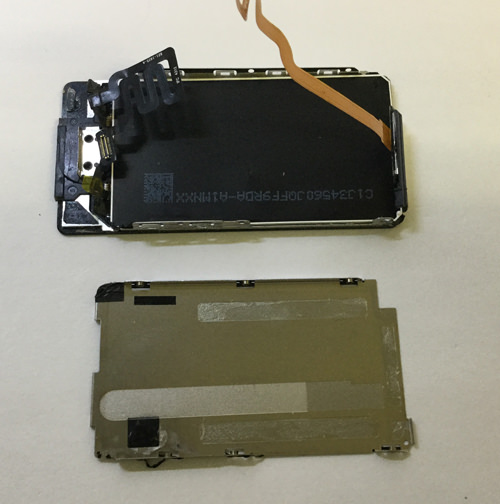
- You can remove the iron plate like this.
[iPod nano 7th generation liquid crystal exchange and decomposition method STEP 20]
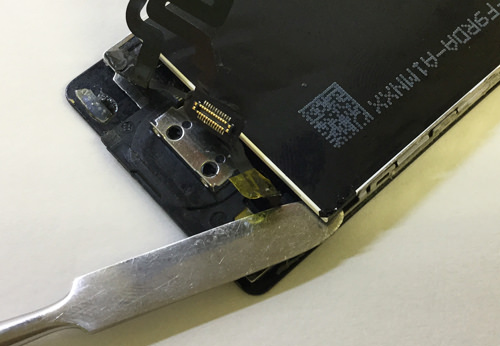
- Next, we will separate the LCD panel from the glass, but please check how it comes off with STEP 22 first.
(We use an iron spatula in the image, but if you are concerned about scratches, we recommend plastic tools.))
[iPod nano 7th generation liquid crystal exchange and decomposition method STEP 21]
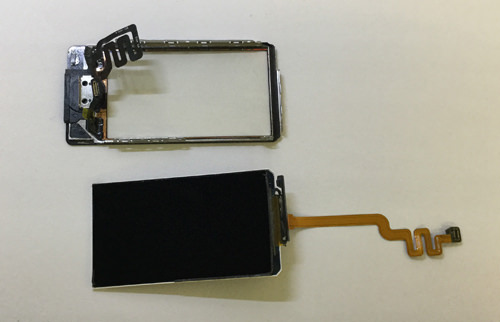
- It was possible to separate the glass and the liquid crystal panel.
After that, if you replace the broken glass or liquid crystal panel and incorporate it with the original procedure, the liquid crystal replacement of the iPod nano seventh generation will be completed.