GALAXY SC-03E Screen replacement of liquid crystal cracking Repair method, disassembly procedure
GALAXY SC-03E is a smartphone released from NTT Docomo, but unlike the iPhone, it is a feature that SD card can be inserted.
This time, the screen is no longer visible even if the power is turned on, so there is a problem of the liquid crystal, and if the motherboard failure is considered.
Because it is not so complicated as decomposition, if the parts seem to be available, you may be able to fix them yourself, so please try to challenge yourself.
[GALAXY SC-03E LIQUID Crystal Repair and Decomposition Method STEP 1]
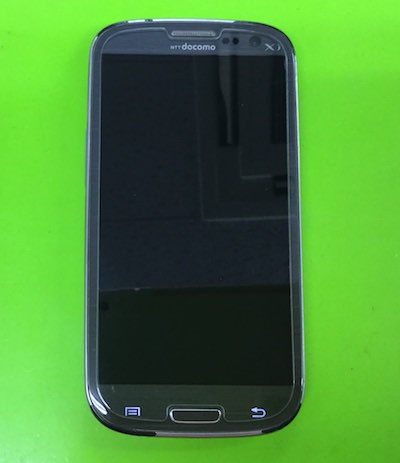

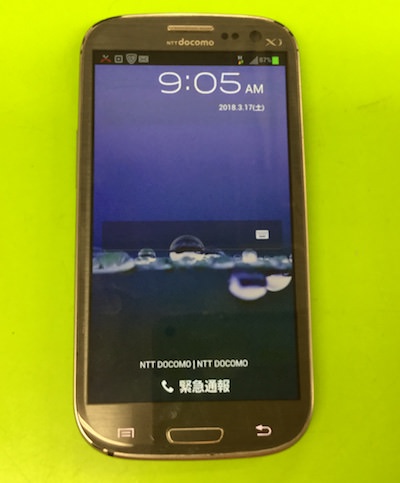
- The image above is powered on, but the screen is no longer visible.
If you look closely, only the button on the left and right of the home button is shining, but at the moment it is not possible to determine whether it is a fault of the LCD or a failure on the motherboard side.
However, what happens when the liquid crystal is changed because the sound that is starting is ringing?It is a place such as.
[GALAXY SC-03E LIQUID Crystal Repair and Decomposition Method STEP 2]
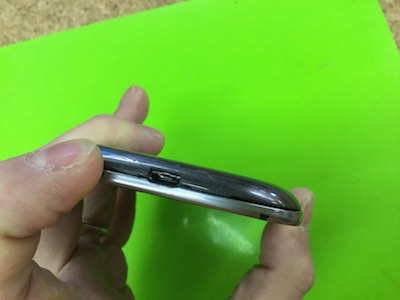

- It will be disassembled from here, but it is possible to remove the back cover from the vicinity of the dock connector.
[GALAXY SC-03E LIQUID Crystal Repair and Decomposition Method STEP 3]
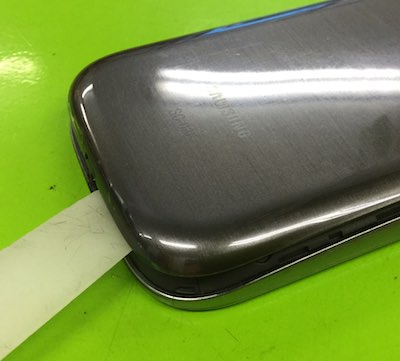

- Insert the tool into a small gap between the silver and black plastic parts.
[GALAXY SC-03E LIQUID Crystal Repair and Decomposition Method STEP 4]
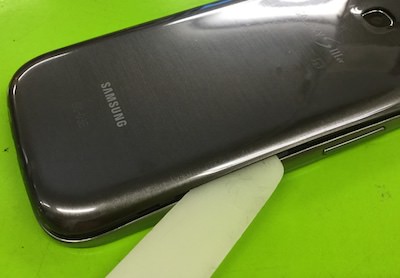

- It is possible to remove the back cover easily if the tool is inserted in the side side.
[GALAXY SC-03E LIQUID Crystal Repair and Decomposition Method STEP 5]
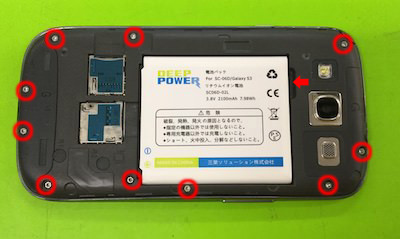

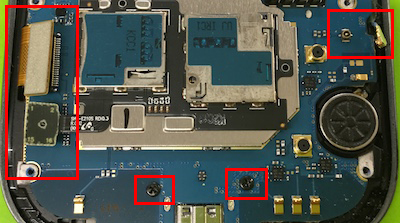
- If you can remove the back cover, first remove the battery first,
Because there is a recess in the arrow part, it is possible to remove it only by raising the battery from there.
Then, remove all the screws in the red circle part.
[GALAXY SC-03E LIQUID Crystal Repair and Decomposition Method STEP 6]


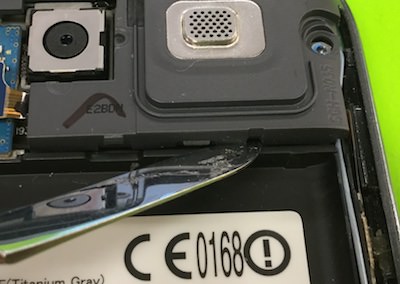
- If you can remove all the screws above, we will remove the new cover, but we will slide it into a small gap like the image and slide it a little bit closer.
[GALAXY SC-03E LIQUID Crystal Repair and Decomposition Method STEP 7]
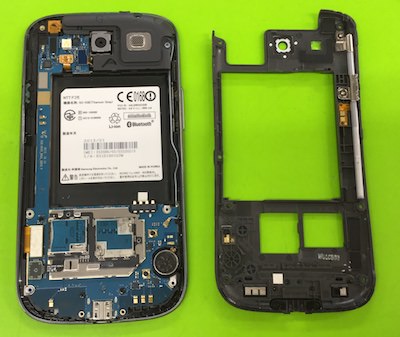

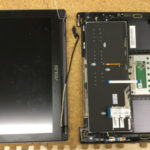
- When the cover was removed, the motherboard became bare.
We'll break it down further from here, but the motherboard is an important part, so you need to be careful not to scratch it.
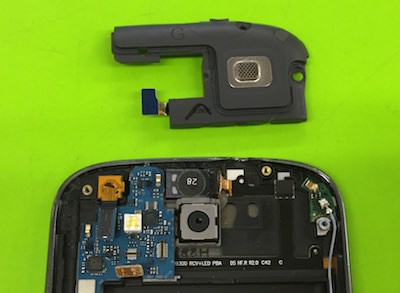
[GALAXY SC-03E LIQUID Crystal Repair and Decomposition Method STEP 8]
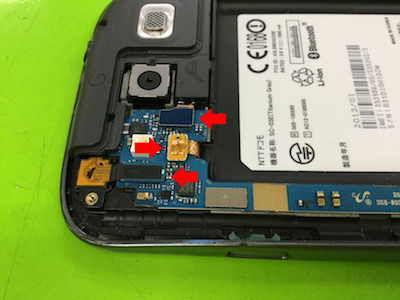
- First of all, remove the three connectors of the red arrow part, but it is possible to remove the connector easily if all are caused from the bottom to the top.
[GALAXY SC-03E LIQUID Crystal Repair and Decomposition Method STEP 9]

- It becomes the cover next to the camera, but it can come off easily if it wakes up from the bottom.
[GALAXY SC-03E LIQUID Crystal Repair and Decomposition Method STEP 10]

- I was able to remove the cover.
[GALAXY SC-03E LIQUID Crystal Repair and Decomposition Method STEP 11]

- It is the base of the dock connector side, but the left frame and the right frame are connectors, and if you wake it up from the bottom, you can remove it, and the screw in the center can be removed with a Phillips screwdriver.
[GALAXY SC-03E LIQUID Crystal Repair and Decomposition Method STEP 12]
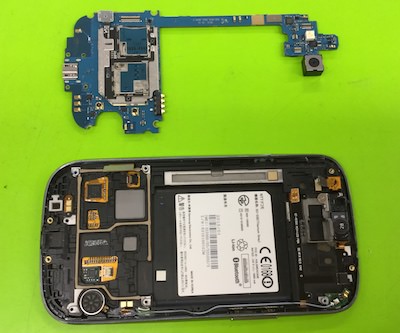

- I was able to remove the motherboard.
From here on, we will replace the liquid crystal prepared and reassemble it by the procedure below.
[GALAXY SC-03E LIQUID Crystal Repair and Decomposition Method STEP 13]

- It is in the state that the power was turned on, but it was confirmed that it is displayed normally.
So the cause of this screen not reflected is not a motherboard failure, it can be seen that it was a liquid crystal failure.