Dell Inspiron One W01B (integrated PC) is a useful decomposition method in the case of liquid crystal cracking!
[DELL Inspiron One W01B LCD Repair and Decomposition Method STEP 1]
The contents of this failure are symptoms that the screen does not stick even if the power is turned on. The main thing is to disassemble the laptop, but we also disassembled the integrated PC, so please refer to it if there is a liquid crystal crack or a bad display.
The tool used for disassembly is basically the same as the laptop, but it is better to use a large one only for The Phillips screwdriver.
Please note that small drivers used for laptops may cause screws to be licked.
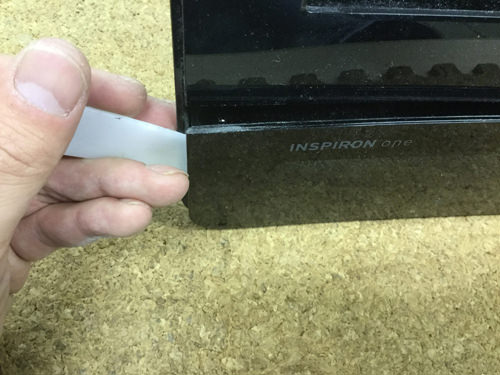
[DELL Inspiron One W01B LCD Repair and Decomposition Method STEP 2]
Many integrated personal computers are often disassembled from the back side of the main body, but in the case of DELL Inspiron One W01B, there are no screws on the back, so we disassemble them from the front side.
The frame is divided into the upper and lower sides roughly on the surface side, but the part of the image is the lower side.
As shown in the image, the tool is inserted into the gap and disassembled.
Since the frame is only fixed with plastic claws inside, it is possible to remove it if you use a spatula (tool) so that it is twisted to the front side.
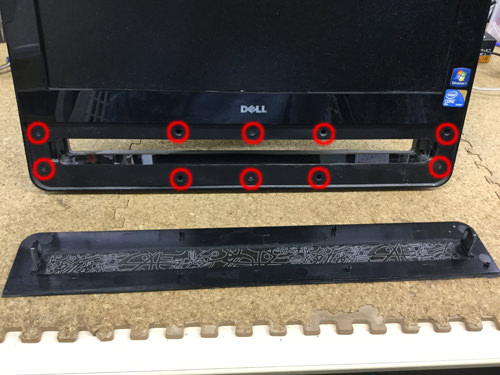
[DELL Inspiron One W01B LCD Repair and Decomposition Method STEP 3]
When the frame can be removed, there is a screw in the red circle part, so use the screwdriver to remove everything.
The DELL Inspiron One W01B (integrated COMPUTER) has a large number of screws, so keep it so that you don't lose your space.
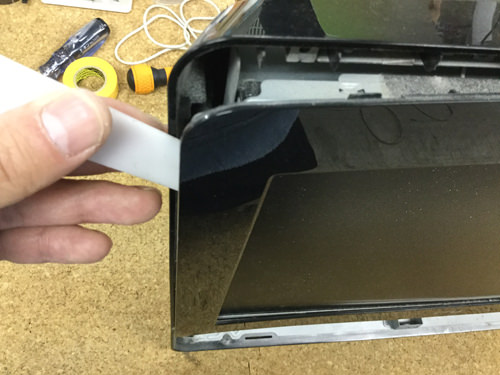
[DELL Inspiron One W01B LCD Repair and Decomposition Method STEP 4]
If you can remove the frame of the lower side of the previous, the next step is to remove the upper frame.
It is possible to remove the frame of the upper side if the spatula is inserted into the gap in the same manner as before and it is made to twist.
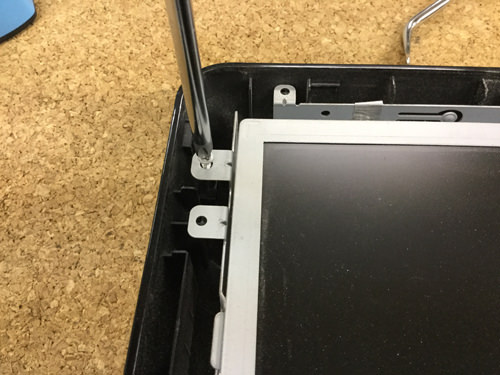
[DELL Inspiron One W01B LCD Repair and Decomposition Method STEP 5]
I think that it became the state of the image when it is possible to remove the frame of the top and bottom, but please remove it because there is a screw in the red circle part.
The red circle part will be six places, but please understand that there may be screws in addition to six places because it has become a long time before publishing the article that carried out this decomposition.
In addition, if it does not seem to move at all even if you remove the screw of six places, please confirm because I think that another screw is still stopped.
[DELL Inspiron One W01B LCD Repair and Decomposition Method STEP 6]
Remove the screw that is fixed with a large Phillips screwdriver as shown in the image.
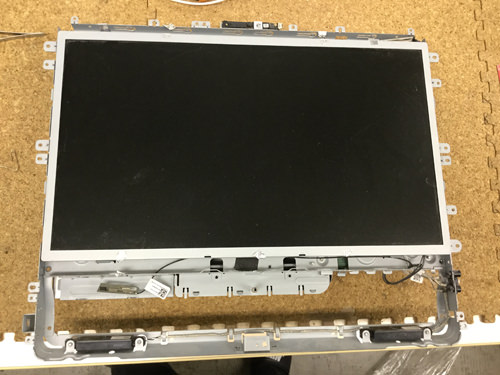
[DELL Inspiron One W01B LCD Repair and Decomposition Method STEP 7]
If you can remove all the screws that are fixed to the rear panel, you can make it look like an image, but please turn this state in the opposite direction as it is.(The surface of the liquid crystal panel is lower)
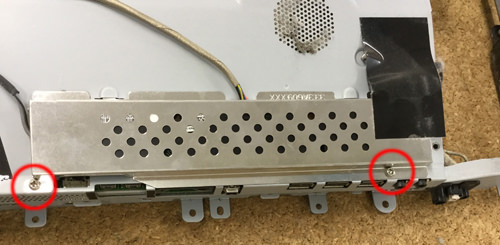
[DELL Inspiron One W01B LCD Repair and Decomposition Method STEP 8]
If you turn the main unit against it, there is a part (inverter) where the backlight cable of the liquid crystal is stuck.
Since the inverter cover is secured with a screw, remove all screws in the red circle part.
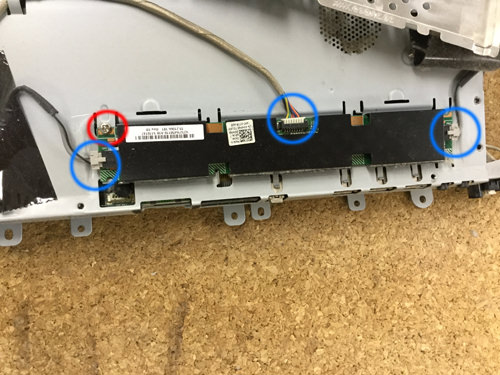
[DELL Inspiron One W01B LCD Repair and Decomposition Method STEP 9]
When you can remove the cover, you will see the connector relationship, but the blue circle part will be a connector, so pull it all out.
Please note that there is a possibility that it will break if you pull it out forcibly.
The red circle part becomes a screw, so try to remove the screwdriver.
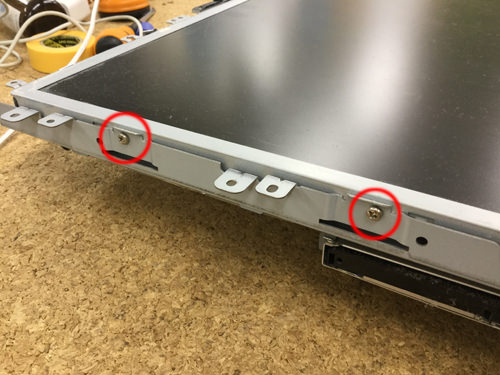
[DELL Inspiron One W01B LCD Repair and Decomposition Method STEP 10]
This is a screw that secures the panel from the side, so let's remove the screw of the red circle part!
Please do not forget to remove it because there is a screw in the same way on the right side opposite when this is the day hunting side!
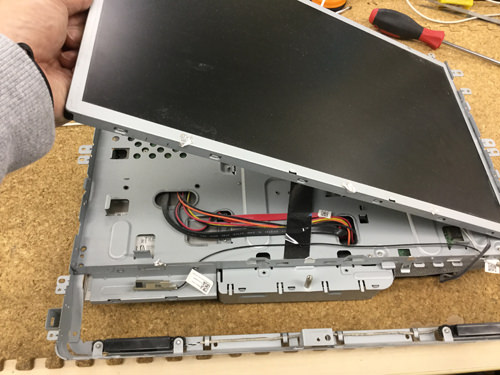
[DELL Inspiron One W01B LCD Repair and Decomposition Method STEP 11]
If you can remove the screw, you will be able to lift only the panel, but the LCD cable is still connected to the back.
For the Inspiron One W01B, lift the panel from the left side because the cable is connected to the right side.
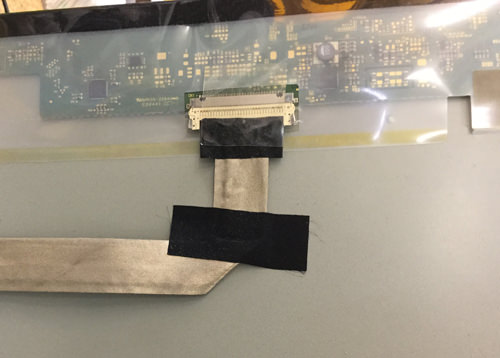
[DELL Inspiron One W01B LCD Repair and Decomposition Method STEP 12]
Since the liquid crystal cable is connected when you look into the back side of the panel, the seal is peeled off, and if you pull out by pinching both sides of the connector, it is possible to remove the cable.
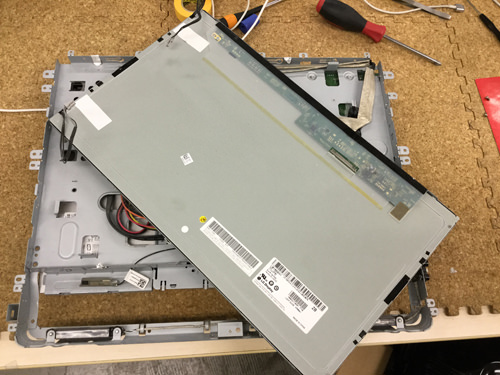
[DELL Inspiron One W01B LCD Repair and Decomposition Method STEP 13]
Only the panel was removed from DELL's integrated PC Inspiron One W01B.
If you want to perform a liquid crystal replacement, install the newly prepared panel and incorporate it in the original procedure and you are done!
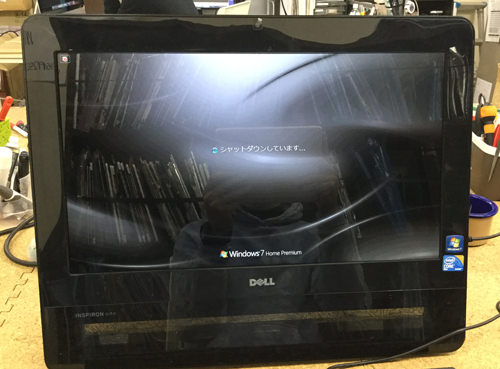
[DELL Inspiron One W01B LCD Repair and Decomposition Method STEP 14]
You can see that it is now displayed normally though it is replaced with a new panel and the power is turned on.