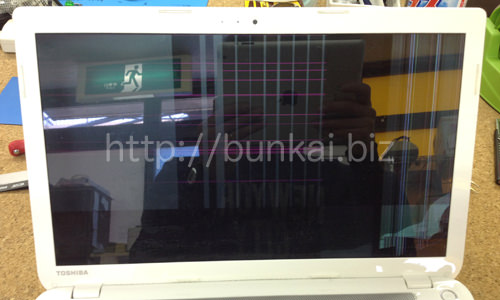
Toshiba T554/76LWS LCD screen cracking, IF THERE is a display failure in the LIQUID CRYSTAL, lcd panel replacement (LCD replacement) is required!
[Toshiba T554/76LWS LIQUID Crystal Repair and Decomposition Method STEP 1]
There is a bad display caused by the fact that the laptop was dropped.
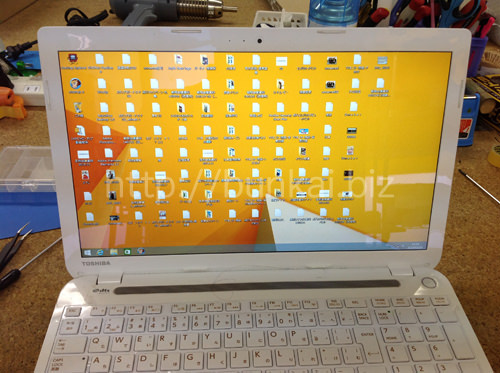
Since we were able to confirm that the external display is displayed normally, we would like to replace the LCD panel.
We use a Phillips screwdriver and spatula for disassembly, so please prepare it.
[Toshiba T554/76LWS LIQUID Crystal Repair and Decomposition Method STEP 2]
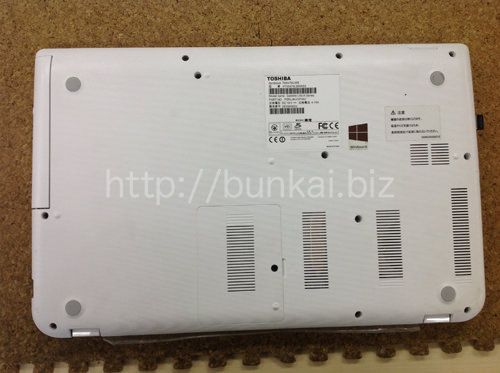
First of all, we remove the battery of T554/76LWS, but it is necessary to disassemble the bottom case side because it is a built-in type.
All screws of the part that the body is turned over are removed.
[Toshiba T554/76LWS LIQUID Crystal Repair and Decomposition Method STEP 3]
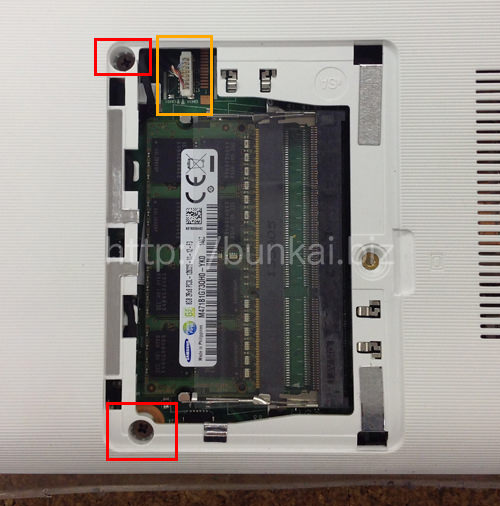
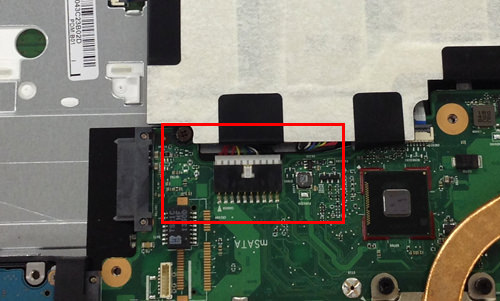
Because there is a part that contains memory around the middle bottom, remove the lid.Then, there is a screw in the red frame part, so remove two screws.
Connector in orange part
[Toshiba T554/76LWS LIQUID Crystal Repair and Decomposition Method STEP 4]
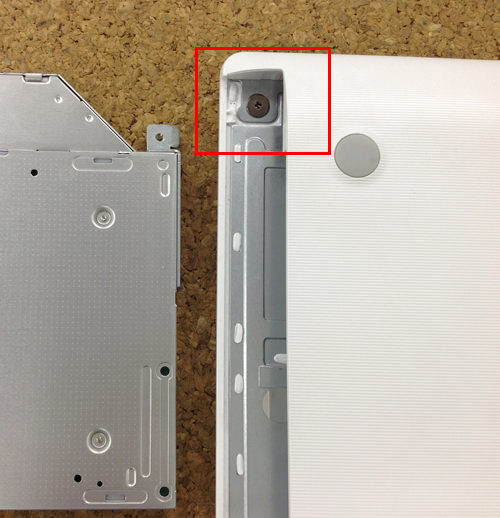
I think that all screws have been removed by STEP2, but you can pull out the DVD drive as it is.
Please do not forget to remove the screw because only one screw is hidden under the DVD drive (red frame part).
Now that you have removed all the screws that secure the bottom case, you will remove the bottom case slowly.
[Toshiba T554/76LWS LIQUID Crystal Repair and Decomposition Method STEP 5]
If you remove the bottom case, you can see the motherboard, but the red frame connects the battery to the motherboard.
You can remove the connector by sliding the white part.
Now that you have removed the battery, let's close the bottom case once.
Returning the bottom case makes the next decomposition process easier.
[Toshiba T554/76LWS LIQUID Crystal Repair and Decomposition Method STEP 6]
From here on, we will decompose the liquid crystal side.
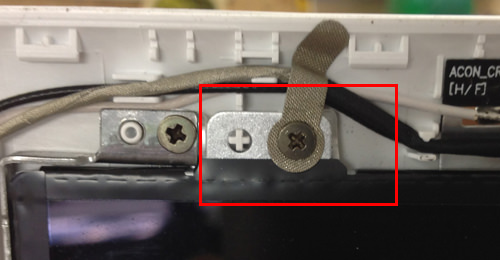
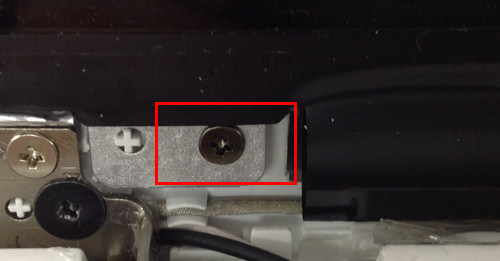
The liquid crystal frame is fixed with screws, but the seal is peeled off with tweezers, etc., because the seal is stuck on the screw as shown in the image and it is not visible.
Then, let's remove all screws because it can be confirmed that there is a screw in the inside.
[Toshiba T554/76LWS LIQUID Crystal Repair and Decomposition Method STEP 7]
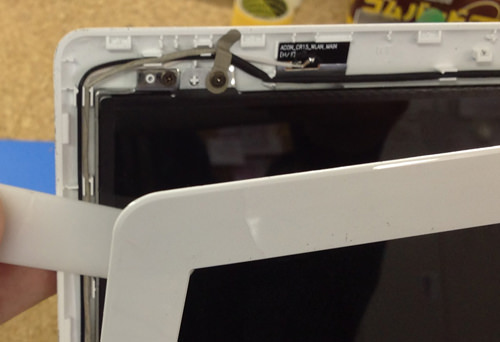
The liquid crystal frame is fixed with screws and plastic claws, but the screw was able to be removed by the previous stroke.
After that, the plastic part is disassembled using a spatula like the image.
The position where the spatula is inserted is between the rear panel and the LCD frame, but you can remove the liquid crystal frame by inserting the spatula into one lap of the liquid crystal.
[Toshiba T554/76LWS LIQUID Crystal Repair and Decomposition Method STEP 8]
If you can remove the liquid crystal frame, I think that the liquid crystal panel is bare, but the liquid crystal panel is also fixed with screws, so remove it.
[Toshiba T554/76LWS LIQUID Crystal Repair and Decomposition Method STEP 9]
STEP8 is the upper side, but this is the lower side.
If all screws can be removed, the LCD panel can be knocked down slowly to the keyboard side.
[Toshiba T554/76LWS LIQUID Crystal Repair and Decomposition Method STEP 10]
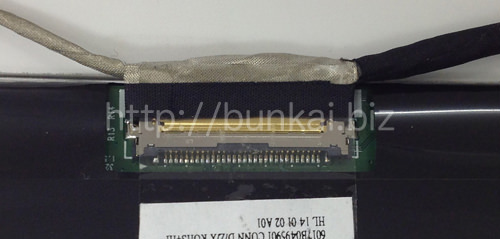
A liquid crystal cable is attached to the back of the LCD panel.
It can be easily removed by sliding parallel to the LCD panel.
I think that the liquid crystal panel was removed by the decomposition so far, and liquid crystal repair is completed if the liquid crystal panel newly prepared is replaced.
[Toshiba T554/76LWS Decomposition STEP 11]
Since we replaced the liquid crystal, it now displays normally.