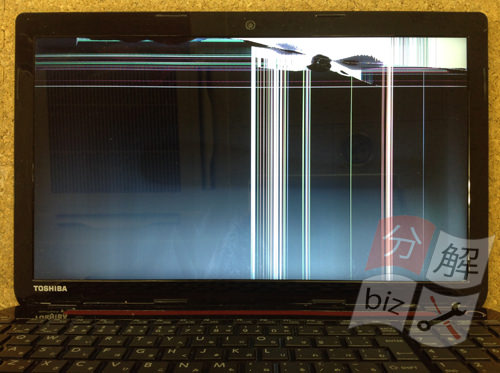
If there is a liquid crystal screen cracking or display failure of Toshiba T554/67KRS (PT55258HBMR), a liquid crystal panel replacement (LCD replacement) is required!
[Toshiba T554/67KRS LIQUID CRYSTAL Repair and Decomposition Method STEP 1]
You can confirm that there is a line or a bad display due to the fact that the LCD panel is broken.
I think that it is possible to repair only by the liquid crystal panel change because it is confirmed that it is displayed normally on the external display.
I would like to replace the LCD panel immediately.
[Toshiba T554/67KRS LIQUID CRYSTAL Repair and Decomposition Method STEP 2]
To start the laptop, you'll have to either plug in the power cord or start it from the battery, but you'll need to remove the battery to disassemble it.
If you can easily remove the battery, you can remove it in a few seconds, but the T554/67KRS has a built-in battery that you can't easily remove it, but there is a part where you can reset the battery in the red frame.
When the tip such as a safety pin is inserted, a "click" sound is heard, so you can reset the battery.
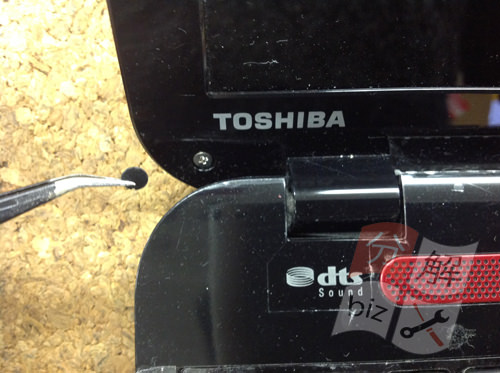
[Toshiba T554/67KRS LIQUID CRYSTAL Repair and Decomposition Method STEP 3]
From here, the liquid crystal will be disassembled, but to remove the LCD panel, it is necessary to remove the liquid crystal frame first.
The lcd frame is secured with screws and the screws are hidden by a screw-hiding (seal).
Therefore, remove the screw after peeling off the screw concealed with tweezers.
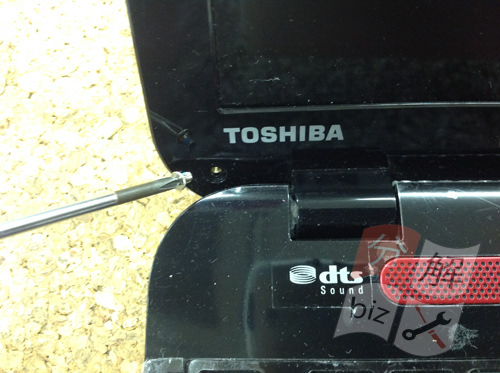
[Toshiba T554/67KRS LIQUID CRYSTAL Repair and Decomposition Method STEP 4]
The screws on the LCD frame can be removed with a Phillips screwdriver.
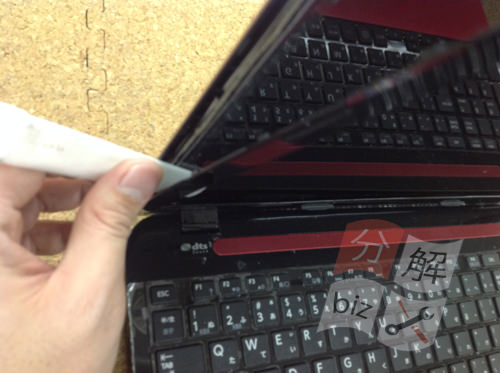
[Toshiba T554/67KRS LIQUID CRYSTAL Repair and Decomposition Method STEP 5]
Next, the liquid crystal frame is disassembled.
If all screws can be removed, decomposition can be performed, but the liquid crystal frame itself is also fixed with plastic claws.
It can be removed smoothly by using a spatula like the image and disassembling it.
[Toshiba T554/67KRS LIQUID CRYSTAL Repair and Decomposition Method STEP 6]
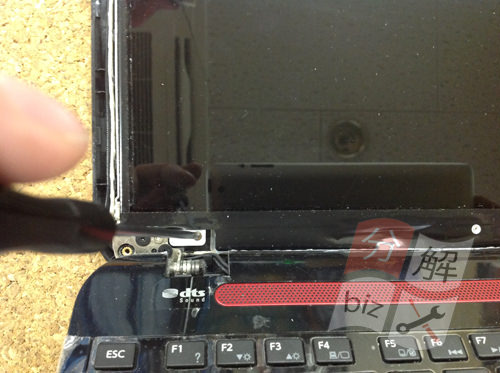
When the liquid crystal frame can be removed, the liquid crystal panel can be seen, but the liquid crystal panel is also secured with screws.
Remove the screw that secures the LCD panel as shown in the image.
If all the screws that secure the LCD panel can be removed, the LCD panel can be moved, so slowly turn it down to the keyboard side.
[Toshiba T554/67KRS LIQUID CRYSTAL Repair and Decomposition Method STEP 7]
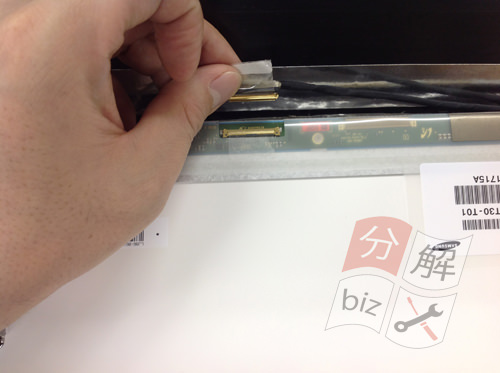
The LCD cable is attached to the back of the LCD panel, so remove it.
You can easily remove the transparent tape by removing it and then sliding the LCD cable.
I think that it was possible to remove the liquid crystal panel if the decomposition procedure up to this point was able to be done accurately, so the liquid crystal repair is completed if parts are replaced with the newly installed liquid crystal panel.
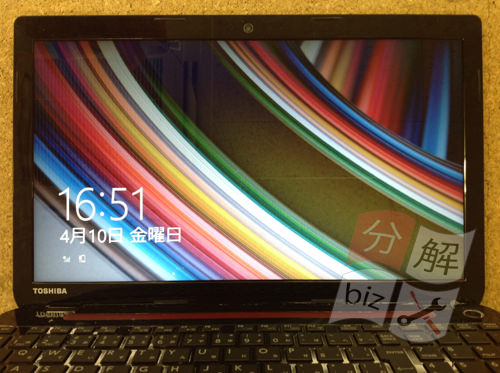
[Toshiba T554/67KRS LIQUID CRYSTAL Repair and Decomposition Method STEP 8]
It is displayed normally though it is in the state that the liquid crystal was newly replaced.