ACER E3-111-A14D/S LCD repair and disassembly method 5 strokes
yossys12345
Screen replacement of LCD cracking of ACER E3-111-A14D/S Repair method, disassembly procedure
If there is a liquid crystal crack or display failure of ACER E3-111-A14D/S, a panel replacement (LCD replacement) is required!
[ACER E3-111-A14D/S LCD repair and disassembly method STEP 1]
If the screen is cracked or cracked, the LCD panel needs to be replaced.
In this decomposition method, we have gone to the point of removing the panel, so please refer to the case where there is a liquid crystal crackin in the laptop by any chance.
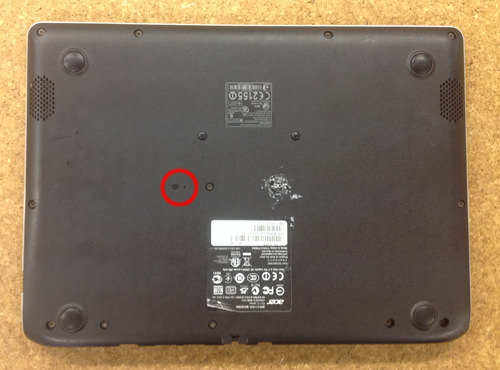
When disassembling, the battery is removed first, but the E3-111-A14D/S has a built-in battery, so it cannot be removed unless it is disassembled.
However, there is a small hole in the red circle part, and when you insert the tip of the safety pin, you will hear a "click" sound, but by doing this work, you will remove the battery.
[ACER E3-111-A14D/S LCD repair and disassembly method STEP 2]
From here, the liquid crystal side is disassembled.
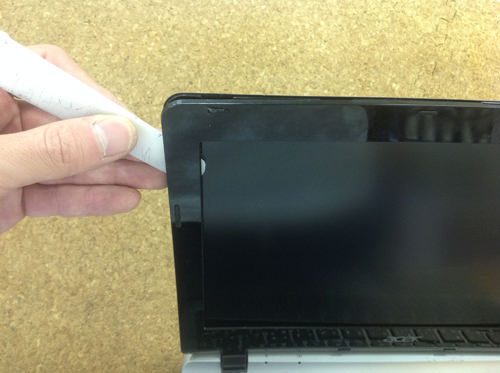
In the case of most laptops, the frame itself is fixed with screws, but this model does not have any screws.
Instead, it is fixed because there is a plastic claw on the inside of the frame.
You can disassemble by using a spatula (tool) such as an image.
If you insert the tool into the gap between the rear panel and the frame and try to break it lightly, you will see the feeling that it is coming off.
[ACER E3-111-A14D/S LCD repair and disassembly method STEP 3]
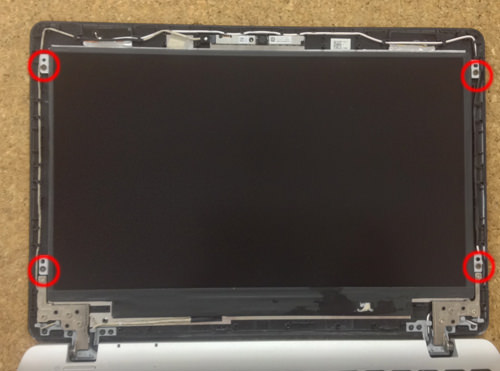
If you can remove the frame, it will be possible to remove the panel side, so let's remove all the screws that are enclosed in a red circle!
After removing the screw, you will be able to move the panel itself, so turn it down to the keyboard surface.
[ACER E3-111-A14D/S LCD repair and disassembly method STEP 4]
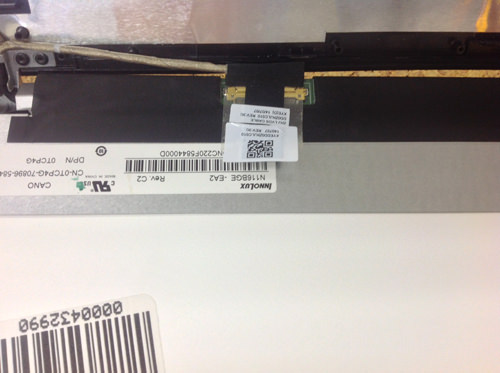
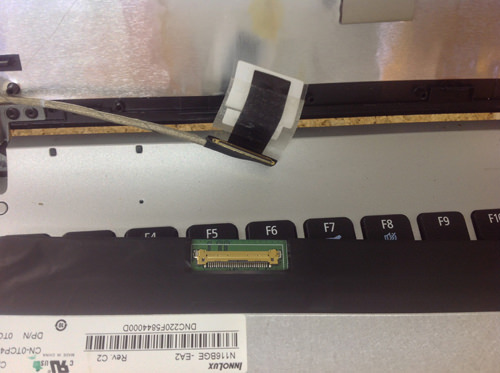
The LCD cable is connected to the back, but you can turn over the transparent seal and slide the connector to remove it.
[ACER E3-111-A14D/S LCD repair and disassembly method STEP 5]
I was able to remove the LCD cable.
I think that i was able to remove only the panel from the laptop body if the decomposition method up to this point was able to be done correctly.
After that, if you replace it with a newly prepared part, the work will be completed.