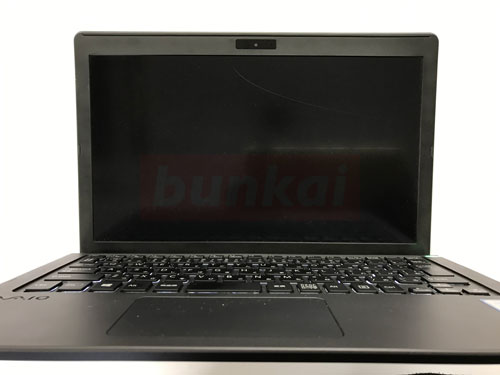
If there is a screen crack or a display defect on the monitor of SONY's laptop VJS111D12N, a liquid crystal replacement is necessary, but if you are thinking of disassembling it from now on, please refer to it because the repair method will be published.
[SONY VJS111D12N LCD replacement 1]

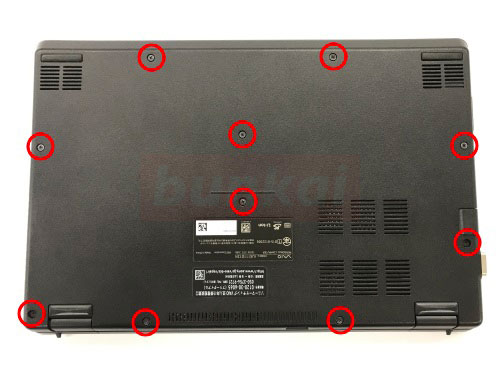
First of all, i will start by removing the battery on disassembling the PC, so Turn the main unit inside out.
The battery can be removed immediately with a typical laptop, but the VJS111D12N needs to be disassembled because the battery is built-in.
Let's remove all screws of the part which is enclosed in red circle.
[SONY VJS111D12N LCD Replacement 2]
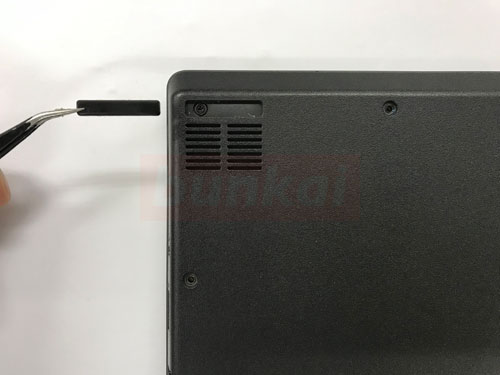
Since the screw is hidden in the rubber foot part, let's remove the screw after turning it with tweezers etc.
[SONY VJS111D12N LCD Replacement 3]
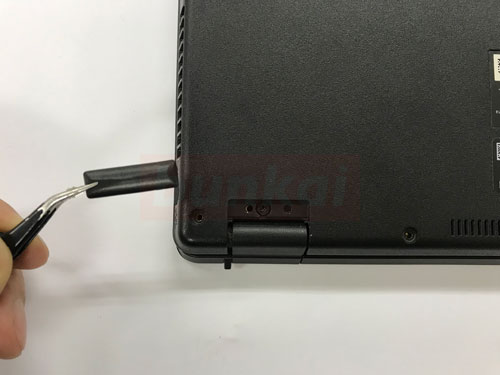
There are four rubber feet in total, so don't forget to remove all the screws.
[SONY VJS111D12N LCD replacement 4]
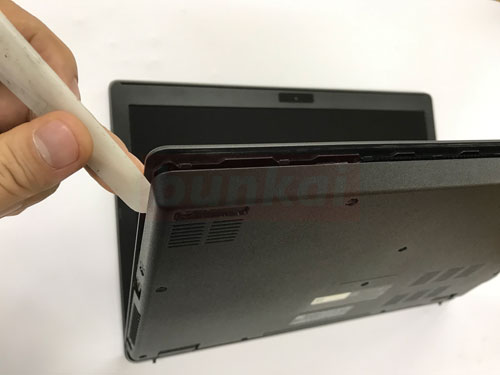
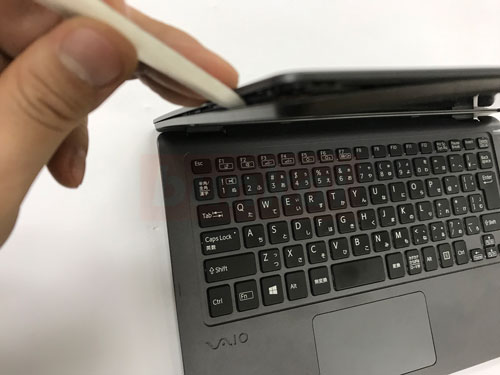
I will remove the back cover from here.
I think that it is good that the wound is hard to stick when i break down using a plastic spatula like the image.
The back cover is covered with a plastic claw on the keyboard surface, but it is heavy when you can see the feeling that it is coming off when you lightly twist it.
This work is done on one lap, but there is a possibility that you forget to remove the screw in the part that feels a little stiff, so please check once.
[SONY VJS111D12N LCD replacement 5]
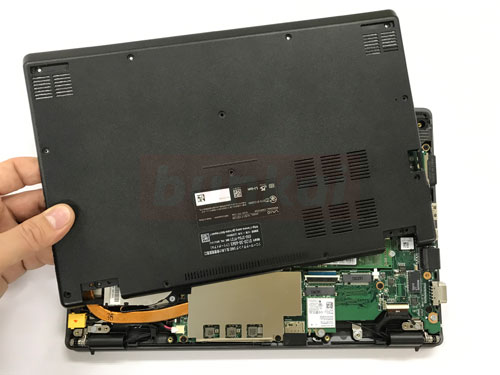
It is possible to remove the back cover like this if it is possible to put the spatula well.
[SONY VJS111D12N LCD replacement 6]
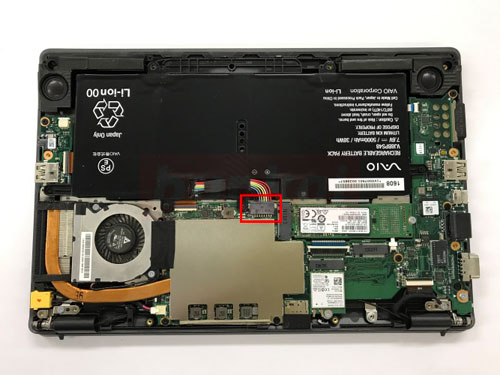
The place surrounded by a red frame in the middle is the connection between the battery and the motherboard.
Because there is a risk of shorting if you remove the liquid crystal side first without removing this part, this work is given priority even if it is troublesome.
[SONY VJS111D12N LCD replacement 7]

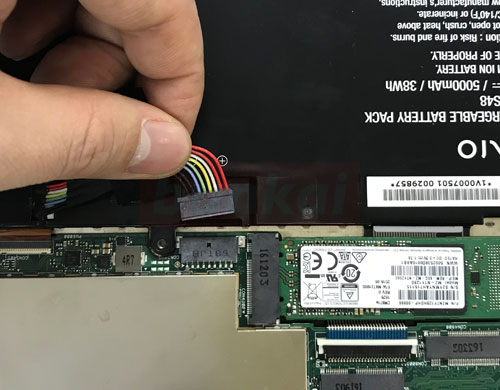
You can pull out the connector of the battery easily like this.
[SONY VJS111D12N LCD replacement 8]

On the screw of the red circle part, there is a ground of the wiring extended from the liquid crystal side.
[SONY VJS111D12N LCD replacement 9]
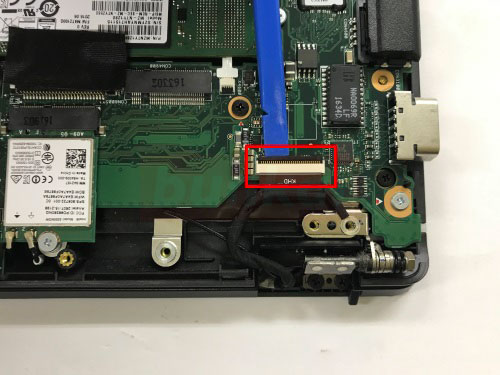
The tip of the LCD cable is connected to the motherboard at the end of the previous ground.
The connector is plastic, but you can pull out the cable if you try to cause the black part to 90 degrees.
[SONY VJS111D12N LCD replacement 10]
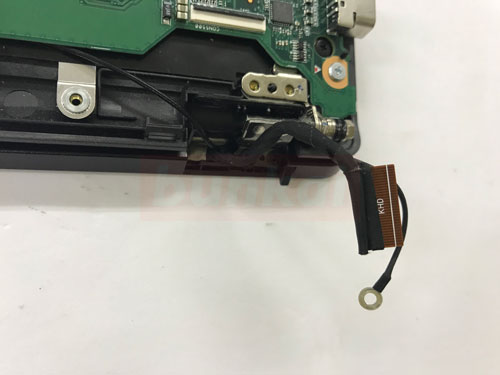
Like this.
[SONY VJS111D12N LCD replacement 11]
From here, I would like to remove the LCD panel.
[SONY VJS111D12N LCD replacement 12]
The vJS111D12N LCD frame does not have any screws, so the spatula is inserted out as it is.
The spatula is inserted into the gap between the LCD frame and the rear panel, but it is exactly the same as the method of removing the bottom cover when removing the battery.
The part where the spatula is inserted is the left and right and the upper part.
It is this method this time because it becomes quite troublesome work though it is good to put a spatula on the lower side and remove the frame.
[SONY VJS111D12N LCD replacement 13]

When you can remove the left and right, top, gently lift the LCD panel upward.
[SONY VJS111D12N LCD replacement 14]
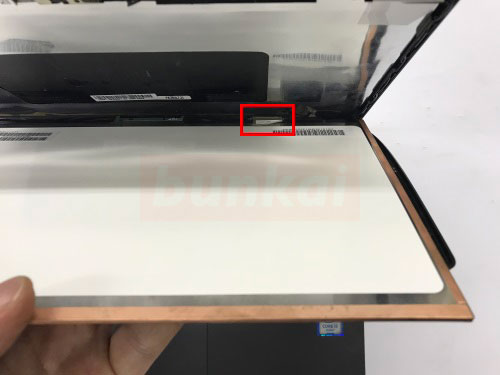
The cable on the other side of STEP 10 is connected to the back of the LCD panel, so you can put your hand in a gap and remove the connector.
[SONY VJS111D12N LCD replacement 15]
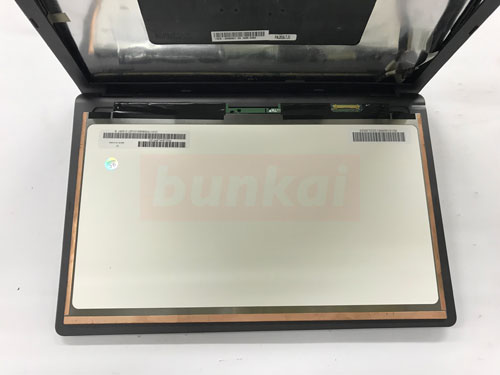
Only the LCD panel of VJS111D12N was able to be removed.
After that, if you replace the liquid crystal that you have prepared for replacement, the liquid crystal replacement will be completed.
[SONY VJS111D12N LCD replacement 16]
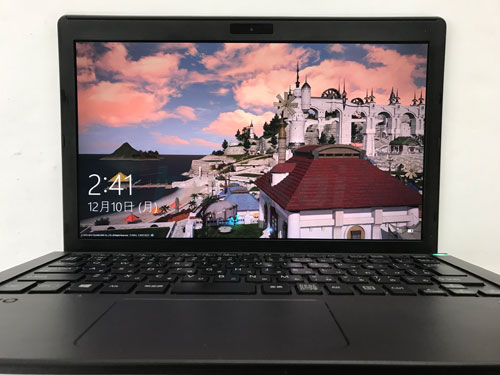
It is in a state of built-in and turned on, but it has become to be reflected normally.