MacbookPro Retina A1398 keyboard does not work, repair method if it cannot be hit, how to disassemble
Keyboards do not work, do not respond, and need to be replaced if they are hit in a row.
[Macbook Pro Retina A1398 Keyboard Replacement STEP 1]
I spilled water and tea on the keyboard, and the button on the keyboard (key top) came off.
If there is a place where the key does not work, and the key is hit in a row, a keyboard change is necessary, but there are two ways to change the keyboard.
One is the replacement of each top case that the keyboard is attached to, but manufacturers become this replacement method and become expensive repair.
The other way is to disassemble everything and replace the failed keyboard alone.
I think that this method is difficult for beginners of MacBook Pro disassembly, but if you are challenged, please refer to it by all means.
Now let's take a quick step into how to disassemble the MacBook Pro Retina Model No.A1398 2013 keyboard replacement.
[Macbook Pro Retina A1398 Keyboard Replacement STEP 2]
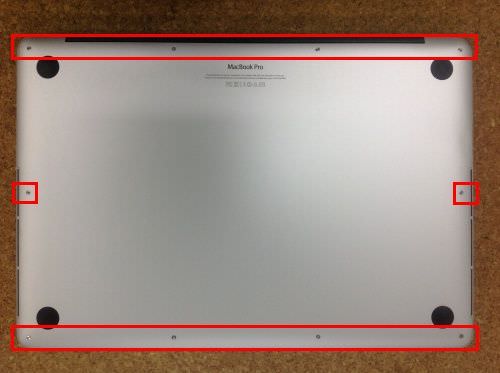
Since the process so far has been omitted, please confirm the details by the battery replacement.
When the battery is removed, it is put in the process of removing the keyboard, but if you are not familiar with it, it is recommended that you disassemble the LCD panel upper body because there is a high possibility that you will break the LCD panel during keyboard disassembly.
Please confirm the process of lcd panel upper body decomposition by replacing the liquid crystal panel.
The lcd upper body is explained by removing it in the main part.
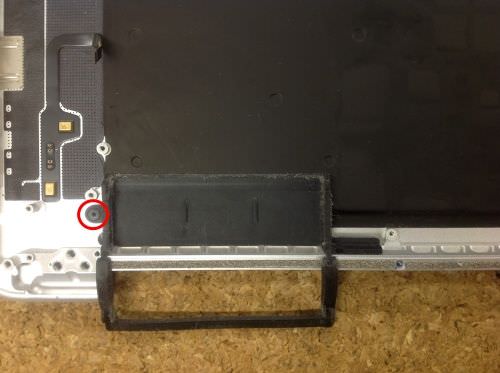
Since the rubber parts of the left FAN are fixed with one screw, remove the screw and remove the rubber parts.
[Macbook Pro Retina A1398 Keyboard Replacement STEP 3]
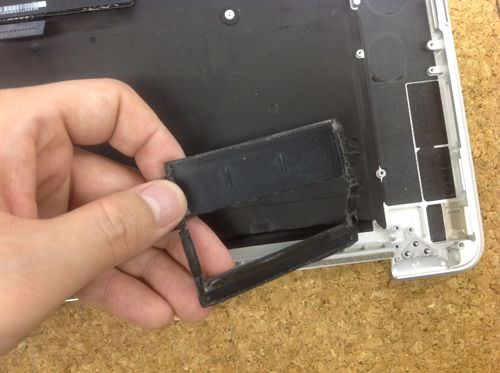
The rubber parts on the right SIDE FAN are easy to remove because there are no screws.
[Macbook Pro Retina A1398 Keyboard Replacement STEP 4]
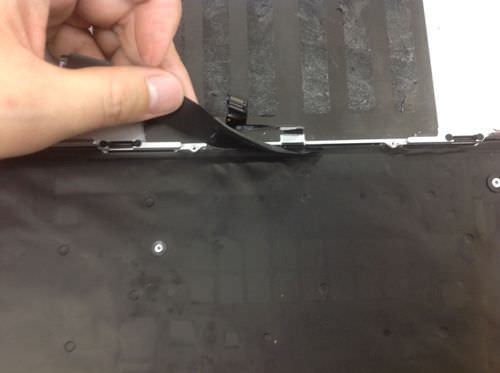
The keyboard and trackpad cables are glued with adhesive tape, so carefully peel off the cables and LED seats so as not to damage them.
[Macbook Pro Retina A1398 Keyboard Replacement STEP 5]
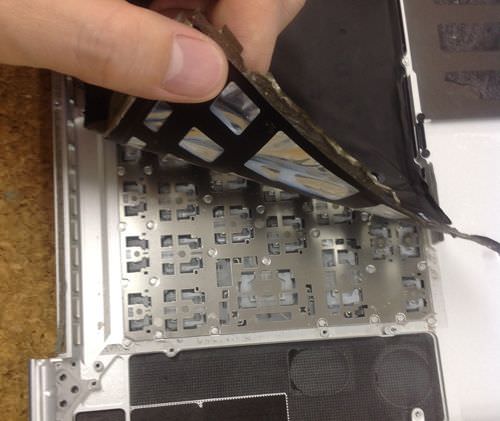
Next, the outer periphery of the LED sheet of the keyboard backlight is glued with adhesive tape, so take the time to peel it off carefully so as not to break the sheet.
If it is difficult to peel off, it will be easy to peel off if it is warmed lightly with a dryer.
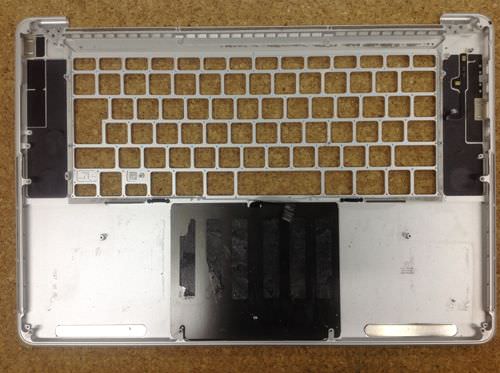
[Macbook Pro Retina A1398 Keyboard Replacement STEP 6]
When the LED sheet is peeled off cleanly, it looks like an image, but I think that it is difficult to understand in the image, but the keyboard is basically riveted rather than screwed.
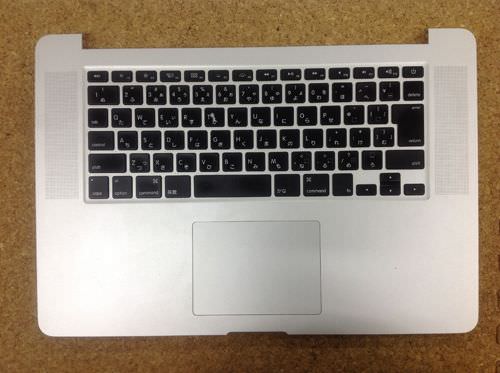
[Macbook Pro Retina A1398 Keyboard Replacement STEP 7]
In the case of replacing the entire top case of the keyboard, the work is finished here, so replace it and undo it by the reverse procedure.
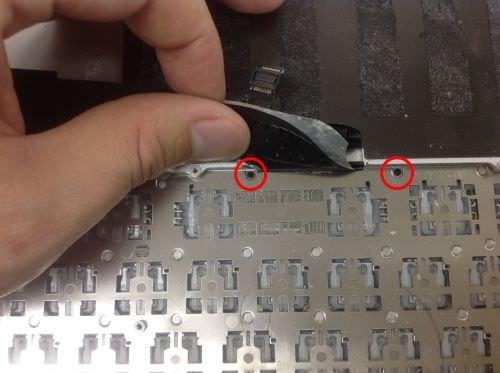
[Macbook Pro Retina A1398 Keyboard Replacement STEP 8]
Because only two places are fixed with a small screw to the red mark part near the keyboard cable, remove it.
[Macbook Pro Retina A1398 Keyboard Replacement STEP 9]
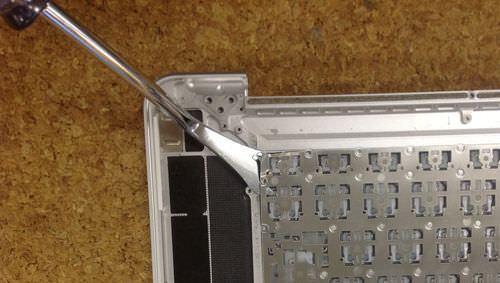
Use the tool to peel off the rivet fastening of the keyboard so as not to damage the top case of the aluminum body.
[Macbook Pro Retina A1398 Keyboard Replacement STEP 10]
The keyboard could be removed.
We will introduce how to install the keyboard later, so please stay tuned.
Although the number of people who are replaced with a US (English) keyboard from a JIS (Japanese) keyboard is increasing, the shape of the key is different in JIS and US, so it is necessary to replace each top case whole!