How to repair and disassemble MacbookAir 11 when it is submerged, does not boot, or does not turn on
MacbookAir does not turn on, power down, submerged, or not booting
[MacbookAir A1370 Logic Board Replacement and Decomposition Method STEP 1]
If the logic board fails, the power may not turn on or the operation may become unstable.
It has become the most important part among MacbookAir, it may become expensive when it comes to repair.
In this decomposition method, we have done the removal of the logic board, but there is also work to remove FAN and SSD in the middle process, so I think that you can check together.
Because it becomes very long as a decomposition process, if you are not confident in the decomposition, we recommend that you consult a repair shop.
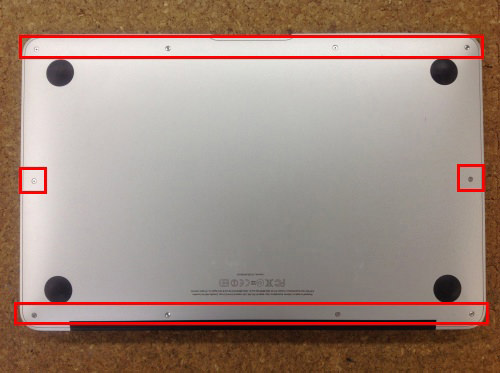
First of all, all the screws on the back cover are removed.
(Red frame part) (With Torx screwdriver)
[MacbookAir A1370 Logic Board Replacement and Decomposition Method STEP 2]
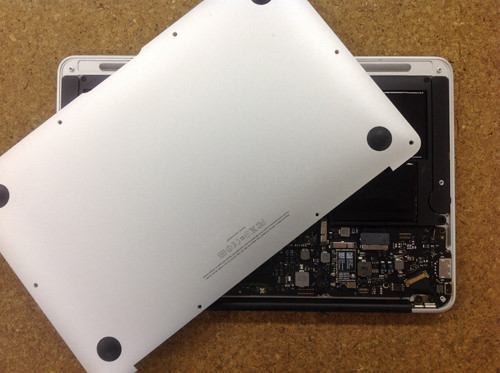
There are various steps to remove the logic board, but the decomposition of the Mac starts from the place where the back cover is removed.
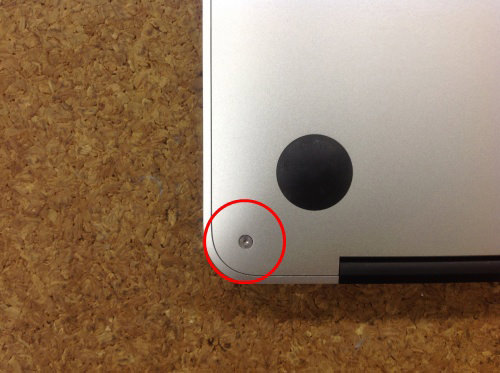
[MacbookAir A1370 Logic Board Replacement and Decomposition Method STEP 3]
The bottom case can be easily removed by removing all screws.
Try to lift the red-framed connector.
[MacbookAir A1370 Logic Board Replacement and Decomposition Method STEP 4]
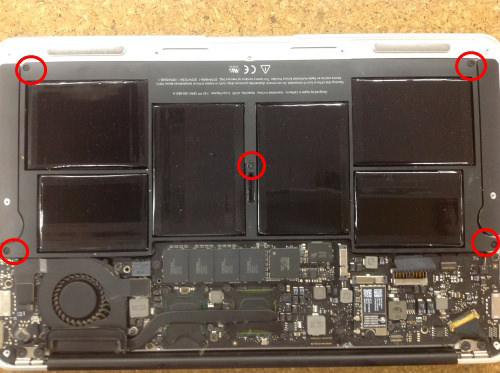
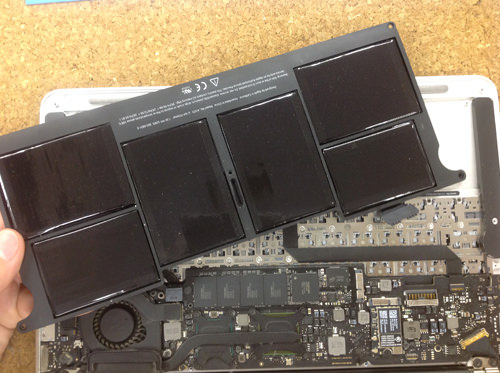
Be sure to remove the battery first.
[MacbookAir A1370 Logic Board Replacement and Decomposition Method STEP 5]
Next, there are five Torx screws that secure the battery, so remove them all.
Since the length of the screw at this time varies depending on the location, let's try to disassemble while taking notes so that you can understand by yourself so as not to get lost at the time of installation!
[MacbookAir A1370 Logic Board Replacement and Decomposition Method STEP 6]
The battery has been released!
[MacbookAir A1370 Logic Board Replacement and Decomposition Method STEP 7]
There is a rubber cushion on the left and right in the red mark of the image, but remove it with tweezers.
[MacbookAir A1370 Logic Board Replacement and Decomposition Method STEP 8]
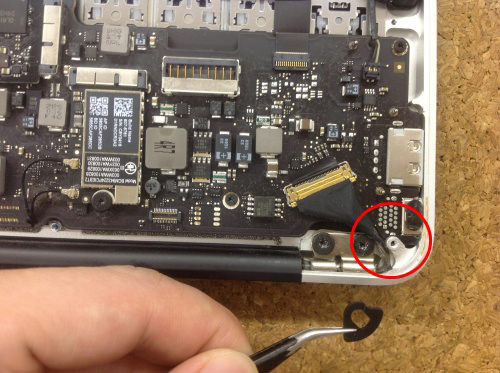
Since the LCD cable is connected to the logic board from the upper body of the liquid crystal, pull out the connector so that it slides after raising the pin.
Work carefully to avoid damaging wiring and connectors at this time!
[MacbookAir A1370 Logic Board Replacement and Decomposition Method STEP 9]
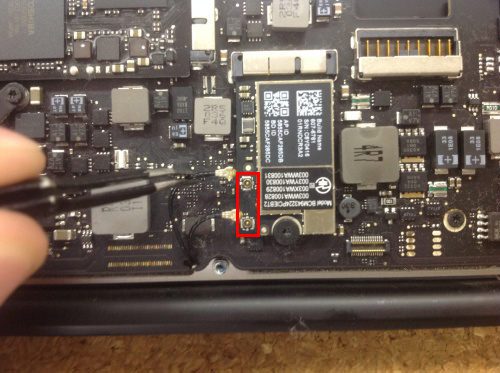
Since the WiFi antenna cable from the upper body of the liquid crystal is connected to the WiFi card of the logic board two places with a small connector pin, use tweezers, etc. and lift it up and remove it.
[MacbookAir A1370 Logic Board Replacement and Decomposition Method STEP 10]
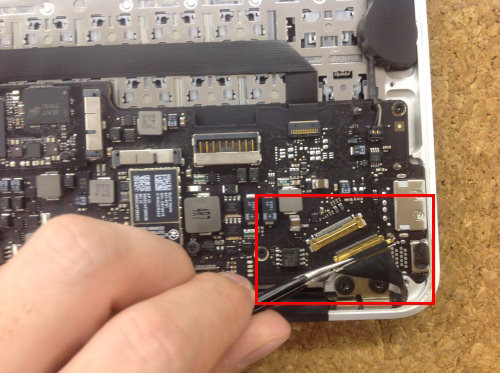
It is a cable that connects the power supply side and the logic board side, but you can remove it if you wake both from the bottom.
[MacbookAir A1370 Logic Board Replacement and Decomposition Method STEP 11]
It is connected by a connector from the power board to the logic board.Because the protrusion part of the connector is stuck in the hole of the upper part of the connector, pull out the connector while pushing in the protrusion part.
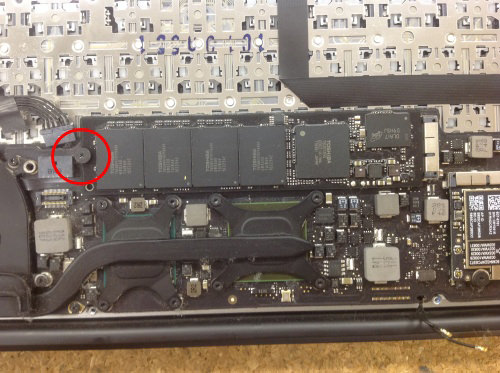
[MacbookAir A1370 Logic Board Replacement and Decomposition Method STEP 12]
The SSD is secured in one Torx screw, so remove it.
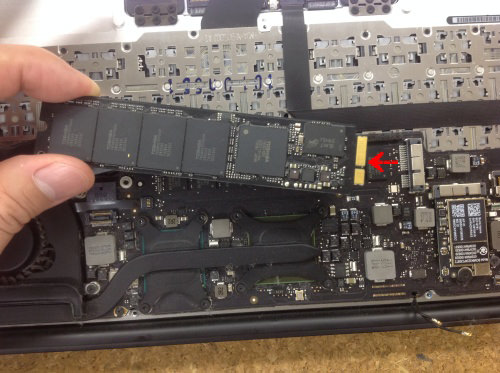
[MacbookAir A1370 Logic Board Replacement and Decomposition Method STEP 13]
When the screw comes off, gently lift the SSD and slide it in the direction of the arrow in the image to pull it out.
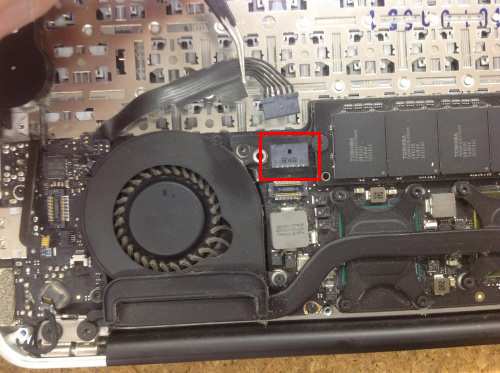
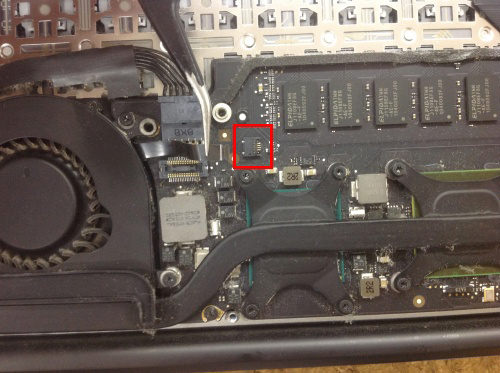
[MacbookAir A1370 Logic Board Replacement and Decomposition Method STEP 14]
The FAN cable is connected to the bottom of the SSD with a small connector, so raise the pin and pull it out carefully.
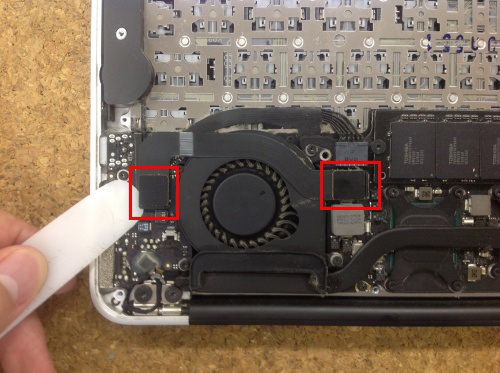
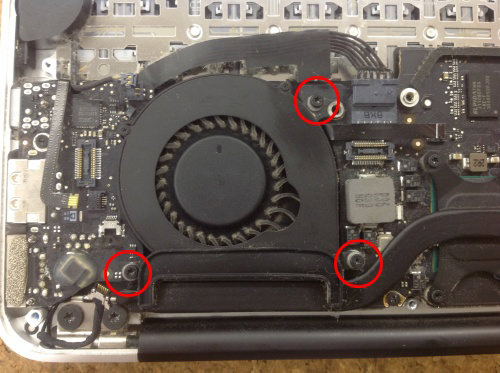
[MacbookAir A1370 Logic Board Replacement and Decomposition Method STEP 15]
When the FAN cable is complete, remove the three torx screws on the red mark on the FAN body.
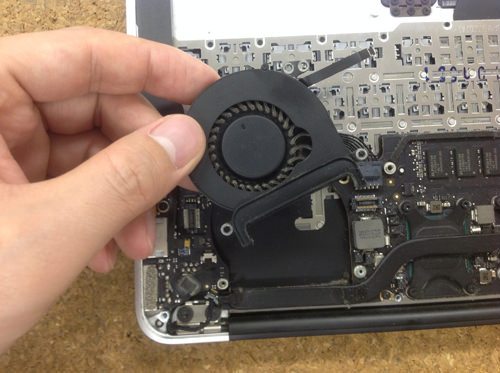
[MacbookAir A1370 Logic Board Replacement and Decomposition Method STEP 16]
When all the cables and screws are removed, the FAN body can be easily removed, so if dust or dirt is attached, it will increase the cooling effect by cleaning cleanly using a soft brush.Let's work carefully over time because it will be a precise part!
[MacbookAir A1370 Logic Board Replacement and Decomposition Method STEP 17]
The wiring of the speaker is also removed by lifting it up while using tweezers.
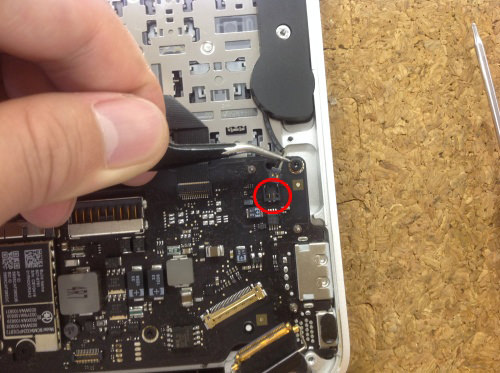
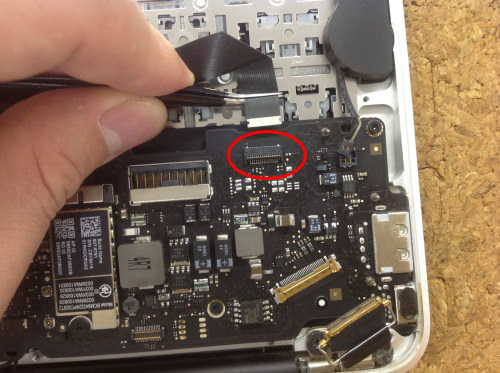
[MacbookAir A1370 Logic Board Replacement and Decomposition Method STEP 18]
The cable is connected from the trackpad to the connector of the logic board of the red mark of the image, so raise the pin and pull out the cable.
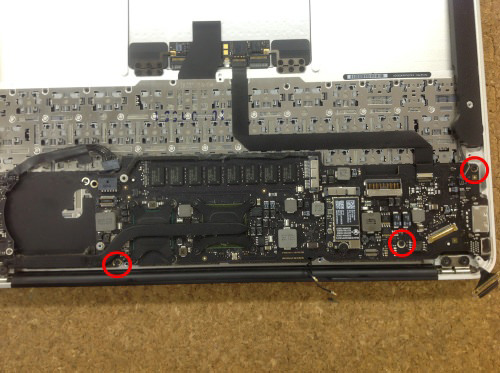
[MacbookAir A1370 Logic Board Replacement and Decomposition Method STEP 19]
The three red marks of the logic board are secured with Torx screws, so remove them all.
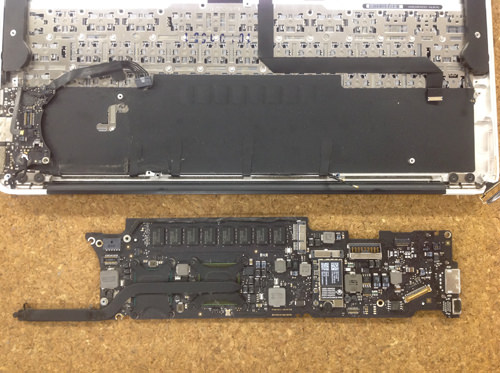
[MacbookAir A1370 Logic Board Replacement and Decomposition Method STEP 20]
I was able to remove the logic board like the image when All the screws were removed!
Logic boards are precision parts, so be careful when handling them.