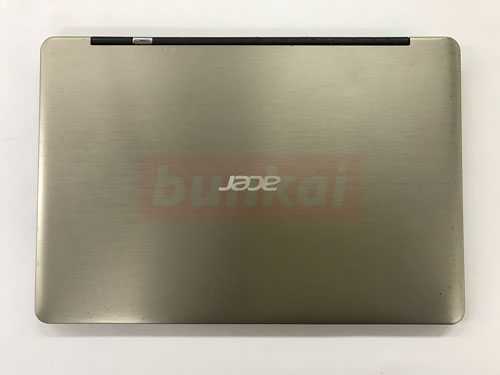
Acer laptop Aspire S3 S3-391-H34D screen cracking, the screen has entered the screen, if there is a crack, it is necessary to replace the liquid crystal panel, please refer to the way of changing the LCD panel.
Since the LCD panel used in the Aspire S3 S3-391-H34D is a little special, it is relatively difficult to obtain parts, but if you want to repair the screen crack yourself, do not prepare the parts first, It is safeto disassemble and check the lcd model number before purchasing.
There are several types of LCD panels.
[Acer S3-391-H34D LCD replacement 1]


Because the screen is cracked, the display failure has occurred even if The power is turned on.
If you can use the COMPUTER as usual if you can do the exact decomposition method of this time, please try to challenge if you have confidence in your arm.
[Acer S3-391-H34D LCD replacement 2]
When fixing the screen crack at a manufacturer or a consumer electronics retailer, the repair price is very expensive because it becomes assembly replacement (lcd upper body replacement), but in this decomposition, remove only the liquid crystal panel, Since we will install a new liquid crystal panel, it can be reduced to about half the price of the repair.
[Acer S3-391-H34D LCD replacement 3]
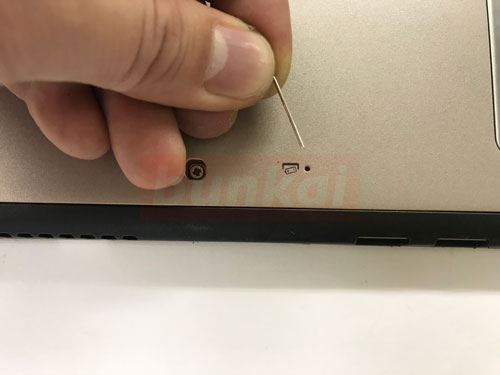
Remove the battery before removing the LCD and turn off the electricity from the computer.
In the case of a typical laptop, you can easily remove it by yourself because you can see the battery when you turn the main unit over, but in the case of Acer S3-391-H34D, it is not possible to easily remove it for the built-in type of battery.
However, there is a small hole in the back of the main body as shown in the image, and you can reset the battery if there is a click ingress inserting a thin thing such as a safety pin or the tip of the clip in this part.
So the battery itself will not be removed, but be sure to reset it.
[Acer S3-391-H34D LCD replacement 4]
The liquid crystal side is decomposed from here, but in order to remove the liquid crystal panel, it is necessary to remove the frame around it first.
In the case of a standard laptop, the frame is attached to the rear panel side with screws, but the frame of the Acer S3-391-H34D is disassembled as it is because there are no screws at all.
[Acer S3-391-H34D LCD replacement 5]
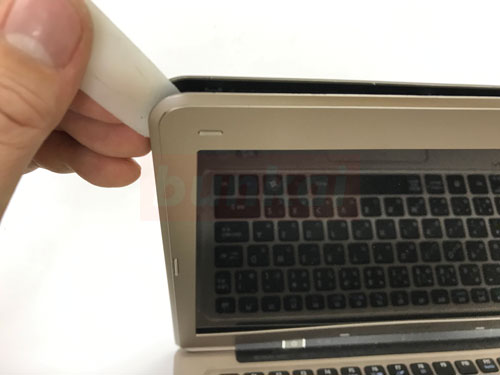
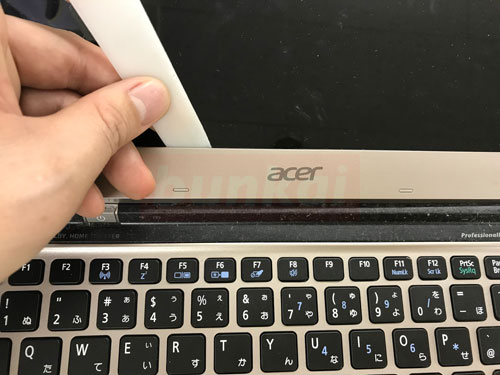
In the image, a plastic spatula is used, but the spatula is inserted into a slight gap between the frame and the rear panel.
The frame and the back panel are connected by plastic claws, but I think that you can understand the feeling that comes off if you make it lightly twisted by inserting a spatula.
This work is applied to one lap of the liquid crystal.
[Acer S3-391-H34D LCD replacement 6]
This is where the spatula is inserted in the lower side, but the same procedure will be removed.
[Acer S3-391-H34D LCD replacement 7]
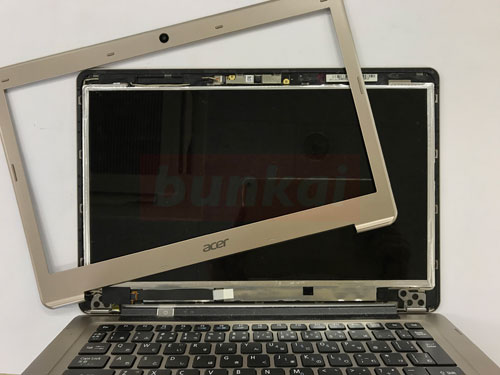
Only the frame was able to be removed from the main body.
[Acer S3-391-H34D LCD replacement 8]
There is a cable connected to the motherboard in this part, but it is special compared to a standard laptop.
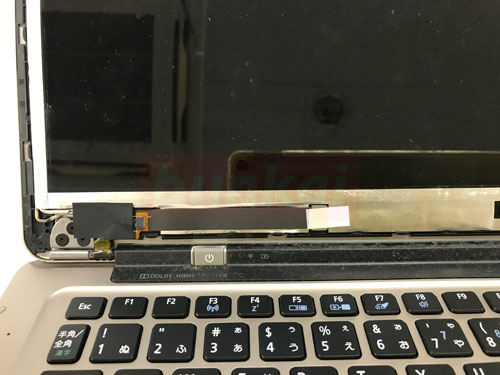
[Acer S3-391-H34D LCD replacement 9]
You can remove the connector just by waking it up in front like the image.
[Acer S3-391-H34D LCD replacement 10]
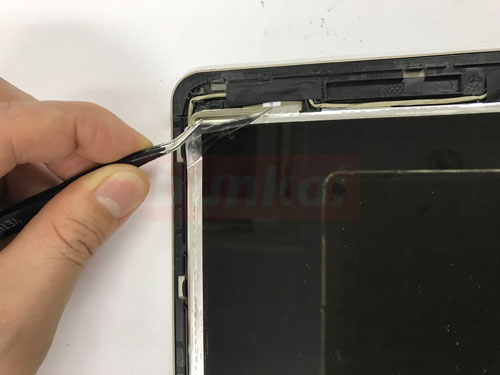
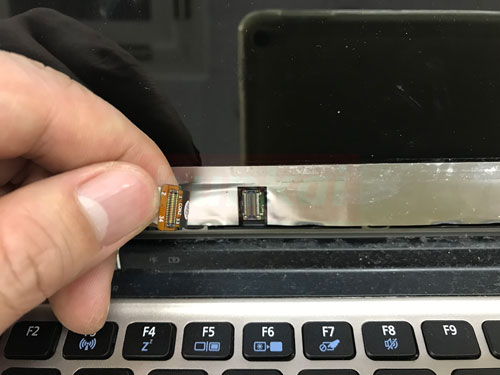
Originally, the LCD panel is screwed on the rear panel side, but in the case of S3-391-H34D, the screw is not used and only is stopped with silver tape.
Let's peel off the tape from the corner as shown in the image.
[Acer S3-391-H34D LCD replacement 11]
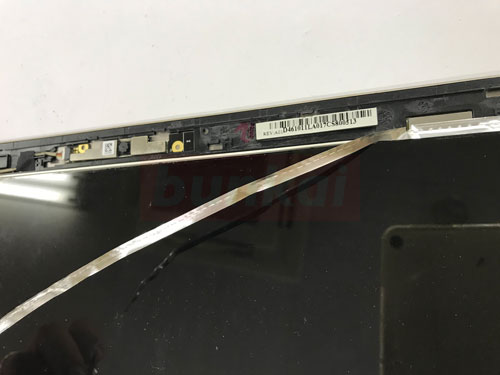
This is where the upper tape is peeled off.
[Acer S3-391-H34D LCD replacement 12]
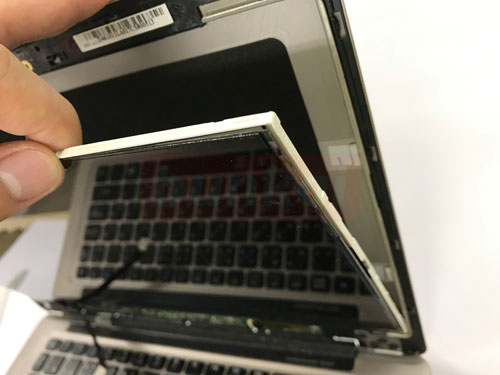
When the tape can be peeled off, the LCD panel can be moved like an image.
[Acer S3-391-H34D LCD replacement 13]
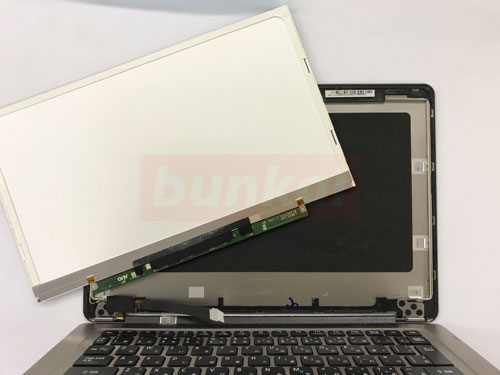
The LCD panel could be removed.
When replacing the liquid crystal, the work is completed if you install the prepared parts and incorporate them in the original procedure.